• UnderConstruction
  • Home
  • Seasons
  • Classes
  • Tours
  • About
  • CONTACT
  • Menus
Menu

Cucina Casa M

Street Address
City, State, Zip
Phone Number

Your Custom Text Here

Cucina Casa M

  • UnderConstruction
  • Home
  • Seasons
  • Classes
  • Tours
  • About
  • CONTACT
  • Menus

Salmon Rillettes

November 9, 2017 Nancy Madok
salmon cover.jpg
salmoningred.jpg

Ingredients

4 cups water
1 cup white wine
1 medium onion cut into ¼ inch pieces
1 stalk celery
2 bay leaves
4 peppercorns

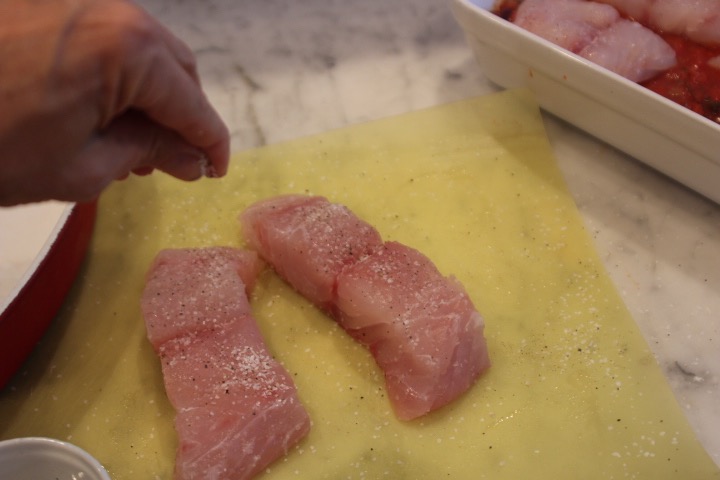
½ pound salmon, 1inch thick, skin and pin bones removed

¼ pound smoked salmon, cut into small dice
3 scallions (green onions), white and green part finely diced
1T capers, rinsed
2T lemon zest (2 lemons) 
4T lemon juice
5T unsalted butter, softened

Crostini:
1 baguette loaf, cut on diagonal into 20 thin slices
 ¼ cup olive oil

salmon1.jpg

1.    In a medium saucepan with a lid, bring the water, wine, onion, celery, bay leaf, and peppercorn to a boil, and then reduce the heat to “low” and simmer for 20 minutes.


2.    Place the salmon into the poaching liquid.  Cover with the lid, and turn off the heat. Poach the fish for 10 minutes.

3.    Remove the fish from the liquid with a slotted spoon, set aside on a plate, and let cool.


salmon4.jpg

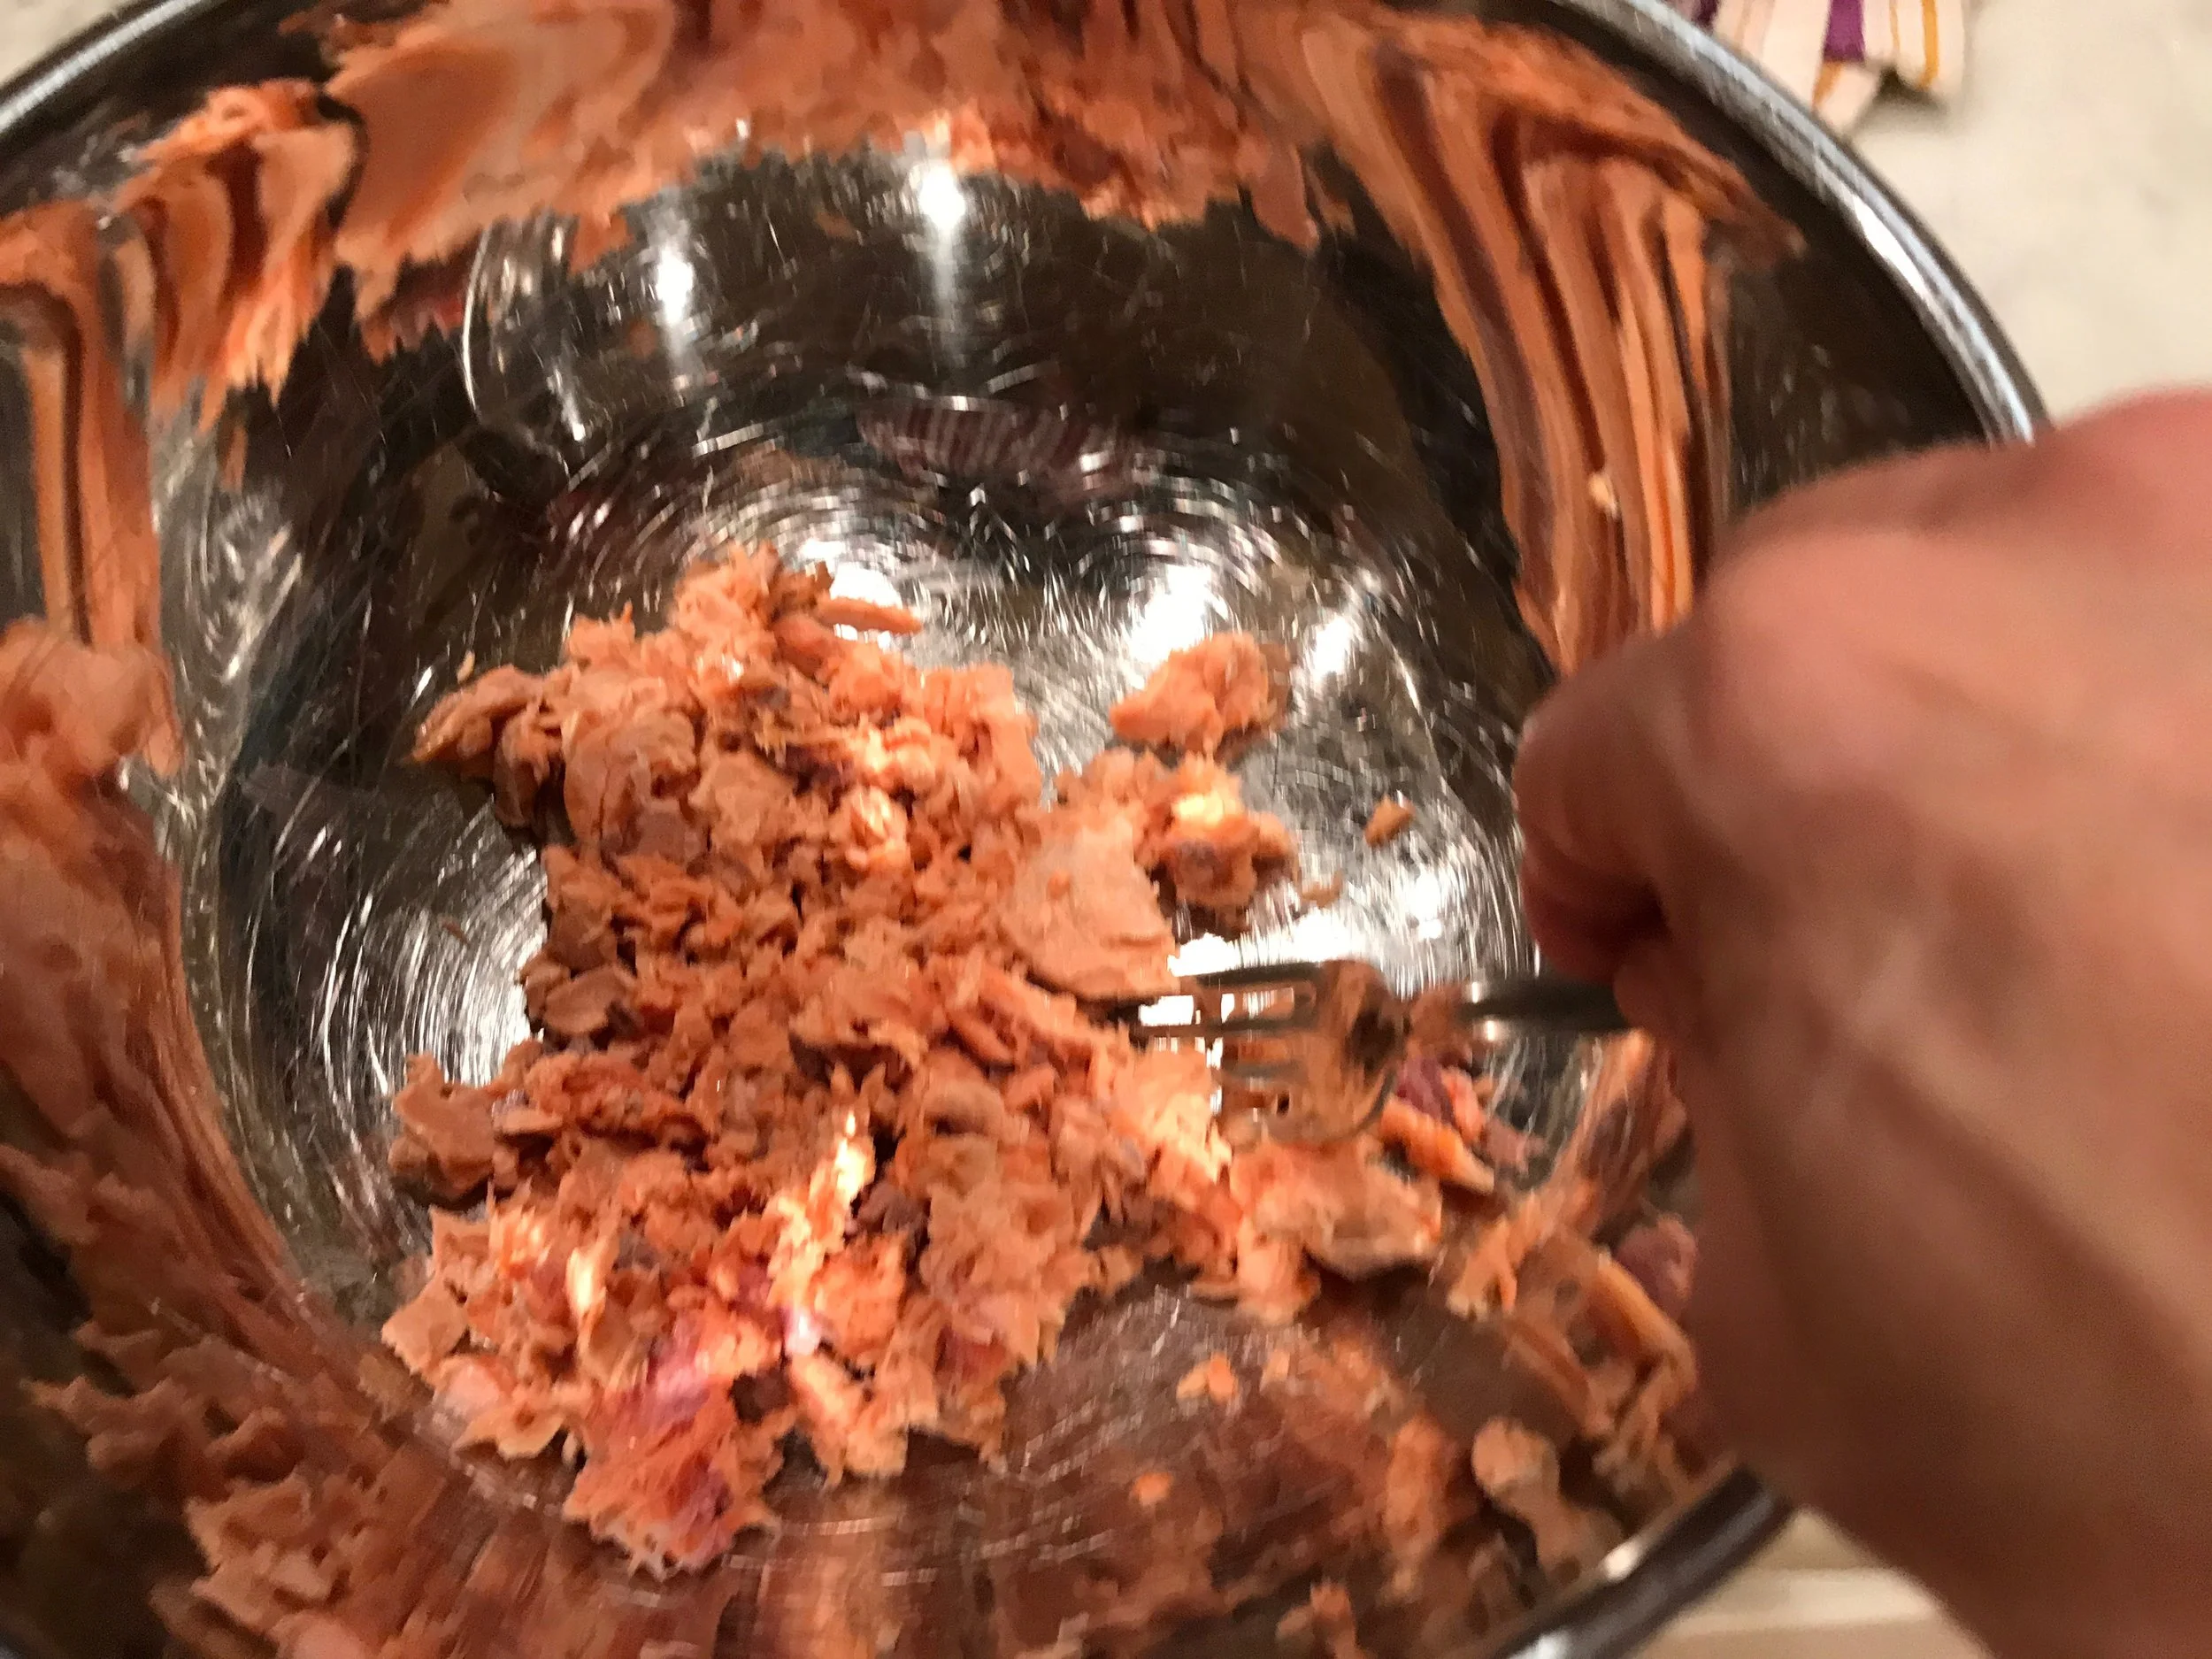
4.    Using a fork or your fingers, flake the salmon and place into a medium size bowl.

5.    Add the smoked salmon, green onions, capers, and lemon zest.  Mix until combined. 


6.    Add the butter, smashing with fork until well combined.

7.    Season with salt and pepper. 

8.    Pour into a terrine or jar, pressing the mixture down into the container. Top with a piece of plastic wrap, pressing it directly onto the mixture.
9.    Chill at least 3 hours, or over night.
10.    Remove the rillettes from the refrigerator at least 30 minutes before serving. Serve with crostini, Melba toast or pita chips.

Crostini:

1.    Preheat the oven to 400º F.
2.    Place the sliced bread onto a baking sheet.  Brush each slice with a little olive oil.  Bake until golden brown, about 8-10 minutes.  Set aside.

TIPS & TRICKS

Tips & Tricks:
•    Poaching fish is a wonderful way to cook fish for this recipe or for a simple meal. I like to use fresh wild salmon. If not available you can use frozen. If using farm-raised salmon try to purchase one without color added. General rule: for every inch of thickness of fish the cooking time is 10 minutes. So if you have a thinner piece, like ½ inch thick poach it for 5 minutes. It will continue to cook once it is removed from the water. 
•    The rillettes can be made 3 days in advance. 


In Nov 2017 Appetizer Class Tags Winter, Appetizer, Salmon, Crostini
Comment

Almond Snowflake Cookies

November 8, 2017 Nancy Madok

Ingredients

6T-granulated sugar
1 egg
1¼ cup sliced almonds
½ tsp. fiori di Sicilia


1.    Preheat oven to 325° F.
2.    Line two baking sheets with parchment paper.  Set aside.

3.    In a medium bowl, beat the egg and sugar until thick and creamy.  

4.    Add the almonds; mix until combined. Stir in the fiori di Sicilia.


cookie5.jpg

5.    The batter will start to separate, so work quickly! If it starts to separate just stir to remix.

6.    Scoop 1 heaping teaspoon of the batter for each cookie onto the parchment-lined baking sheet.  Space each cookie 2 inches apart. 


7.    Flatten out cookie with a fork.


8.    Bake at 325° F for 20 minutes until golden brown.  Let the cookies to cool for 10 minutes before removing from the baking sheet.  Transfer to rack and let cool completely before serving.

TIPS & TRICKS

•    Fiori di Sicilia, Extract is a combination of citrus and vanilla that is positively addictive. It is very popular in Italian baking. I think it’s a must have for all your baking goodies. You can add it to all your baking items that call for vanilla. Just use a ½ tsp. that enough brighten up but not overpower your recipe. It can be purchased at King Arthur. Keep it in your refrigerator and it will last a long time
•    Dorie Greenspan’s 3 ingredient cookies inspire this recipe. I added the fiori di Sicilia which I think give them a nice a sublime flavor! Try to eat just one! 
•    I called them snowflakes, because each one is different in shape, like a snowflake. 
•    If the weather is humid it will make the cookies soften and become a bit soggy. Just place back in a 350° F oven for 6 minutes until crisp again. Store in an air tight container. 


In Nov 2017 Appetizer Class Tags Almond, Winter, Cookie, Fiori di Sicilia
Comment

Stuffed Summer Vegetables

May 3, 2017 Nancy Madok
stuff vegcover.jpg
stuff veg1.jpg

Ingredients

3T olive oil
1 medium yellow onion, finely diced
2 cloves garlic, crushed
1 cup white rice    
1 cup diced tomatoes and juice
1 cup water
1T double concentrated tomato paste
½ cup grated Pecorino Romano cheese
¼ cup toasted pine nuts*
3T fresh basil, chiffonade
2T chopped flat parsley
salt & pepper
4 peppers
4 medium zucchinis or yellow squash 

stuff veg2.jpg

1.   In a sauté pan, with a lid over medium heat, add the olive oil; when warm, add the onion and sauté 4 minutes, until they start to soften.  Add the garlic and sauté gently for 1 minute more. 


stuff veg3.jpg

1b.  Add the rice and cook stirring until opaque; about 2 minutes.

stuff veg4.jpg

2.    Add the tomatoes and the water cover; with the lid, lower the heat to “low” and simmer, stirring occasionally until the rice is tender, about 15 minutes.


stuff veg7.jpg

3.    Remove from the heat and add the cheese, basil, pine nuts and parsley.  Season with salt and pepper.

4.    Pre heat the oven to 350º F.

stuff veg5.jpg

5. Cut the peppers in half and remove the seeds.

stuff veg6.jpg

5b. Cut the zucchinis in half.  Using a melon baller or small knife, scoop out the interior flesh creating a little boat.  

stuff veg9.jpg

5c. Fill the peppers and zucchini with the rice mixture (you may have extra rice filling). 

6. Place the stuffed vegetables on a rimed baking sheet.  Cover with aluminum foil and place in the 350º F oven.  Bake until the vegetables are slightly soft; about 50 minutes.  Remove from the oven.  Remove the foil and let cool.  Serve warm or room temperature. 

stuffed veg10.jpg

Tips & Tricks

  • To toast pine nuts: place on a rimmed baking sheet in a 350º F oven for 3-4 minutes or until golden brown. Watch carefully: they burn quickly!
  • Rice is delicious as a simple side dish. You can also stuff eggplant or tomatoes.
print recipe
Stuffed Summer Vegetables
by Nancy Madok October-10-2017
Ingredients
  • 3T Olive Oil
  • 1 Medium Yellow Onion Finely Diced
  • 2 Cloves Garlic, Crushed
  • 1 Cup White Rice
  • 1 Cup Diced Tomatoes and Juice
  • 1 Cup Water
  • 1T Double Concentrated Tomato Paste
  • 1/2 Cup Grated Pecorino Romano Cheese
  • 1/4 Cup Toasted Pine Nuts*
  • 3T Fresh Basil, chiffonade
  • 2T Chopped Flat Parsley
  • Salt and Pepper
  • 4 Peppers
  • 4 Medium Zucchinis or Yellow Squash
Instructions
In a sauté pan, with a lid over medium heat, add the olive oil; when warm, add the onion and sauté 4 minutes, until they start to soften. Add the garlic and sauté gently for 1 minute more. Add the rice and cook stirring until opaque; about 2 minutes. Add the tomatoes and the water cover; with the lid, lower the heat to “low” and simmer, stirring occasionally until the rice is tender, about 15 minutes.Remove from the heat and add the cheese, basil and parsley. Season with salt and pepper. Pre heat the oven to 350º F.Cut the peppers in half and remove the seeds. Cut the zucchinis in half. Using a melon baller or small knife, scoop out the interior flesh creating a little boat. Fill the peppers and zucchini with the rice mixture (you may have extra rice filling). Place the stuffed vegetables on a rimed baking sheet. Cover with aluminum foil and place in the 350º F oven. Bake until the vegetables are slightly soft; about 50 minutes. Remove from the oven. Remove the foil and let cool. Serve warm or room temperature. Tips & Tricks ** To toast pine nuts: place on a rimmed baking sheet in a 350º F oven for 3-4 minutes or until golden brown. Watch carefully: they burn quickly! Rice is delicious as a simple side dish. You can also stuff eggplant or tomatoes.
Details
Prep time: 30 mins Cook time: 20 mins Total time: 1 hour Yield: 8
Featured
Stuffed Summer Vegetables
Garlic & Herb Marinated Steak with Tomato Relish
Chocolate Chip Pavlova
In May 17th Grill Class Tags appetizer, quick, easy, bell peppers, May 17th Grill Class, Summer
Comment

Garlic & Herb Marinated Steak with Tomato Relish

May 2, 2017 Nancy Madok
steakcoverjpg.jpg
Garlic___Herb_Marinated_Steak_with_Tomato_Relish_—_Cucina_Casa_M.jpg

Ingredients

Ingredients Steak:
3 cloves garlic, crushed
2T Herbs d’ Provence
1T salt
1T ground pepper
2T olive oil
3 pounds flap meat 

Ingredients Tomato Relish:
1½ pound (2cups) cherry tomatoes, cut into bite-sized pieces
2 shallots sliced thinly
6T oil-packed sun dried tomatoes drained, chopped (reserved 3T of the oil)
2T capers
4T fresh basil leaves, julienne
3T red wine vinegar
salt & pepper

steak3.jpg

In a small bowl, mix the garlic, herbs, salt, pepper and oil. 

steak4.jpg

Rub this spice mixture all over steak and allow the meat to sit at least 30 minutes at room temperature.  The rub can be placed on the meat and refrigerated ahead, but no more than 4 hours.

steak7.jpg

About 20 minutes before you are ready to grill, turn on the grill to heat to your grilling temperature, usually “medium-high” or the setting that gives you a good sear when the meat hits the steel grating.

steak8.jpg

Grill the meat until medium rare, 3-5 minutes a side, or until internal temperature is 130 - 135°F.  Transfer steak to a platter and let rest for 5-10 minutes.

steak9.jpg

Slice the steak against the grain and serve with relish.

steak5.jpg

In a medium bowl, toss all the ingredients together.

steak6jpg.jpg

Season well with salt and pepper and let sit at room temperature for a least 30 minutes.  Serve with grilled meat. Will keep in refrigerator for 3 days. 


Tip & Tricks

•    Flap meat is a terrible name for a delicious cut of meat. It comes from the sirloin section of the animal. The French call this cut bavette which means “bib” because of the shape of the meat which is long and skinny like a bib. When preparing your meat cut it into manageable size pieces that will be easy to grill.The texture and taste are very similar to a skirt steak but usually cost less. 
•    Marinated meat can be placed in a zip lock bag and refrigerated up to 4 hrs. before cooking, no longer or meat fibers will start to break down and get soggy. Before grilling remove the meat from the bag using paper towels blot the meat to remove any moisture that has accumulated. This will insure you get a nice sear on the meat. 

print recipe
Garlic & Herb Marinated Steak with Tomato Relish
by Nancy Madok June-28-2017
Garlic and Herb Marinated Steak cook on the Grill to sweet perfection. Topped with a Tomato Relish
Ingredients
  • 3 Garlic Cloves Crushed
  • 2 Tbsp Herbs d' Provence
  • 1 Tbsp Salt
  • 1 Tbsp Ground Pepper
  • 2 Tbsp Olive Oil
  • 3 Pounds Flap Meat
  • Tomato Relish
  • 2 Cups Cherry Tomatoes, cut into bite sized pieces
  • 2 Shallots - cut thinly
  • 6 Tbsp Oil Packed Sun dried tomatoes drained, chopped (reserved 3T of the oil)
  • 2 Tbsp Capers
  • 4 Tbsp Fresh Basil Leaves, julienne
  • 3 Tbsp Red wine vinegar
  • Salt and Pepper
Instructions
1. In a small bowl, mix the garlic, herbs, salt, pepper and oil. Rub this spice mixture all over steak and allow the meat to sit at least 30 minutes at room temperature. The rub can be placed on the meat and refrigerated ahead, but no more than 4 hours. 2. About 20 minutes before you are ready to grill, turn on the grill to heat to your grilling temperature, usually “medium-high” or the setting that gives you a good sear when the meat hits the steel grating. 3. Grill the meat until medium rare, 3-5 minutes a side, or until internal temperature is 130 - 135°F. Transfer steak to a platter and let rest for 5-10 minutes. 4. Slice the steak against the grain and serve with relish. Tip & Tricks • Flap meat is a terrible name for a delicious cut of meat. It comes from the sirloin section of the animal. The French call this cut bavette which means “bib” because of the shape of the meat which is long and skinny like a bib. When preparing your meat cut it into manageable size pieces that will be easy to grill.The texture and taste are very similar to a skirt steak but usually cost less. Marinated meat can be placed in a zip lock bag and refrigerated up to 4 hrs. before cooking, no longer or meat fibers will start to break down and get soggy. Before grilling remove the meat from the bag using paper towels blot the meat to remove any moisture that has accumulated. This will insure you get a nice sear on the meat. Prep for Tomato Relish:1. In a medium bowl, toss all the ingredients together. 2. Season well with salt and pepper and let sit at room temperature for a least 30 minutes. Serve with grilled meat. Will keep in refrigerator for 3 days.
Details
Prep time: 30 mins Cook time: 10 mins Total time: 40 mins Yield: 8 Servings
Featured
Stuffed Summer Vegetables
Garlic & Herb Marinated Steak with Tomato Relish
Chocolate Chip Pavlova
In May 17th Grill Class Tags entree, steak, tomato, bbq, grill, main, May 17th Grill Class, Summer, sun-dried tomatoes, tomato relish
Comment

Chocolate Chip Pavlova

May 1, 2017 Nancy Madok
pavcovershot.jpg
pav1.jpg

Ingredients:

2 cups superfine sugar
1T cornstarch
1 tsp. vanilla extract
2 tsp. white vinegar
6 egg whites at room temperature for 30 minutes
1 cup dark chocolate chips/chunks(at least 60% cacao)
1½ lbs. strawberries
½ lb. raspberries
2T granulated sugar
3T Cointreau liqueur
3 cups heavy whipping cream
2T confectioner’s sugar 

1.        Preheat oven to 275° F with the rack in the middle.

pav7.jpg

2.        Line the bottom of two baking sheet pans with parchment paper. Using a pencil, draw six 3½ inch circles on each piece of paper, then flip it over so the pencil lines are on the bottom of the paper.

3.       In a small bowl, combine the superfine sugar and cornstarch; mix until combined. 

4.       In a small bowl, stir the vanilla and vinegar together.

pav2.jpg

5.        In the bowl of an electric mixer, beat the eggs whites with a pinch of salt at medium speed until they hold soft peaks, about 3 minutes.


pav3.jpg

Increase the speed to “medium-high” and add the sugar mixture 1T at a time.  After all the sugar has been added, beat 1 minute more. 


pav4.jpg

Add the vinegar mixture and continue beating at high speed

pav5.jpg

Do this until meringue is glossy and holds stiff peaks, about 5 minutes.


pav6.jpg

Fold in the chocolate chips.

pav9.jpg
pav10.jpg

6.   Spoon the meringue into the pencil drawn circles (about a ½ cup of batter per circle).  Using an offset spatula or the back of the spoon, make a little well in the center of each meringue.

7.        Bake the meringues at 275° F for about 1 hour or until they have a crisp crust and feel dry to the touch; the inside will still be marshmallow-like.

8.        Turn the oven off and prop the door open using a wooden spoon.  Allow the meringues to cool in oven 1 hour, then remove from the oven and let meringues cool completely. 

pav11.jpg
pav12.jpg

9.        While the meringues are cooling, wash and slice the strawberries. Toss them and the raspberries with the 2 tablespoons of granulated sugar and liqueur and let sit 1 hour at room temperature.


10.        In a bowl of an electric mixer, beat the heavy cream and confectioner’s sugar until it forms soft peaks.

pav13.jpg

11.        Place each meringue on a plate. Top each with a dollop of the whipped cream and then a spoonful of the fruit (with juice) over the top.  Repeat with the remaining meringue, cream and fruit.  Serve immediately. 

TIPS AND TRICKS

  • You can make “Superfine” sugar by placing regular granulated sugar in a food processor and pulse a few times until the mixture looks and feels like sand.

  • Meringues can be made ahead and stored in zip lock bags or airtight containers in your pantry for a week.

  • An egg slicer is a great way to slice the strawberries into nice uniform slices.

print recipe
Chocolate Chip Pavlova
by Nancy Madok May-14-2017
A wonderful mix of creaminess and strawberries with a touch of chocolate goodness
Ingredients
  • 2 cups Superfine Sugar
  • 1 Tbsp Cornstarch
  • 1 Tsp Vanilla Extract
  • 2 Tsp White Vinegar
  • 6 Egg Whites (room temp for 30 mins)
  • 1 Cup Dark Chocolate Chip/Chunks (60% Cacao)
  • 1 1/2 Pounds Strawberries
  • 1/2 Pound Rasberries
  • 2 Tbsp Granulated Sugar
  • 3 Tbsp Cointreau Liqueur
  • 3 Cups Heavy Whipping Cream
  • 2 Tbsp Confectioners Sugar
Instructions
Meringues: 1. Preheat oven to 275° F with the rack in the middle. 2. Line the bottom of two baking sheet pans with parchment paper. Using a pencil, draw six 3½ inch circles on each piece of paper, then flip it over so the pencil lines are on the bottom of the paper. 3. In a small bowl, combine the superfine sugar and cornstarch; mix until combined. 4. In a small bowl, stir the vanilla and vinegar together. 5. In the bowl of an electric mixer, beat the eggs whites with a pinch of salt at medium speed until they hold soft peaks, about 3 minutes. Increase the speed to “medium-high” and add the sugar mixture 1T at a time. After all the sugar has been added, beat 1 minute more. Add the vinegar mixture and continue beating at high speed until meringue is glossy and holds stiff peaks, about 5 minutes. Fold in the chocolate chips. 6. Spoon the meringue into the pencil drawn circles (about a ½ cup of batter per circle). Using an offset spatula or the back of the spoon, make a little well in the center of each meringue. 7. Bake the meringues at 275° F for about 1 hour or until they have a crisp crust and feel dry to the touch; the inside will still be marshmallow-like. 8. Turn the oven off and prop the door open using a wooden spoon. Allow the meringues to cool in oven 1 hour, then remove from the oven and let meringues cool completely. 9. While the meringues are cooling, wash and slice the strawberries. Toss them and the raspberries with the 2 tablespoons of granulated sugar and liqueur and let sit 1 hour at room temperature. 10. In a bowl of an electric mixer, beat the heavy cream and confectioner’s sugar until it forms soft peaks. 11. Place each meringue on a plate. Top each with a dollop of the whipped cream and then a spoonful of the fruit (with juice) over the top. Repeat with the remaining meringue, cream and fruit. Serve immediately. TIPS AND TRICKS • You can make “Superfine” sugar by placing regular granulated sugar in a food processor and pulse a few times until the mixture looks and feels like sand. • Meringues can be made ahead and stored in zip lock bags or airtight containers in your pantry for a week. • An egg slicer is a great way to slice the strawberries into nice uniform slices.
Details
Prep time: 20 mins Cook time: 1 hour Total time: 1 hour 20 mins Yield: 12 servings
Featured
Stuffed Summer Vegetables
Garlic & Herb Marinated Steak with Tomato Relish
Chocolate Chip Pavlova
In May 17th Grill Class Tags Dessert, Strawberries, Cream, May 17th Grill Class, Summer, pavlova, chocolate chips, whip cream
Comment

Risotto with Mint, Peas & Pecorino Romano Cheese

April 3, 2017 Nancy Madok

Ingredients

4T olive oil
   1 medium yellow onion, finely diced
   1 leek, finely diced
   2 clove garlic, crushed
   ½ cup white wine
   14 ounces Arborio rice (2 cups)
   7 cups chicken or vegetable stock, heated
   1 cup fresh or frozen petite peas
   ½ cup grated Pecorino Romano cheese(more for serving)
   2 tsp. chopped mint
   1 tsp. lemon zest
   2T chopped flat parsley
   salt & pepper


1.    In a large sauté pan, over medium heat, add the olive oil; when warm add the onion and leek and sauté 3-4 minutes until they start to soften.  Add the garlic and sauté gently for 1 minute more.  Add the wine and continue stirring until the wine has almost disappeared.


2.    Add the rice and sauté 1 minute, stirring constantly. 

3.    While stirring, add one ladle of stock.  


4.    When the stock has disappeared, ( and you can draw a line in the rice) add another ladle of stock. 

5.    Continue adding stock one ladle at a time until the rice is cooked; about 20 minutes (you may not need all the stock). 

risotto7.jpg

6.    Add the peas and stir until well incorporated into the rice.

7.    Remove from the heat and, add the cheese, mint, lemon zest, and parsley.

risotto9.jpg

8.    Season with salt and pepper.  Serve immediately with extra cheese


Tips & Tricks

•    When washing the leeks cut it in half. Place the root end under running water (Like your giving the leek a shower) Carefully separate each layer letting the water pass though and remove any dirt and sand
•    For the freshest cheese buy a wedge. Cut into small cubes and grate it in your food processor or blender. Then store it in a glass jar in the refrigerator.
•    You can substitute the peas and mint for sautéed mushrooms & thyme for a totally different dish.


Featured
Risotto with Mint, Peas & Pecorino Romano Cheese
rack cover.jpg
Rack of Lamb with Mint Chimichurri Sauce
Blood Orange & Lemon Curd Tart
In April 2017 Class Tags April 2017 Class, appetizer, Risotto, Mint, Peas, Pecorino Romano Cheese, Pasta, Spring
Comment

Rack of Lamb with Mint Chimichurri Sauce

April 2, 2017 Nancy Madok
rack cover.jpg
rack1.jpg

Ingredients

Rub:
4 cloves garlic
2 cups loosely packed parsley leaves
1 cup mint leaves
4 teaspoons grated lemon zest
2T mustard
4T olive oil
4 racks of lamb, about 1½  pounds each
salt & pepper

Sauce:
4 cloves garlic
2 stalks green onion, cut into pieces
1½ cups parley leaves
½ cup mint leaves
1 tsp. lemon zest
½ cup lemon juice
½ cup olive oil
salt & pepper


1.    Preheat the oven to 450º F.

rack2.jpg

2.    Rub: In the bowl of the food processor while running add the garlic, then add the parsley and mint, and pulse until finely chopped.  Add the lemon zest, mustard, and olive oil and pulse until combined.  Set aside.


rack3.jpg

3.    Place the racks of lamb on a rimed baking sheet fat side up, and bones toward the center of the pan.  Sprinkle with salt and pepper.  Rub the lamb with the herb rub mixture from Step 2

4. Place the pan in the center rack of a 450º F oven and roast the lamb for 25 minutes.

rack4.jpg
rack 5.jpg

5. Remove the lamb from the oven and cover loosely with aluminum foil. Let rest for 15 minutes.  Then cut the racks into either single or double chops and serve with sauce.

Sauce:

rack 6.jpg

6. In a bowl of your food processor, while running, add the garlic, green onion, parsley and mint; pulse just until rough chopped.  Add the lemon zest, juice and olive oil.  Pulse just until combined.  Season with salt and pepper.

rack7.jpg

7. Transfer to serving bowl.  Serve with the lamb.


Tips & Tricks

•    Having the food processor running before you add your ingredients gives your food a nice fine chopped appearance.
•    The rub can be made a day ahead.  The herb mixture doesn’t need to cover the whole rack. Keep it on the thick meat part of the rack.
•    Sauce can be used with beef and chicken. Will keep in refrigerator 2-3 days.

Featured
Risotto with Mint, Peas & Pecorino Romano Cheese
rack cover.jpg
Rack of Lamb with Mint Chimichurri Sauce
Blood Orange & Lemon Curd Tart
In April 2017 Class Tags April 2017 Class, Main, Lamb, Mint, Chimichurri Sauce, Spring
Comment

Blood Orange & Lemon Curd Tart

April 1, 2017 Nancy Madok
tart cover.jpg
tart ingred.jpg

Ingredients

Pastry:
12T room temperature butter cut into cubes
½ cup granulated sugar
2 egg yolks
2 cups all purpose flour
¼ tsp. salt

Lemon Curd:
zest of 2 lemons
½ cup lemon juice
2 egg yolks
3 eggs
1/3 cup granulated sugar
8T room temperature butter, cut into cubes

Tart:
4T apricot jelly
2T water
3-4 blood oranges or regular navel 

Dough: 

1.    In the bowl of your mixer with the paddle attachment on low speed cream the butter and sugar together until fluffy, about 1 minute. Scrape down the sides of the bowl.  

2.    Add the egg yolks and mix till combined, scrape down the sides of the bowl again then add the flour and salt; mix just until the mixture  start to come together. 


3.    Be careful not to over mix. 


4.    Use your hands to gather the dough and form into a ball.


5.    Divide the dough into half and place in a 10-inch removable bottom tart pan. Using your fingers press the dough into the bottom of the pan. . 


6.    Then press the into the sides. Add more dough as needed, making sure to keep an even thickness.  

tart7.jpg

7.    You might not use all the dough. ( the little extra can be cooked off as a small cookie) Cover the tart pan and place in refrigerator of at least 1hour.  


tart8.jpg

8.    Pre heat the oven to 375ºF. Remove the tart pan from refrigerator. Line tart pan with parchment or aluminum foil pressing it into the edges. Fill the tart pan with pie weights and place immediately into oven.


9.    Bake at 375º F for 20 minutes.  Remove the tart from the oven, take out the pie weights and the parchment and return to the oven for an additional 5-10 minutes, until golden brown.  Remove from oven and let cool.  


Lemon Curd:
 

10.    In a small saucepan over low heat, whisk the lemon zest, juice, eggs yolks, eggs, and sugar until combined. 


11.    Stir in the butter, stirring constantly until the mixture thickens, about 5-8 minutes. 

tart12.jpg

12.    It should thicken enough to hold a line when draw with finger on a wooden spoon.


13.    Remove from the heat and strain into a clean bowl.


14.    Cover with a piece of plastic wrap, pressing it directly on top of the curd and let cool completely.


Tart:

15.    In a small saucepan, mix the jelly and the water over low heat until melted to make the glaze. Brush the glaze on to the bottom of the tart shell and let set for a few minutes.  Reserve the remaining glaze.

tart16.jpg

16.    Spread the lemon curd on the tart.  


17.    Using a small knife  cut off the top and bottom of the orange. Carefully move you knife from the top to the bottom of the orange removing the membrane and the peel. Then slice the orange into slices. Repeat with remaining oranges. 


18.    Arrange the orange slices in an attractive pattern on top of the lemon curd.  

tart19.jpg

19.    Lightly brush the remaining glaze on top of the fruit.  Serve immediately.


Tips & Tricks


•    The pastry can be baked 2 days in advanced. 
•    It can also be pressed into a tart pan and frozen uncooked for 3-4 months. I placed it in a giant zip lock bag. When ready to use. Preheat oven and place frozen tart pan directly into oven.  Bake for 20mins, or until golden brown. No need for pie weights. 
•    Use can use almost any fruit to top the tart; Berries, kiwi, stone fruit
•    Completed tart is best eaten within the day so that crust doesn’t get soggy. 


print recipe
Blood Orange & Lemon Curd Tart
by Nancy Madok October-10-2017
Blood Orange & Lemon Curd Tart
Ingredients
  • Pastry
  • 12T room temperature butter cut into cubes
  • 1/2 Cup Granulated sugar
  • 2 Egg Yolks
  • 2 Cups All Purpose Flour
  • 1/4 Tsp Salt
  • Lemon Curd
  • 2 Lemons Zest of Lemons
  • 1/2 Cup Lemon Juice
  • 2 Egg Yolks
  • 3 Eggs
  • 1/3 Cup Granulated Sugar
  • 8T Room Temp Butter, Cut into cubes
  • Tart
  • 4T Apricot Jelly
  • 2T Water
  • 4 Blood Oranges or regular Navel
Instructions
Dough: In the bowl of your mixer with the paddle attachment on low speed cream the butter and sugar together until fluffy, about 1 minute. Scrape down the sides of the bowl. Add the egg yolks and mix till combined, scrape down the sides of the bowl again then add the flour and salt; mix just until the mixture start to come together. Be careful not to over mix. Use your hands to gather the dough and form into a ball.Divide the dough into half and place in a 10-inch removable bottom tart pan. Using your fingers press the dough into the bottom of the pan. Then press the into the sides. Add more dough as needed, making sure to keep an even thickness. You might not use all the dough. ( the little extra can be cooked off as a small cookie) Cover the tart pan and place in refrigerator of at least 1hour. Pre heat the oven to 375ºF. Remove the tart pan from refrigerator. Line tart pan with parchment or aluminum foil pressing it into the edges. Fill the tart pan with pie weights and place immediately into oven. Bake at 375º F for 20 minutes. Remove the tart from the oven, take out the pie weights and the parchment and return to the oven for an additional 5-10 minutes, until golden brown. Remove from oven and let cool. Lemon Curd:In a small saucepan over low heat, whisk the lemon zest, juice, eggs yolks, eggs, and sugar until combined. Stir in the butter, stirring constantly until the mixture thickens, about 5-8 minutes. It should thicken enough to hold a line when draw with finger across the wooden spoonRemove from the heat and strain into a clean bowl. Cover with a piece of plastic wrap, pressing it directly on top of the curd and let cool completely.Tart:In a small saucepan, mix the jelly and the water over low heat until melted to make the glaze. Brush the glaze on to the bottom of the tart shell and let set for a few minutes. Reserve the remaining glaze. Spread the lemon curd on the tart shell. Using a small knife cut off the top and bottom of the orange. Carefully move you knife from the top to the bottom of the orange removing the membrane and the peel. Then slice the orange into slices. Repeat with remaining oranges. Arrange the orange slices in an attractive pattern on top of the lemon curd. Lightly brush the remaining glaze on top of the fruit. Serve immediately.TIPS and TRICKSThe pastry can be baked 2 days in advanced. It can also be pressed into a tart pan and frozen uncooked for 3-4 months. I placed it in a giant zip lock bag. When ready to use. Preheat oven and place frozen tart pan directly into oven. Bake for 20mins, or until golden brown. No need for pie weights. Use can use almost any fruit to top the tart; Berries, kiwi, stone fruit Completed tart is best eaten within the day so that crust doesn’t get soggy.
Details
Prep time: Cook time: Total time: 1 hour Yield: 8-10
Featured
Risotto with Mint, Peas & Pecorino Romano Cheese
rack cover.jpg
Rack of Lamb with Mint Chimichurri Sauce
Blood Orange & Lemon Curd Tart
In April 2017 Class Tags April 2017 Class, Dessert, Blood Oranges, Tart, Lemon, Spring
Comment

Preserved Lemons

March 4, 2017 Nancy Madok
lemons cover.jpg
lemons ingredts..jpg

Ingredients

7 lemons, washed and dried (2 lemon for juicing)
1/3 cup kosher salt

1.    Roll the lemons on a board to soften them.

2.    Juice 1 or 2 lemons to make a ½ cup juice. Set aside

lemons3.jpg

3.     Using a sharp knife, cut the remaining lemons into quarters, not cutting completely through and keeping the stem end intact.

4.    Sprinkle the salt on the flesh of the lemons.  

lemons4.jpg

5.    Pack the lemons into a glass jar, pressing the lemons down, sprinkle with the remaining salt.  

lemons5.jpg

6.    Add the lemon juice making sure to cover the lemons and place the lid on top and seal the jar.

7.    Place the jar on your kitchen counter and turn the jar upside down every day for 30 days. If necessary push lemons down or add more lemon juice to keep them submerged.

8.    After 30 days the lemons are ready to enjoy. Once jar is opened refrigerate.


ALTERNATE RECIPE

QUICK PRESERVED LEMONS
Ingredients:
3 lemons, 2 sliced thinly, 1 lemon for juicing
½ cup lemon juice
4 tsp. salt

Preparation:
1.    In a small saucepan with a lid, over medium heat, add the lemon slices, lemon juice, and salt.  Bring to a boil, cover with a lid, and cook until soft, about 8-10 minutes.
2.    Drain and cool, then chop.  Set aside for future use.
*Adapted from Paula Wolfert

TIPS & TRICKS

•    Meyer lemons are the best lemons to preserve. They area the perfect balance of sweet and sour and add the perfect punch to many dishes. •    Preserve lemons can last up to a year before opening.

Featured
Preserved Lemons
Preserved Lemons
Winter Vegetable Soup with Pistou
En Papillotes of Fish with Lemon & Greens
Chocolate Cheesecake
In March 2017 Tags preserved lemons, lemons, Winter, Lemonaddon
Comment

Winter Vegetable Soup with Pistou

March 3, 2017 Nancy Madok
soup cover.jpg
soup ingred.jpg

Ingredients

Soup:
¼ cup olive oil
2 leeks (white & light green part, medium dice)
2 medium onions, medium dice
1 small square (4-inch) piece of cheesecloth
4 sprigs thyme
2 bay leaves
4 cloves garlic
2 cups carrots, (about 4 medium sized carrots)
2 cups butternut squash, (about 1 medium squash)
2 cups turnips, about 2 medium
3 quarts chicken or vegetable stock
1 28 oz. can tomatoes with the juice, broken into pieces
2 cups kale, chard, or spinach chopped (1 small bunch)
½ cup small shaped pasta or spaghetti, broken into pieces salt and pepper

Pistou:
4 cloves garlic, peeled
2 cups loosely packed parsley leaves
½ cup olive oil

soup1.jpg

1.    Peel then cut the onions, carrots, butternut squash, and turnips into medium dice.

soup1a.jpg
soup1b.jpg

1b. Wash the leeks, then dice. Wash and chop the kale or spinach. Set aside. 

soup2jpg.jpg

2.    In a large soup pot over medium heat, add the olive oil.  When warm, add the leeks, and onions.  Sauté until they start to soften, about 4-6 minutes.

soup3.jpg
soup3a.jpg

3.    Lay the cheesecloth on the counter.  Place the bay leaves, thyme sprigs and garlic on top.  Tie the cheesecloth into a little bag.  Crush the garlic with the back of your knife.  Place into the soup pot.

soup4.jpg

4.    Add the carrots, squash, potatoes, and turnips and continue cooking for an additional 5 minutes.

soup5.jpg

5.    Add the stock, tomatoes and bring to a boil, then reduce to a simmer and cook for 30 minutes, or until vegetable are softened.

soup6a.jpg
soup6.jpg

6.    Add the greens and the pasta and cook an additional 10 minutes or until pasta is cooked and greens are wilted.

7.    Season with salt and pepper.

Pistou:

1.    In a food processor or blender, add the garlic and parsley and pulse until finely chopped.  With the motor running, add the olive oil.  Season with salt and pepper.
 

pistou1.jpg
pistou2.jpg
pistou3.jpg


2.    The pistou sauce can be covered and refrigerated for a 1-2 days.  It can be frozen for up to 6 months.  Bring to room temperature before serving.

FINAL PREP OF SOUP

Remove the cheesecloth and serve soup in bowls topped with pistou.

soup8.jpg

TIPS & TRICKS

•    You can purchase pre-cut package butternut squash  (just make sure pieces are all the same size as other vegetables).
•    Can substitute zucchini and yellow squash for butternut squash and turnips to make it a summer vegetable soup.
•    Can add potatoes instead of pasta.
•    Can also add pre cooked sausage, diced cooked chicken, or beans at step 10 to add a protein component.
•    Can substitute basil in pistou in the summer.
•    Pistou freezes very well. Just defrost and add to soup. 

Featured
Preserved Lemons
Preserved Lemons
Winter Vegetable Soup with Pistou
En Papillotes of Fish with Lemon & Greens
Chocolate Cheesecake
In March 2017 Tags Winter, Vegetable, Soup, Pistou
Comment

En Papillotes of Fish with Lemon & Greens

March 2, 2017 Nancy Madok
fish ingred..jpg

Ingredients

8 fish fillets, -6 oz. (salmon, halibut, Maui Maui, grouper or any firm fish)
salt, pepper
1 cup preserved lemons, medium diced
1 cup sundried tomatoes packed in oil, drained (reserve the oil) and julienne
2 shallots finely diced
4T chopped flat leaf parsley
2 cups white wine
4 cups baby spinach
2 cups arugula
1 medium head fennel, cored and thinly sliced
salt and pepper
parchment paper

fish1.jpg

1.    Preheat oven to 425° F.  Set two baking sheets aside.

2.    Fold 8 sheets of 20-inch long parchment paper in half to resemble a     book. Using scissor to cut each paper into a heart shape. Set aside.

3.    Place a fish fillet on one half of paper near the folded edge.

4.    Sprinkle with salt & pepper.


fish5.jpg

5.    Place on top of the fish one tablespoon each of the preserved lemon,  and the sundried tomatoes, a sprinkle of shallots and the chopped parsley

fish6.jpg

6.    Drizzle 3 tablespoon wine on top.

7.    Working from one corner closest to the fold, make a series of small  folds working around the edges of the parchment. Pressing firmly to  “seal “ in the fish.  Place the packet on a baking sheet.  Repeat with the  remaining fish.


8.    Place the baking sheets in a 425º F oven and cook for 12 minutes.

fish7.jpg

9.   When the fish is almost finished baking, in a small bowl, whisk together the lemon juice, and oil. Season with salt and pepper. In Medium bowl toss the spinach, arugula and fennel with the dressing (you may not use all of the vinaigrette; adjust to desired amount of coating of the greens).  Add salt and pepper, if needed

fish9.jpg
fish9a.jpg

10.  When the fish is done, Place each papillotes on a plate.  Cut or tear back the paper, place a spoon of greens on top of then fish. Cover with the paper and allow the greens to slightly wilt. Serve immediately.


TIPS AND TRICKS

•    Always roast 2 chickens. They make great leftovers. 
•    Trussing the chickens makes it cook more evenly and is easier to turn.
•    I remove the cooked rosemary sprigs before serving but stir the chopped cooked lemons into the vegetables. 


March 2017 CLASS
Preserved Lemons
Preserved Lemons
Winter Vegetable Soup with Pistou
En Papillotes of Fish with Lemon & Greens
Chocolate Cheesecake
In March 2017 Tags Fish, Papillotes, Lemon, Main, Winter
Comment

Chocolate Cheesecake

March 1, 2017 Nancy Madok
cheesecake cover.jpg

Ingredients

CRUST:

1½ cups chocolate cookie crumbs** (about 30 cookies)
6T unsalted butter, melted

FILLING:

24 oz. cream cheese, room temperature
1 cup granulated sugar
½ cup unsweetened cocoa powder
4 eggs
1 tsp. vanilla

TOPPING:

1 pint sour cream
2T granulated sugar
1½ tsp. vanilla

GANACHE:

4 oz. bittersweet chocolate, cut into pieces ½ cup heavy cream

1.    Pre-heat oven to 350° F.

cheesecake2.jpg

2.    Crust: In a bowl, combine the chocolate cookie crumbs and the melted butter.  Stir until the mixture comes together. 

IMG_1008.jpg

2b. Using your fingers, press the mixture into the bottom and sides of a 10-inch spring form pan.  Set aside.

cheesecake3.jpg

3.    Filling: In a large bowl, add the cream cheese and sugar; beat at medium speed until creamy and smooth.  

cheesecake4jpg.jpg

4.    Add the unsweetened cocoa power.  

cheesecake5.jpg

5.    Add the eggs one at a time, beating after each one until combined and smooth.  Add the vanilla.

cheesecake6.jpg
cheesecake6a.jpg

6.    Pour the mixture into the prepared pan and bake for 30 minutes in a 350° F oven.  Remove from oven and cool for cool 30 minutes.

7.    Topping: Re-Heat oven to 475° F.

8.    While the filling of the cheesecake is cooling, in a small bowl, combine from the “Topping” ingredients the sour cream, sugar and vanilla.  Stir until combined.

cheesecake9.jpg

9.    Place the mixture on top of the cooled cheesecake, spreading it out evenly.

10.    Place the cheesecake in the 475° F oven for 5 minutes.  Remove from the oven.

cheesecake11.jpg

11.    Ganache: In a small saucepan, heat the heavy whipping cream until it is hot and almost boils.  Pour the hot cream over the chocolate; make sure all the chocolate is submerged.  

cheesecake11a.jpg

11b. Let it sit for 10 minutes, and then whisk vigorously until the chocolate is smooth and silky.  Let the chocolate to sit a few minutes until it thickens slightly.

cheesecake12a.jpg

12.    Drizzle the ganache on the top of the cheesecake. (you might not use it all) Let cool, then place in the refrigerator for 12 hours to set and chill completely.

13.    When ready to serve, remove cheesecake from refrigerator 30 minutes before serving, slice into slices and enjoy.

cheesecake13.jpg

Tips & Tricks:

•    **To make crumbs: place cookies in a food processor and pulse until they are the consistency of fine sand
•    Don’t worry if cheesecake cracks the topping will cover it up!

Featured
Preserved Lemons
Preserved Lemons
Winter Vegetable Soup with Pistou
En Papillotes of Fish with Lemon & Greens
Chocolate Cheesecake
In March 2017 Tags Dessert, Chocolate, Cheesecake, Ganache, cream cheese, Winter
Comment

Wintergreens with Roasted Beets, Fennel & Gorgonzola with Apple Cider Vinaigrette

February 3, 2017 Nancy Madok
salad cover.jpg
salad ingred.jpg

Ingredients

Salad:
3-4 medium red or golden beets
4-5 handfuls of spinach, washed
4-5 handfuls winter greens: arugula, chicory, or curly endive, washed and torn into bite-size pieces
2 medium heads fennel, washed
8 oz. Gorgonzola, crumbled
½ cup roasted walnuts, broken into pieces ** see tips & tricks 

Vinaigrette:
1T Dijon mustard
4T apple cider vinegar
½ cup extra virgin olive oil
salt and pepper

1.    Preheat oven 350º F.
2.    Line a baking sheet with foil.  Place the beets on the sheet and roast uncovered for 40-50 minutes, or until the beets are soft to the touch.

3.    Once the beets are cool enough to handle, peel them.


4.    Then dice into medium size dice.

5.    Using a knife cut remove the fennel fronds, discard or save for another use. Cut the fennel bulb in half, carefully remove the core and slice the fennel into thin slices


6.    Vinaigrette: In a small bowl, whisk together the mustard and vinegar.  Slowly add the olive oil in a steady stream, whisking constantly until emulsified.  Season with salt and pepper. Set aside.


7.    In a large bowl, place the greens and fennel and toss with the vinaigrette; season with salt and pepper, as needed to taste.

salad8.jpg

8.    Place the dressed leaves on a platter or individual plates.  Sprinkle the beets and cheese on top of the greens.  Top with the toasted walnuts.
9.    Serve immediately.

TIPS AND TRICKS

•    To roast nuts; preheat oven 350º F.Place nuts on a baking sheet and bake for 5 minutes. Shake the pan and continue baking until nuts are toasted, about 3-5 minutes more.  Allow them to cool . Can be store in an air tight container for weeks.
•    Your clean hands are the best salad tongs! Don’t over dress your salad. You don’t want drown it. You can also add more dressing later. Always dress the salad right before serving
•    Roasted beets can last in refrigerator 2weeks. 
•    You can change this salad buy altering the cheese (blue, fete, and goat. The vinegar (raspberry, balsamic, and champagne) and the nuts (roasted almond, walnuts) 


Featured
Wintergreens with Roasted Beets, Fennel & Gorgonzola with Apple Cider Vinaigrette
Roasted Chicken & Vegetables with Rosemary & Preserved Lemon
Apple & Walnut Crostata
In February 2017 Class Tags Appetizer, salad, February 2017 Class, Winter
Comment

Roasted Chicken & Vegetables with Rosemary & Preserved Lemon

February 2, 2017 Nancy Madok
chix cover.jpg
chix ingred.(1).jpg

Ingredients

2 medium yellow onions
4-6 medium carrots
2 heads fennel, frons removed
1 pound Yukon gold potatoes, wash
Two chickens, about 4-5 pounds each
2 tsp each: sea salt and black pepper, mixed together
2 preserved lemons, flesh & skin cut into small dice ** recipe attached
several sprigs fresh rosemary
4T olive oil
1 cup chicken stock
kitchen twine


chix2.jpg

1.    Preheat oven to 425º F.
2.    Peel and cut the carrots into thick slices about 1inch thick and onions into quarters. Set aside.

chix3jpg.jpg

3.    Cut the potatoes and fennel into quarters Set aside. 


chix4.jpg

4.    Wash and pat dry chickens.  Rub the outside of bird with 2 tablespoons of olive oil.

chix5.jpg

5.    Carefully separate the skin from the breast meat; rub the salt & pepper mixture underneath the skin and all over the birds.  Place ¼ of 1 lemon and a sprig of rosemary under each side under the skin. Place the remaining ½ lemon and a sprig of rosemary in cavity.


chix6.jpg

6.    Tuck the wings behind the “shoulders”. 

chix7e.jpg

7.    Truss with kitchen twine.  Repeat with the other chicken.


chix8jpg.jpg

8.    Lay the chickens on their tummy on a rack in roasting pan. Add stock and the vegetables to the pan and roast the chickens in 425º F oven for 20 minutes.  

9.    Turn chickens to their side, and roast for 20 minutes.  Turn chicken to other side, and roast for 20 minutes. 

10.     Place chicken on their backs, baste with juices, and roast for about 20 minutes more or until internal temperature is 170° F


chix10.jpg

11.    Transfer the chickens to a platter, cover loosely with foil, and let rest for 15 minutes.


chix11.jpg

12.    Carve the chicken and place on a plate or platter top with the roasted vegetables and pan drippings. 

TIPS AND TRICKS

•    Always roast 2 chickens. They make great leftovers. 
•    Trussing the chickens makes it cook more evenly and is easier to turn.
•    I remove the cooked rosemary sprigs before serving but stir the chopped cooked lemons into the vegetables. 


FEBRUARY 2017 CLASS
Wintergreens with Roasted Beets, Fennel & Gorgonzola with Apple Cider Vinaigrette
Roasted Chicken & Vegetables with Rosemary & Preserved Lemon
Apple & Walnut Crostata
Lemon Preserve Recipe
Preserved Lemons
Preserved Lemons
In February 2017 Class Tags February 2017 Class, Main, Vegetables, Rosemary, Lemon, Winter, preserved lemons, Chicken
Comment

Apple & Walnut Crostata

February 1, 2017 Nancy Madok
crostatacovershot.jpg
crostata1.jpg

Ingredients

Pastry:
1½ cup all-purpose flour
8T butter, cut into cubes and cold
¼ tsp. salt
1 tsp. granulated sugar
8T iced, cold water

Filling:
 3-4 medium size apples (about 1½ pounds): (gala, pink lady, or pipen)
2T brown sugar
1 tsp. cinnamon
¼ cup raisins
¼ cup walnuts, roughly chopped
1 egg, beaten
2T turbinado or Demerara sugar

crostata1.jpg

1.    Pastry: In a food processor, add the flour, salt, and sugar; pulse a few times until combined.  

crostata2.jpg

2.    Add the butter and then pulse until the mixture has bits of butter the size of peas.  

crostata3.jpg

3.    Add the cold water and pulse just until the mixture starts to come together. Dump the dough onto a large piece of plastic film: use the plastic to bring the dough together.  


crostata4A.jpg

4.    Flatten into a disk and chill at least 1 hour.

5.    Preheat oven to 400° F. If you have a pizza stone, place it on a rack in the middle of the oven.


crostata6A.jpg

6.    On a lightly floured surface, roll dough out into a circle about 14 inches in diameter,

crostata6B.jpg

6b. Transfer the dough to a parchment-lined baking sheet pan.  Place in refrigerator for 10 minutes.

crostata7jpg.jpg

7.    Fruit: Peel and cut the apples into slices. Place in a medium size bowl and toss with brown sugar, cinnamon, raisins and nuts.


crostata8.jpg

8.    Remove the pastry from the refrigerator. Pile the apple nut mixture on the dough, leaving a 2-inch border. Fold the dough border over the fruit, making pleats and making sure that there are no holes.  

crostata9jpg.jpg

9.    Brush with beaten egg and sprinkle with turbinado sugar.

crostata11.jpg

10.    Place the baking sheet into a 400° oven directly on the pizza stone for 25-30 minutes, until golden brown, until brown. 


11.    Carefully pull on the parchment paper to remove the crostata from the baking sheet and place onto a cooling rack; cool for 15-20 minutes before slicing. Serve with whipped cream or vanilla ice cream.  

NEW platter photo .jpg

Tips & Tricks:

  • Pastry can be made 3 days ahead and kept in refrigerator. Place disc into a ziplock bag and freeze.  It freezes beautifully up to 3 months. Defrost in refrigerator overnight.
  • Use any firm apple that is your favorite or in season.
  • Use regular or golden raisins. 
  • You can also use different nuts; almonds, pecans or hazelnuts are delicious.
  • The turbinado or demerara sugar adds a nice sweet crunch to the pastry. 
  • Baking the crostata on a pizza stone helps the crust brown and keep crispy. 
  • The crostata is best served warm to room temperature. 
print recipe
Apple & Walnut Crostata
by Nancy Madok October-10-2017
Apple & Walnut Crostata
Ingredients
  • 1 1/2 Cup All Purpose Flour
  • 8T Butter, Cut into cubes and cold
  • 1tsp Salt
  • 1 tsp Granulated Sugar
  • 8T Iced, Cold Water
  • 4 Medium Medium Sized Apples About 1 1/2 Pounds - Gala, Pink Lady, or Pipen
  • 2T Brown Sugar
  • 1tsp Cinnamon
  • 1/4 Cup Raisins
  • 1/4 Cup Walnuts Roughly Chopped
  • 1 Egg Beaten
  • 2T Turbinado or Demerara Sugar
Instructions
Pastry: In a food processor, add the flour, salt, and sugar; pulse a few times until combined. Add the butter and then pulse until the mixture has bits of butter the size of peas. Add the cold water and pulse just until the mixture starts to come together. Dump the dough onto a large piece of plastic film; use the plastic to bring the dough together. Flatten into a disk and chill at least 1 hour. Preheat oven to 400° F. If you have a pizza stone, place it on a rack in the middle of the oven.On a lightly floured surface, roll dough out into a circle about 14 inches in diameter, then transfer the dough to a parchment-lined baking sheet pan. Place in refrigerator for 10 minutes. Fruit: Peel and cut the apples into slices. Place in a medium size bowl and toss with brown sugar, cinnamon, raisins and nuts. Remove the pastry from the refrigerator. Pile the apple nut mixture on the dough, leaving a 2-inch border. Fold the dough border over the fruit, making pleats and making sure that there are no holes. Brush with beaten egg and sprinkle with turbinado sugar. 20 minutes, until brown. Carefully pull on the parchment paper to remove the crostata from the baking sheet and place onto a cooling rack; cool for 15-20 minutes before slicing. Serve with whipped cream or vanilla ice cream. TIPS AND TRICKSPastry can be made 3 days ahead and kept in refrigerator. It freezer beautiful up to 3 months. Use any firm apple that is your favorite or in season.Use regular or golden raisins. You can also use different nuts; almonds, pecans or hazelnuts are delicious.The turbinado or demerara sugar adds a nice sweet crunch to the pastry. Baking the crostata on a pizza stone helps the crust brown and keep crispy. The crostata is best served warm to room temperature.
Details
Prep time: 1 hour Cook time: 20 mins Total time: 1 hour 20 mins Yield: 8
February 2017 Class
Wintergreens with Roasted Beets, Fennel & Gorgonzola with Apple Cider Vinaigrette
Roasted Chicken & Vegetables with Rosemary & Preserved Lemon
Apple & Walnut Crostata
In February 2017 Class Tags Dessert, fruit, Crostata, Walnut, Apple, Pastry, February 2017 Class, Winter
Comment

Pasta with Ragu Bolognese

September 7, 2016 Nancy Madok
bolognese-recipe shot.jpg
bolognese- ingred.jpg

Ingredients

2T olive oil
5 oz. pancetta (uncured bacon)
1 medium onion, finely diced
½ cup carrot, finely diced
½ cup celery, finely diced
1-pound ground beef
½ cup red wine
2T double-concentrated tomato paste dissolved in 1-cup warm water
1-cup whole milk
Salt & pepper
1-pound fresh pasta (tagliatelle, fettuccine, pappardelle, or penne)
½ cup Parmigiano Reggiano cheese, and some extra cheese for table

bolognese#1.jpg

1.    In a food processor, or by hand, finely chop the pancetta until it resembles ground pork.

bolognese#2jpg.jpg

2.    In a medium saucepot or Dutch oven over medium heat, add the olive oil. When warm add the pancetta, cook about 4 minutes until some of the fat starts to render out.  

bolognese#3.jpg

3.    Add the onion, carrots, and celery and cook until vegetables are soft, about 4-6 minutes. 

bolognese#4.jpg

4.    Increase the heat to medium-high and add the ground beef. Using a spoon, break the meat up into small pieces. Continue stirring and continue breaking the meat into very small pieces until the meat has cooked evenly.

bolognese#5.jpg

5.    Stir in the red wine and cook about 2 minutes. Add the diluted tomato paste and reduce the heat to a simmer.

bolognese#6.jpg

6.    Every few minutes, give the sauce a stir and add a tablespoon of the milk until it is all gone. Cook the sauce for 1½ to 2 hours until most of the liquid has evaporated. If the sauce should become too dry during the cooking time, carefully add 1-2 tablespoons of water. Season with salt and pepper. Set the sauce aside until ready to use. Reheat if necessary.

7.    When ready to serve, bring a large pot of water to a boil. Add 1 tablespoon of salt. Add the pasta and cook the pasta for 2-4 minutes.

8.    Drain the pasta. Place in a large bowl or platter and reserve ½ cup of the pasta cooking liquid.

9.    Toss the pasta with the sauce. If it seems a little dry, add a little of the pasta cooking liquid. Add the cheese and toss again.

10.    Serve with more cheese on the side.

bolognese#7.jpg

TIPS & TRICKS

•    There are so many recipes for ragu Bolognese. I adapted this version from the Accademia Italiana Della Cucina recipe, which is the standard recipe most Bolognese’s follow.
•    Sauce can be made 3-4 days in advance and freezes nicely.
•    If possible, always serve with fresh, long stranded pasta so that the sauce clings to the noodles.

Featured
bolognese-recipe shot.jpg
Pasta with Ragu Bolognese
fish-cover recipe.jpg
Baked Fish with Olives, Tomatoes, & Herbs
sbisolona-covershot.jpg
Torta Sbisolona
In Sept 2016 Bologna Italy Tags Pasta, Ragu, Bolognese, Fall
Comment

Baked Fish with Olives, Tomatoes, & Herbs

September 6, 2016 Nancy Madok
fish-cover recipe.jpg

Ingredients

3T olive oil
1 medium onion, medium dice
4 cloves of garlic, crushed
1 28 oz. can of whole tomatoes and juice
5 sprigs fresh thyme
3-4 basil leaves (extra leaves for decoration)
½ cup Kalamata Olives, pitted
2T capers
Salt and pepper

8 8 oz. skinless firm white fish filets (mahi-mahi, halibut, cod, or grouper)

1.    Preheat oven to 425º F.

fish#1.jpg

1b.  In a medium sauté pan over medium heat, add the olive oil; when warmed, add the onions sauté 3-4 minutes.  Add the garlic and continue cooking until the onions are soft, about 2-3 minutes more.  

2.    Add the tomatoes, and, using a wooden spoon, break the tomatoes into small pieces.  

3.    Add the thyme and basil leaves.  Bring the sauce to a simmer, stirring occasionally for 25 minutes, until sauce thickens.  

fish#3.jpg

4.    Remove from heat stir in the olives and capers; adjust seasoning with salt and pepper.  Pour the sauce into a 9”x13” roasting pan. (if you make the sauce ahead reheat it, so that is hot)

5.    Season the fish filets on both side with salt and pepper.

fish#5.jpg

5b.  Place on top of the sauce.

6.    Place the fish into the 425º F oven and cook 10-15 minutes.  Check for doneness by inserting a knife into a thick part of the fish; it should be slightly firm and opaque.  Remove fish from oven and let sit 2 minutes, it will continue to cook out of the oven, so be careful not to overcook. 

7.    Place the fish filets on platter or plates, remove the thyme sprigs and

8.    Garnish with a few fresh basil leaves.  Serve immediately.  

fish#7:6.jpg

TIPS & TRICKS

•    I like to use San Marzano Tomatoes, I think they have the best flavor of all the canned tomatoes.
•    Try to buy olives with their pits. This way the olive flesh is firm and not soggy from sitting in the brine. Use the side of your French knife and lightly press the olive until the pit pops out.
•    Use whatever fish is the freshest. Most firm white fish are delicious in this recipe. I have also used frozen wild caught cod and halibut with great success. 

Featured
bolognese-recipe shot.jpg
Pasta with Ragu Bolognese
fish-cover recipe.jpg
Baked Fish with Olives, Tomatoes, & Herbs
sbisolona-covershot.jpg
Torta Sbisolona
In Sept 2016 Bologna Italy Tags Fish, Olives, Tomatoes, Baked, Fall
Comment

Torta Sbisolona

September 5, 2016 Nancy Madok
sbisolona-covershot.jpg
sbislona#ingred.jpg

Ingredients

1½ cups whole raw almonds plus 12 almonds for decoration
1½ cups all-purpose flour
1 cup finely ground corn meal
1 cup granulated sugar
2 sticks of butter
2 eggs yolks
zest of 1 lemon
1 tsp. vanilla

1.    Preheat oven to 350º F.

2.    In a food processor, place the almonds, and process until the almonds resembles coarse sand.  Place in a large bowl. 

3.    Add the flour, corn meal and sugar.  Mix together.  Add the butter, and, working with your hands break, the butter up into little pieces.  Mix with the dry ingredients until it starts to look like wet sand.  The mixture should be loose and not a cohesive mass.

sbisolona#4.jpg

4.    Add the egg yolks, lemon zest, and vanilla. Mix just until ingredients are incorporated.  

sbisolona#4A.jpg

4b.  The dough should be loose and crumbly.

5.    Let the dough crumble and fall out of your hands like it is raining dough into a 11-inch, removable-bottom tart pan.  Do not press the dough down into the pan; this is imperative to keep the crumbly texture.

sbisolona#5A.jpg

5b.  Decorate the top of the torte with the 12 almonds.

6.    Bake at 350º F oven for 35-40 minutes, until golden brown.  Remove the torte from the oven and cool completely in the pan.

7.    To serve, remove the torte from the tart pan and place on a platter.  The torte should not be cut rather broken into piece with your hands.  Enjoy! 

TIPS & TRICKS

•    This torta makes a wonderful dessert or van equally be enjoyed for breakfast.
•    Can be made a week in advance. Store it in a large zip lock bag.

Featured
bolognese-recipe shot.jpg
Pasta with Ragu Bolognese
fish-cover recipe.jpg
Baked Fish with Olives, Tomatoes, & Herbs
sbisolona-covershot.jpg
Torta Sbisolona
In Sept 2016 Bologna Italy Tags Dessert, Torta, Sbisolona, Fall
Comment

Caesar Salad

September 4, 2016 Nancy Madok
caesarcover.jpg
caesaringred..jpg

Ingredients

Croutons
½ fresh baguette, cut into ¾ -1 inch cubes (3 cups)
6T olive oil
2 cloves garlic, crushed

Dressing
4-6 oil-packed anchovies
4 cloves garlic, crushed
1 egg yolk
1 tsp. lemon zest
3T lemon juice
2 tsp. Dijon mustard
½ tsp. Worcestershire sauce
¼ tsp. salt
¼ tsp. pepper
½ cup extra virgin olive oil
¼ cup Parmigiano-Reggiano, grated

Salad
2 large heads Romaine lettuce
½ cup Parmigiano-Reggiano, grated

1.    Pre-heat oven to 350°F.

caesarcroutons2.jpg

2.    Place the bread cubes into a large bowl.  In a small bowl, mix together the olive oil and garlic until combined.  Add the garlic oil mixture to the bread cubes and toss until coated.

caesarcroutons3.jpg

3.    Spread the cubes onto a baking sheet in a single layer. Bake until the bread cubes are golden brown, about 15-17 minutes. 

caesardressing1.jpg

Dressing:
1.    In a blender, add the anchovies, garlic, egg yolk, lemon zest, juice, mustard, Worcestershire sauce, salt and pepper.  Pulse a few times until all ingredients are combined.

caesardressing2.jpg

2.    With the blender running on “low” speed, slowly add the olive oil in a steady stream.

3.    Stop the blender and stir in the cheese.

caesarsalad1.jpg

1.    Wash the heads of Romaine lettuce.  Cut off the stems, and then cut the head into quarters.  Lay on a platter or salad plate.  Drizzle the salad dressing over each spear.

2.    Sprinkle the cheese, top with croutons and serve immediately.

TIPS & TRICKS

•    Croutons can be made and kept in airtight container for a week.
•    Dressing can be made 3 days in advance. It also made a great dip for crudités veggies and stemmed artichokes. 

Featured
caesarcover.jpg
Caesar Salad
pizza sauce3.jpg
Perfect Pizzas - Part 1 - Sauce
Pizza clas cover shot.jpg
Perfect Pizzas - Part 2 - Dough
tiramisu:covershot.jpg
Tiramisu
In Sept 2016 Pizza Class Tags Salad, Appetizer, Caesar Salad, Crutons, Fall
Comment

Perfect Pizzas - Part 1 - Sauce

September 3, 2016 Nancy Madok
pizza sauce3.jpg
pizza sauce ingred.jpg

Ingredients

2T olive oil
2 cloves garlic, crushed
1 28 oz. can whole tomatoes
3-4 basil leaves salt & pepper

pizza sauce1.jpg

1.    Place a small sauté pan over medium-low heat, add the oil and heat until slightly warm.  Add the garlic and cook 1-2 minutes, until soft and being careful not to burn the garlic

pizza sauce2.jpg

2.    Add the tomatoes; using a wooden spoon, break the tomatoes into small pieces.  Raise the heat to medium- high.  

pizza sauce3.jpg

3.    Add the basil and cook until the sauce thickens slightly, about 5-7 minutes. Season with salt and pepper. Sauce can be used chunky or pureed.

pizza cover.jpg

Continue to Part 2 of Recipe

Part 2 - Pizza Dough and Toppings
Featured
caesarcover.jpg
Caesar Salad
pizza sauce3.jpg
Perfect Pizzas - Part 1 - Sauce
Pizza clas cover shot.jpg
Perfect Pizzas - Part 2 - Dough
tiramisu:covershot.jpg
Tiramisu
In Sept 2016 Pizza Class Tags Pizza, Main, Sauce, tomato, Fall
Comment
← Newer Posts Older Posts →

PRIVACY POLICY 2020

COPYRIGHT 2020 Cucina Casa M