• UnderConstruction
  • Home
  • Seasons
  • Classes
  • Tours
  • About
  • CONTACT
  • Menus
Menu

Cucina Casa M

Street Address
City, State, Zip
Phone Number

Your Custom Text Here

Cucina Casa M

  • UnderConstruction
  • Home
  • Seasons
  • Classes
  • Tours
  • About
  • CONTACT
  • Menus

Dried Figs, Cranberries, Walnuts & Goat Cheese with Citrus Vinaigrette

February 20, 2020 Nancy Madok
salad:ingred.jpg

Ingredients

Vinaigrette:
3T lime juice
1T Dijon mustard
1tsp. salt pepper
½ cup extra virgin olive oil

Salad:
10 oz. mixed salad greens, arugula or spinach (8-10 handfuls)
2 Belgium endives, sliced
1 small head radicchio, washed and torn into bite size pieces
1 cup dried figs, chopped
1 cup dried cranberries
1 cup toasted walnuts, roughly chopped
10 oz. goat cheese, crumbled

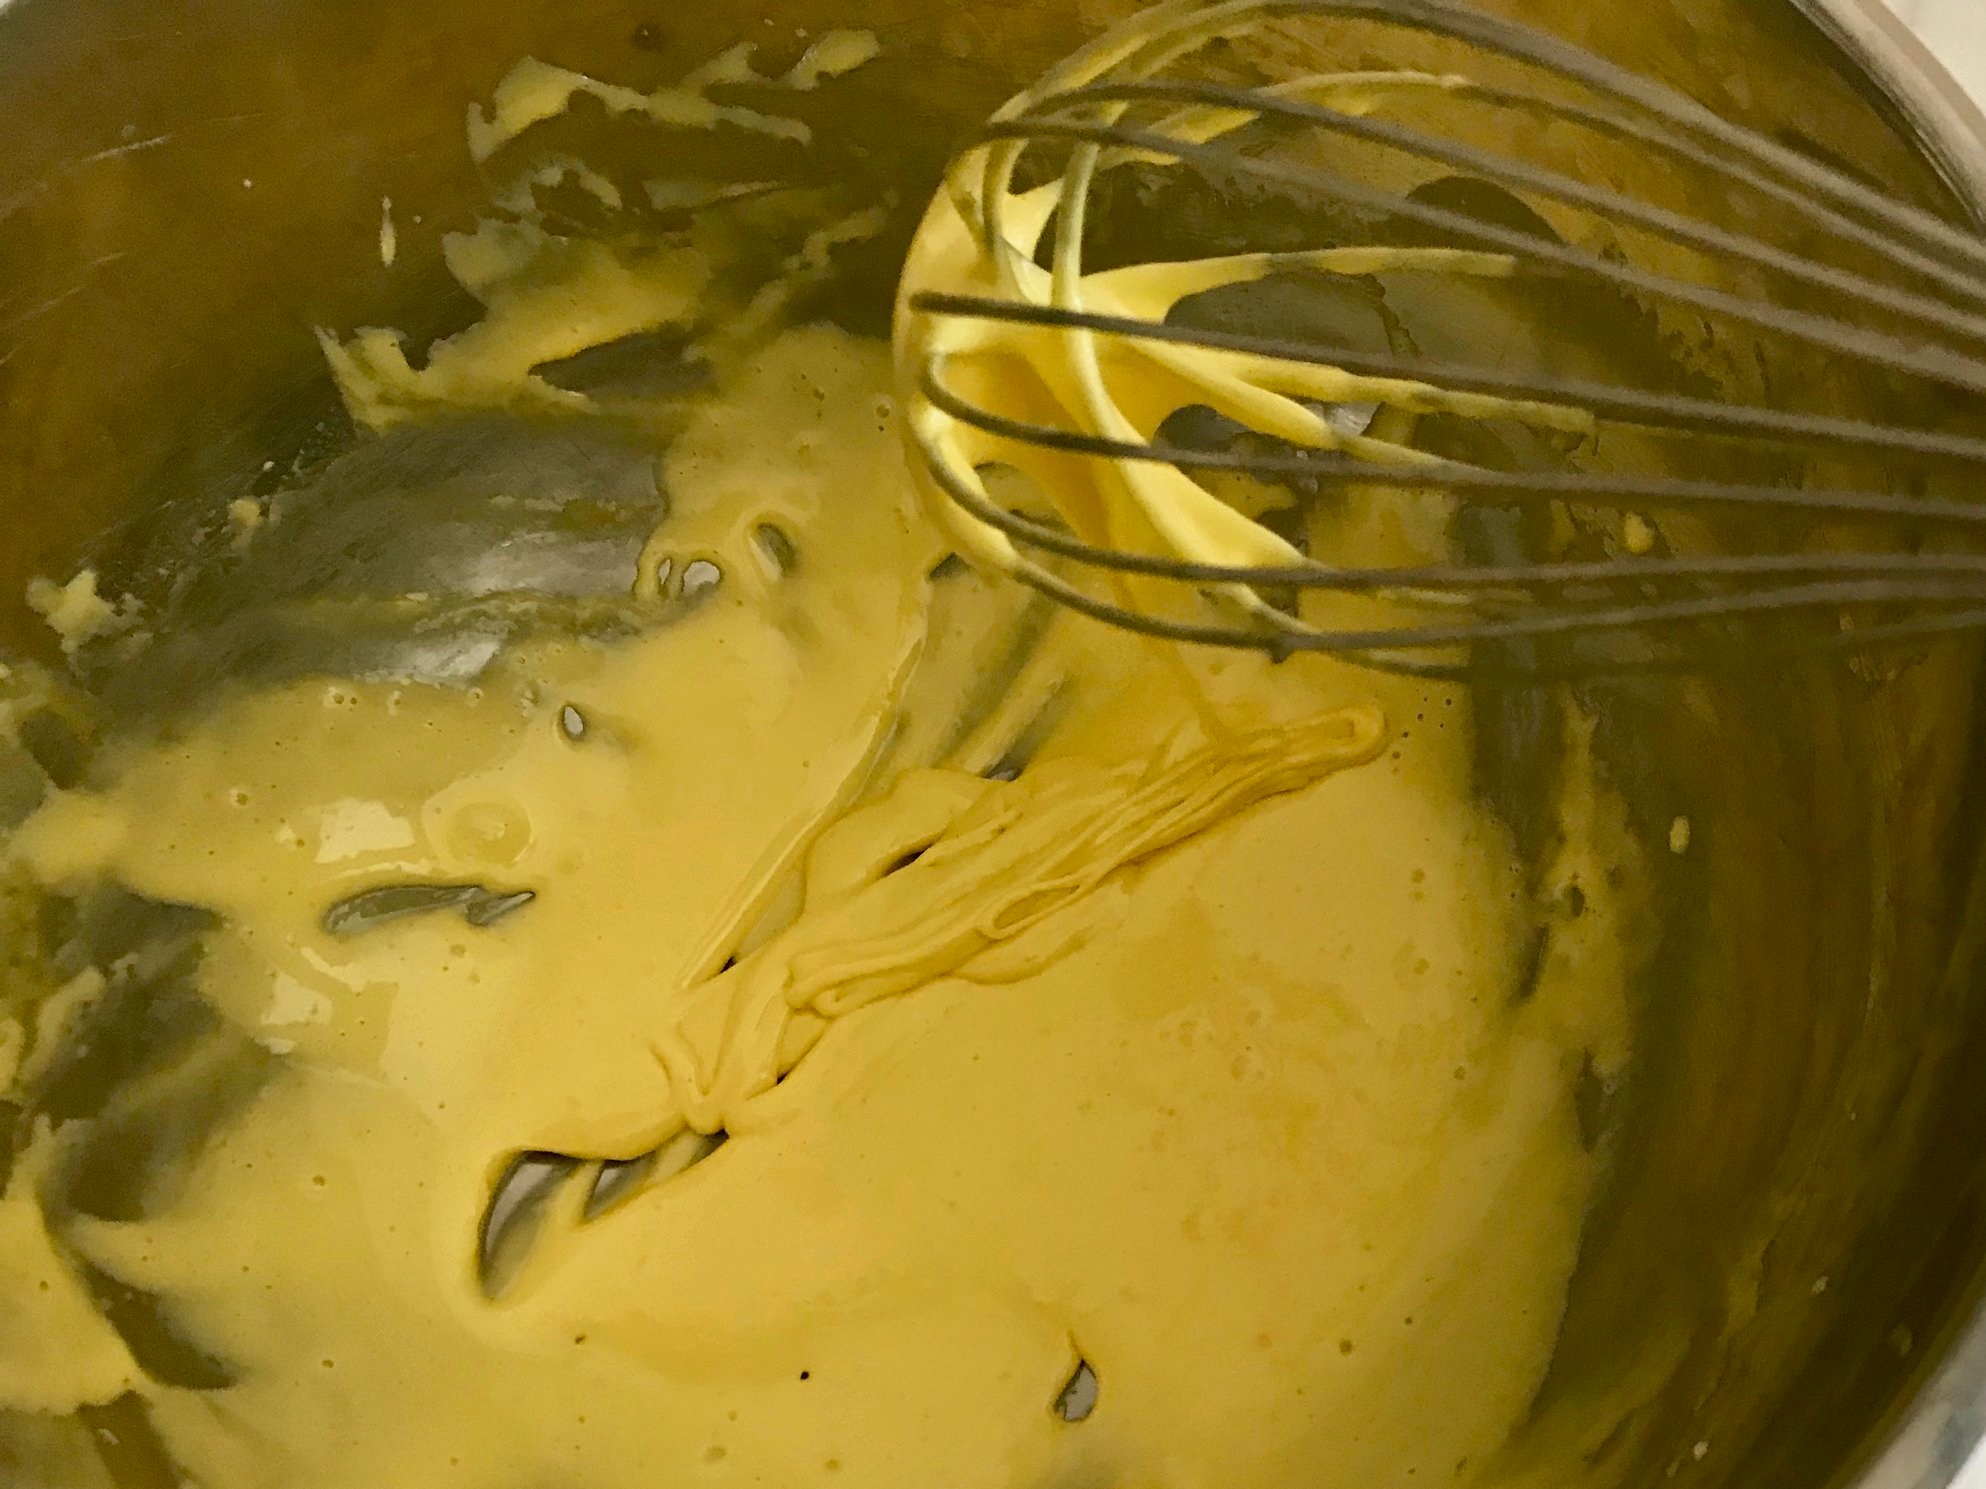
1. Vinaigrette: In a small glass jar with a lid, add the lime juice and mustard, 5 grinds of pepper and salt. Put on the lid and shake.

2. Add the olive oil recover and shake until the dressing is emulsified.

3. Salad: In a large salad bowl. Add the salad greens, figs, cranberries, nuts, and goat cheese. Add just enough dressing to coat the salad greens. Toss the salad and then adjust the seasoning.

4. Place the dressed leaves on a platter or individual plates. Serve immediately.

TIPS & TRICKS

• To toast nuts, place them on a baking sheet in a 350° F oven for 5 minutes. Give the pan a shake and toast for an additional 3 minutes until slightly brown. Be careful: they burn easily! Chop as desired
• You can substitute lemon or orange juice for the lime juice, or use any vinegar.
• The vinaigrette will separate, but just shake to re-emulsify. It will keep in your fridge for up to two weeks.
• One handful of salad greens is equal to one serving.
• You can substitute any dried fruit: dates, dried blueberries, cherries, or apricots for the figs and cranberries.
• You can substitute almonds, pistachios, or pecans for the walnuts. ¼ cup of walnuts has been said to help promote good brain health.

DOWNLOAD FIG CRANBERRY WALNUTS SALAD RECIPE
In February 2020 Class Tags Starter, appetizer, Spring, Lime, Lime Juice, dijon mustard, Olive Oil, Arugula, Spinach, Belgium Endives, Radicchio, Figs, cranberries, walnuts, Goat Cheese
Comment

Shrimp Scampi with Pasta

February 20, 2020 Nancy Madok
shrimp:ingred.jpg

Ingredients

1 pound shrimp, peeled, and deveined
5T butter
2T olive oil
1 shallot, finely diced
5 cloves garlic, finely diced
½ cup white wine
1 tablespoon lemon zest
½ cup lemon juice
1 pound fresh pasta
2T chopped flat parsley
salt & pepper
chili flakes-optional

shrimp#1.jpg

1. With a paper towel pat dry the shrimp and season with salt and pepper.

2. In a large sauté pan, over medium heat, heat 2 tablespoons of the butter. Once melted, add the shrimp and cook until they start to turn pink about 2 minutes (they will be undercooked). Remove from pan place on a plate and set aside.

3. Heat the remaining 3 tablespoons of the butter and olive oil, and then add the shallot and sauté 1 minute. Add the garlic and sauté for 1 minute more. Add the wine and lemon juice and cook for 1-2 minutes.

shrimp#4.jpg

4. Add the shrimp back into the pan and toss in the sauce to finish cooking, about another 2-3 minutes.

shrimp#5.jpg

5. Meanwhile, bring a large pot of water to a boil. Add 1 tablespoon of salt. Add the pasta and cook the pasta until just al dente. Drain and reserve ½ cup of the cooking water. Add the cooked pasta to the pan with the shrimp.

shrimp#6a.jpg

6. Add the lemon zest, and parsley, tossing until well coated, adding a little of the pasta cooking water if needed to thin out the sauce. Season with salt, pepper and chili flakes. Serve immediately.

TIPS & TRICKS

• You can keep the shrimp whole or cut them into pieces, as you prefer. I used 16/20 shrimp, which means that there are 16-20 pieces per pound. I like to use shrimp from the Gulf of Mexico.
• Have your mise en place, a French culinary term that means “to put in place” prepped and ready to go before you start cooking since the cooking time is so short. In other words, have all your ingredients prepped and organized before you begin.
• The recipe calls for fresh pasta, which normally take just 3-4 minutes to cook. You can substitute dried pasta (cooking time 8-10mins); just start cooking the pasta before you start cooking the shrimp.
• You can also substitute the pasta for couscous, cauliflower rice or quinoa.
• You could add scallops when you sauté the shrimp. Or add capers, chopped olives, chopped tomatoes or basil to add different flavors to the dish.
• This recipe doubles easily.

DOWNLOAD SHRIMP SCAMPI RECIPE
In February 2020 Class Tags Main, Spring, entree, shrimp, butter, garlic, white wine, lemon, pasta, chili flakes, parsley
Comment

Chocolate Orange Mousse, with Berries

February 20, 2020 Nancy Madok
mousse:ingred.jpg

Ingredients

6 oz. bittersweet chocolate, chopped
2T unsalted butter, cut into 8 pieces
¼ cup orange liquor
3 large egg whites, room temperature
pinch of salt
3T super fine sugar
1 cup cold heavy cream
1 cup raspberries, washed
Confectioner’s sugar for dusting

1. Place the chocolate in a medium-size heat-proof bowl and set the bowl on top of a pot of boiling water. Turn the heat off. Stir until the chocolate is melted, remove from heat, stir in the liquor and the butter. Stir until the chocolate is completely mixed and smooth. Set aside to cool slightly.

mousse#2a.jpg

2. In a bowl of your mixer, over medium speed beat the egg whites with salt until they form soft peaks, about 2 -3 minutes. While still beating, sprinkle in the sugar by the spoonful and continue beating until soft, shining peaks are formed, about another 2-3 minutes. Set aside.

3. In a clean bowl, whip the cream until it is fairly thick and holds a soft peak.

mousse#4b.jpg

4. Using a large spatula, gently fold about 1/3 of the egg whites into the chocolate mix until slightly incorporated. Fold in the remaining whites. Now fold in the whipped cream gently folding until all the cream is blended in.

5. Spoon or pipe the mousse into serving dishes and refrigerate for at least an hour to firm up.

mousse#6.jpg

6. When ready to serve, sprinkle a few raspberries on top of the mousse. Dust with confectioner’s sugar and serve with meringue kiss cookies on the side.

TIPS & TRICKS

• Use a good dark 60% cacao chocolate.
• You can use Grand Marnier, triple sec, or Cointreau for the orange liquor. I prefer the Cointreau; it adds a clean, light orange flavor.
• Egg whites separate best when they are cold. They beat up best when they are room temperature. They can sit on your counter for hours.
• Take care when separating the egg whites to insure that there is no egg yolk in the whites. Egg yolks have fat, and fat will cause the whites to not whip up. Make sure your mixing bowl is really clean.
• Chocolate mousse can be made two days in advance. Just cover the dishes with plastic wrap. Remove the mousse from the fridge 30 minutes before serving to remove a little of the chill.

DOWNLOAD CHOCOLATE ORANGE MOUSSE

This is a Companion recipe to
Meringue Kisses recipe.
Click photo below to go to recipe.

kisses:cover.jpeg
In February 2020 Class Tags Dessert, Spring, Chocolate, Mousse, Orange, Grand Marnier, Raspberries, Heavy Whipping Cream, Egg Whites, Triple sec, Cointreau
Comment

Meringue Kisses

February 20, 2020 Nancy Madok
kisses:ingred.jpg

Ingredients

4 egg whites at room temperature
¼ tsp. Cream of Tartar
pinch of salt
1 cup superfine sugar
red food color

1. Preheat oven to 200° F.

2. Line 2 baking sheet with parchment paper, set aside.

kisses#3.jpg

3. In the bowl of an electric mixer, beat the eggs whites with the cream of tartar and a pinch of salt at medium speed until they are foamy, about 2-3 minutes.

kisses#4.jpg

4. Add the sugar, 1 tablespoon at a time, allowing time for it to dissolve into the whites. After all the sugar has been added, increase the speed to “high” and continue beating until the egg whites are stiff and shiny, about 8-10 minutes (the whipped egg whites should stick straight up when the whisk is turned upside down).

5. Add a drop or two of food coloring. Mix until combined.

kisses#6.jpg

6. Scoop the egg whites into a piping bag. Pipe the meringue into kisses.

7. Place the sheet pans in the 200° F oven. Bake the meringues for an hour. Turn off the heat to the oven and let the meringues sit and cool inside the oven for about an hour. Cookies should come off easily from the paper.

8. Store in a cool, dry place until ready to use.

TIPS & TRICKS

• The meringue cookies can be colored with different colors and can be flavored with a teaspoon of vanilla or peppermint extract.
• If after 1 hour of baking and 1 hour of “cooling” the cookies still stick to the parchment. Turn the oven back on to 200 degrees. Once it reaches temperature turn the heat off and put the cookies back in the oven and allow them to sit another hour or until they are completely dry.
• The meringue cookies can be made up to two weeks in advance. Store them in an airtight container.

DOWNLOAD MERINGUE KISSES RECIPE

This is a Companion recipe to
Chocolate Orange Mousse, with Berries recipe.
Click photo below to go to recipe.

mousse:cover.jpg
In February 2020 Class Tags Dessert, Spring, Egg Whites, cream of tartar, Sugar, Red Food Color
Comment

Grilled Shrimp & Beef Kebobs with Avocado with Tzatziki Sauce

May 22, 2019 Nancy Madok
beef:cover.jpg

Ingredients

2 pounds Top Sirloin
2 pounds Shrimp

Rub:
1T black peppercorns
2T coriander seeds
3T cumin seeds
6 cloves garlic, crushed
1T chili powder
1T salt
1 tsp. dried mustard
1 tsp. paprika

Sauce ingredients Below.

beef#1.jpg

1. Cut the Top Sirloin into 1½-2 inch pieces. Place them into a medium-sized bowl and set aside.

2. Peel, remove tails, and devein the shrimp. Then set into a separate medium bowl and place in refrigerator until ready to use.

beef#3a.jpg

3. Rub: In a small dry skillet over low heat, add the black pepper corns, coriander, and cumin seeds. Toast until fragrant. Place in a spice grinder, or mortar and pestle, and grind until fine.

beef#4.jpg

4. Place the ground spices in a small bowl. Add the garlic, chili powder, salt, mustard, and paprika. Mix until combined.

5. Set aside 3T of the spice mixture. Pour the remaining spice mixture over the meat and toss until well coated. Let marinate for at least one hour (but can be marinated and refrigerated up to 8 hours in advance. Just remove from refrigerator an hour before serving)

6. 30 minutes before grilling, remove the shrimp from the refrigerator and toss with the remaining spice mixture. After 30 minutes, pat the shrimp dry with a paper towel and thread onto skewers.

7. Preheat your BBQ grill.

8. Place the meat on a cutting board and pat dry with paper towels. Then thread onto the skewers, making sure not to overcrowd the meat on the skewers.

beef#9.jpg

9. When the grill is hot, place the meat kebobs on the grill over medium heat for 3-4 minutes a side for medium rare. Remove from heat and place on a platter.

10. Place the shrimp on the grill. Grill until pink, about 3-4 minutes a side. Then place on platter.

11. Remove the meat and shrimp from the skewer and serve with sauce immediately.

SAUCE PREP:

sauce:ingrd.jpg

Ingredients

2 large ripe avocado, peeled and pitted
2 tsp. lime zest
3T lime juice
½ cup Greek yogurt
1 cup Persian or English cucumber cut into ½” cubes
1 shallot, finely chopped
1/2 cup fresh dill, finely chopped
4-5 dashes hot sauce (to taste)
Salt & pepper

1. In the bowl of a food processor, place the avocados and pulse on and off until mixture is smooth. Add juice, yogurt, and pulse until smooth.

sauce#2.jpg

2. Add the cucumber, shallot, the lime zest, and dill. Pulse until combined, but still has some texture. If the sauce is a little too thick add ¼-½ cup of water until you reach the desired consistency.

sauce#3jpg.jpg

3. Season with salt and pepper. Add a few dashes of hot sauce if desired.

sauce#4.jpg

4. Place in a bowl and serve with beef and shrimp kebobs.

TIPS & TRICKS

• I love this rub. I make a double or triple batch and the store it in my fridge to be used for other dishes. It is fantastic on chicken, lamb, or other beef & shrimp recipes.

• The top sirloin can be marinated for up to 8 hours. You don’t want to go much longer because the salt begins to change the texture of the meat.

• You can also leave the sirloin whole instead of cutting in to cubes.

• Some secrets to grilling: Pre heat your grill. Place you meat down on the hot grill and don’t touch it. The meat will release from the hot grill when it is ready to turn. After cooking the meat, always allow it to sit a few moments on a platter to rest before cutting and serving.

• The shrimp will turn pink as they start to cook. Turn them over and cook for another 3-4 minutes. The time will vary depending how cool your grill is (it will be cooler after cooking the meat compared to if you put the shrimp on first).

• The shrimp and sauce make a fantastic appetizer.

• Sauce can be made 2 days in advance.

DOWNLOAD SHRIMP & BEEF KABOBS RECIPE
In May 2019 Class Tags Spring, Main, Top Sirloin, Shrimp, Peppercorns, Coriander seeds, Cumin Seeds, paprika, Avocado, Shallot, Greek Yogurt, English Cucumber, Dill, Hot Sauce, Cholula, Tabasco
Comment

Couscous with Apricots & Pine Nuts

May 22, 2019 Nancy Madok
couscous:cover.jpg

Ingredients

3 cups couscous
4½ cups boiling water
½ cup golden raisins
1 cup apricots, cut into bite-size pieces
½ cup pine nuts toasted
*2T chopped flat parsley
Salt & pepper

couscous#1a.jpg

1. In a large 9x11 baking dish, spread out the couscous into a thin layer. Pour the boiling water on top. Cover with plastic wrap and let sit for 15 minutes.

couscous#2.jpg

2. Meanwhile, in a small bowl, add the raisins, apricots, pine nuts, and parsley. Toss together.

3. Remove the plastic wrap. Fluff the couscous with a fork, and then gently stir in the raisin mixture. Season with salt & pepper.

4. Serve warm or cold.

TIPS & TRICKS

• To roast nuts: preheat oven 350º F. Place the nuts on a baking sheet and bake for 3-5 minutes. Watch carefully, they burn very quickly! Once cooled, the roasted nuts can be stored in an airtight container for several weeks.

• There are so many combinations of dried fruits and nuts to add to create multiple spins on this dish. I love adding figs, dates, currents, almonds, and hazelnuts, too.

• You can add a drizzle of olive oil to add a yummy richness to the dish.

• It’s a great way to “clean out” the fridge. Use all of your left over bits of veggies, meats, and cheese and add them to the cooked couscous.

• It’s also fantastic as a salad. Just toss it with a nice vinaigrette!

DOWNLOAD COUSCOUS WITH APRICOTS RECIPE
In May 2019 Class Tags Spring, Couscous, appetizer, side, Golden Raisins, Pine Nuts, Parsley
Comment

Strawberry Semifreddo

May 22, 2019 Nancy Madok
freddo:cover.jpg
freddo:ing.jpg

Ingredients

Berries:
2 cup strawberries, washed, hulled & cut in half
3T granulated sugar

Cream:
1cup heavy whipping cream
1tsp. vanilla

Zabaglione:
4 egg yolks, room temperature
4T granulated sugar

Meringue:
4 egg whites, room temperature
pinch of salt
¼ tsp. cream of tartar
¾ cup granulated sugar
½ cup water
1 bar semisweet chocolate

1. Line a 9x5-inch loaf pan with a 12x20-inch piece of plastic wrap; the wrap should hang over the long edges by 4 inches, and it will not completely cover the short ends. Press the plastic into the corners. Set aside.

2. Berries: Place the berries and sugar into the bowl of the food processor and process until puréed. Strain the purée though a medium strainer into a small bowl, set aside.

3. Cream: In a mixing bowl with a whisk attachment beat the heavy whipping cream over high speed until the cream forms stiff peaks, about 4-6 minutes. Gently fold in the vanilla. Place back in the refrigerator.

4. Zabaglione: Place a medium saucepan filled with about 2 inches of water on the stove and brings to a boil. In a heat resistant medium-size bowl, beat the egg yolks and 4 tablespoons of sugar with a whisk or hand mixer until combined.

5. Place this bowl on top of the water-filled saucepan, turn the heat to medium (water should not touch the bottom of the bowl). Beat continuously until mixture is thick, pale yellow, and the batter should make ribbons as it falls off beater/whisk, about 5 minutes. (You may need to remove the bowl occasionally from the heat to prevent the eggs from scrambling).

freddo#6.jpg

6. Remove the zabaglione from heat and gently fold in the strawberry purée. Set aside.

freddo#7.jpg

7. Meringue: In a clean mixing bowl with the whisk attachment, slowly beat the egg whites until foamy, about a minute, then add the salt and cream of tartar; increase the speed slightly and beat until soft peaks are formed, about 3-4 minutes. Turn off the mixer.

8. In a small saucepan with a lid, over medium-high heat, add the granulated sugar and water. Bring the mixture to a boil, swirling the pan until the sugar is dissolved. Do not stir! Cover with the lid and boil to the thread stage*, about 5 minutes, to make a sugar syrup.

Freddo#9a.jpg

9. Turn the mixer back on low and slowly add the sugar syrup. Once the syrup is incorporated, increase the speed to high and beat until the mixture is cool and shiny, stiff peaks are formed.

freddo#10.jpg

10. Using a large spatula, gentle fold in ¼ of the meringue into the zabaglione. When almost completely incorporated add the remaining meringue, continue folding the mixture until fully incorporated. Fold in the whipped cream.

11. Place the mixture into the prepared loaf pan, smooth out the top with an off set spatula: cover the top with the plastic wrap and place in freezer for 8 hours.

12. To serve, unwrap the loaf and invert the loaf pan on to a platter. Pull down slightly on the plastic wrap as you lift the loaf pan. Remove the plastic wrap. If there are wrinkles, dip a knife or offset spatula into a little warm water and run over the surface to smooth out any wrinkles

freddo#13.jpg

13. Garnish with chocolate curls.

14. Cut into slices and serve immediately.

TIPS & TRICKS

• *We are cooking the sugar and water together to make sugar syrup. To test if your syrup has cooked it enough, take a small amount of the syrup and drop it into a cup of cold-water. Little threads should appear. Of if you have a candy temperature cook until 230°

• Carefully add the sugar to you egg whites, trying not to hit the beaters as you add the hot syrup.

• You can test the temperature of the meringue by placing your hand on the bottom of the mixing bowl. When it is cool to the touch, the meringue is ready.

• This is called an Italian meringue. It also makes a fantastic icing for cakes & cup cakes.

• The semifreddo can be made several days in advance. Store in your freezer until ready to serve.

• Use the freshest sweetest strawberries, or you can substitute frozen. You can also make the with raspberries or a combo of berries.

• To make chocolate curls, place bar of chocolate in microwave for just a few seconds. Then using a potato peeler make the curls. You can make them ahead and top semifreddo before serving

DOWNLOAD STRAWBERRY SEMIFREDDO RECIPE
In May 2019 Class Tags Spring, Dessert, Strawberries, Whipping Cream, egg whites, cream of tartar, Egg yolks
Comment

Herb Crusted Leg of Lamb, Mint Salsa Verde

April 15, 2019 Nancy Madok
lamb:cover.jpg
lamb:salsa: ingrd.jpg

Ingredients

Lamb:
10 cloves of garlic, peeled
½ packed cup mint leaves
4T fresh thyme leaves
1 packed cup parsley Italian leaves
1 T lemon zest
5 T Olive oil
1 4-5 pound leg of lamb
salt and pepper

Mint Salsa Verde:
2 clove garlic, peeled
1 cup fresh mint leaves, packed
1 cup fresh Italian parsley leaves, packed
1 shallot, finely diced
2 T capers, rinsed
1 T lemon zest
¼ cup lemon juice
2/3 cup olive oil
salt & pepper

1. In bowl of the food processor, with the motor running, add the garlic and process until chopped. Add the herbs, parsley, lemon zest, and process into a smooth paste. Scrape down the sides of the bowl. Add the olive oil; pulse until combined.

2. Remove the meat from the netting; wash and pat dry. Place the leg of lamb on a cutting board, using a boning knife to “butterfly” the thickest part of the leg areas so that the overall thickness of the meat is the same. If necessary, trim any large pieces of fat off the leg.

lamb3.jpg
lamb3c.jpg
lamb3d.jpg

3. Place on a baking sheet. Spread the herb mixture all over both sides of the leg of lamb. Roll the lamb up into a roll. Using butcher twine, secure the roll. Refrigerate for 8 hours or over night.

4. Pre-heat oven to 450° F.
5. Remove the lamb from the refrigerator 1 hour before cooking and let rest at room temperature.

lamb6.jpg

6. Transfer the leg of lamb to a rack in a roasting pan. Sprinkle with the salt and pepper. Add enough water to cover the bottom of pan (2-4 cups) and place in a 450° F oven. Close the oven door and immediately lower the oven temperature to 350° F. Roast for 1 hour and 10 minutes (20 minutes a pound) until the meat reaches 130-135° F in the center for medium rare. Check the temperature at 1 hour and every fifteen minutes thereafter until the desired temperature is reached.

7. Remove the lamb from the pan, place onto a platter, and cover with foil. Let rest for at least 15 minutes. Pour the pan drippings into fat separator. Once separated, pour into a small saucepan and reheat.

lamb8.jpg

8. Slice the lamb, place it on a platter, and serve with mint salsa verde

Tips & Tricks

• Rub the marinade all over the lamb and let it sit uncovered in your fridge over night is best for maximum added flavor.

• I feel lamb has gotten a bad rap a lot of people think that is gamey tasting meat. It’s not, the meat has a delicious mild flavored. If there were any hint of gamey taste it would be in the fat. So remove any large pieces from the center of the meat, but leave a fat cap on the outside of the roast to keep it moist as it cooks. Lamb is high in iron, zinc & vitamin B12.

• Since the size of the boneless legs of lamb vary from low 4 to high 5 pounds a leg. I recommend you cook it 20 minutes a pound, checking the meat at a hour to insure that it is not overcooked.

• Left over lamb, is fantastic in sandwiches. Try it in a pita with tzatziki sauce

Mint Salsa Verde
Makes 2 cups

Preparation:

1. In bowl of a food processor, with the motor running, add the garlic, mint, and parsley leaves. Process until finely chopped, but still has texture.

2. Add the shallots, capers, lemon zest, and juice. Pulse until chopped and combined. Scrape down the sides of the bowl.

3. With machine running, slowly add the olive oil. Mix until smooth.

4. Season with salt & pepper

Tips & Tricks

• I make this sauce right after I make the marinade for the lamb, so I don’t have to wash the food processor twice.

• It can be made 3 days in advance and last a week in your fridge.

• It is wonderful on rack of lamb or on grilled or sautéed fish.

• Replace the mint with oregano and thyme and the sauce is wonderful on other grilled meats.

DOWNLOAD LEG OF LAMB MINT SALSA RECIPE
In April 2019 Tags Main, lamb, mint, salsa, Spring, Garlic, thyme, parsley, lemon zest, Shallots
Comment

Yukon Gold Potato Gratin

April 15, 2019 Nancy Madok
potato:cover.jpg.jpg

Ingredients

1 ½ cup milk
1 cup heavy cream
2 cloves garlic, crushed
4 sprigs fresh thyme
1 cup dried breadcrumb, or panko
½ cup grated Parmigiano - Reggiano cheese
salt & pepper
2 pounds Yukon Gold potatoes

1. Preheat oven to 425° F.

2. In a saucepan with a lid over medium-high heat, heat the milk, cream, garlic, and thyme until it comes to a boil. Turn off the heat. Cover and steep for 15 minutes. Strain and season with salt and pepper. Set aside.

3. In a small bowl, combine the breadcrumbs and cheese. Set aside.

4. Wash and slice the potatoes into 1/8 –inch slices Place in a large bowl, toss the potatoes with salt and pepper. Place them in an 8-x10 oven proof-baking dish, layering and over-lapping the slices as you go.

potato#5a.jpg

5. Pour the milk mixture on top, then sprinkle the breadcrumb topping on top.

6. Bake in a 425° F oven for 45-55 minutes, until bubbly and brown.

potato7.jpg

7. Remove from oven and allow to cool 10-15 minutes before serving.

Tips & Tricks

• This dish is best cooked then served, but you can prepare all the steps ahead then assemble it at the last moment. You can steep and strain the milk/cream mixture (just rewarm in before adding to potatoes). Prepare the breadcrumb topping ahead and slice the potatoes ahead, just cover them in water to keep them from turning brown, drain and pat very well before assembling dish.

• I love using Yukon gold potatoes because the texture is so creamy and buttery. T. hey also hold their shape very well after being cooked. But you could substitute and use Idaho potatoes. Their texture is fluffier.

• Potatoes need to sit 10-15 minutes after cooking so that the cream mixture will set. They keep warm for up to 30 minutes after cooking, but if you need to reheat cover with foil and pop in oven for just a few minutes, otherwise they will dry out

Download Yukon gold potato gratin
In April 2019 Tags side, main, Spring, garlic, Gold Potatoes, Heavy Whipping Cream, thyme, Panko Crumbs, Parmigiano-Reggiano cheese
Comment

Carrot Cake With Honey Cream Cheese Icing

April 15, 2019 Nancy Madok
cake:cover.jpg

Ingredients

Cake:
1 T Butter, soften
2 T flour
3 cups all purpose flour
1½ tsp. baking soda
2 tsp. cinnamon
½ tsp. salt
2 cups grated carrots
1 cup chopped pecans, toasted*
1 ½ cups granulated sugar
3 eggs
¾ cups vegetable oil
1 cup can crush pineapple w/ juice
¾ cup Greek nonfat yogurt
2 tsp. vanilla

Frosting:
2 8 oz. packages cream cheese, softened
1 stick butter, softened
1 T orange zest
¾ honey
½ cup confectioners’ sugar
¼ cup chopped pecans

1. Pre-heat the oven to 350º F.

2. Butter and flour two 9-inch round cake pans. Line the bottom with parchment paper and set aside.

3. In a medium bowl, sift the flour, baking soda, cinnamon, and salt together, add the carrots and nuts and toss until well coated with the flour mixture. Set aside.

4. In a mixer set on medium speed, mix together the sugar and the eggs until well combined. Add the oil, pineapple, yogurt, and vanilla. Mix well, scrape down the side of the bowl.

5. With the mixer on low, add carrot nut ingredients. Mix just until combined.

6. Pour batter into the prepared pans and bake at 350º F for 35-40 minutes or until toothpick comes out clean.

7. Place cake pans onto a cooling rack and allow to cool for 10 minutes before unmolding. Allow to completely cool before frosting.

8. Frosting: In a medium bowl, cream together the cream cheese, butter, and honey until creamy and smooth, about 3 minutes. Add in the sugar and orange zest. Beat until smooth.

9. Place one layer of completely cooled cake on the platter. ( if you wish use a cake cutter to remove/cut off the cake edges) Spread ½ the frosting on top. Place the remaining cake on top and frost with remaining frosting.

10. Decorate with chopped nuts. Serve and enjoy.

*To roast nuts: preheat oven 350º F. Place nuts on a baking sheet and bake for 5 minutes. Shake the pan and continue baking until nuts are toasted, about 3-5 minutes more. Let them cool. The roasted nuts can be stored in an airtight container for weeks.

Tips & Tricks

• The cake can be made the day ahead and placed in zip lock gallon bags or covered very well.

• You may frost the cake in advance, just place in fridge, and remove 1 hour before serving so the frosting can soften slightly.

• You may cook this cake in a 9x11 square pan or as cup cakes (check the cupcakes after baking 20 mins.)

Download Carrot Cake Recipe
In April 2019 Tags Dessert, Spring, Carrot, cream cheese, honey, Greek Yogurt, Pecans
Comment

Creamy Polenta

March 31, 2019 Nancy Madok
polenta:cover.jpg
polenta:ingred.jpg

Ingredients

2T butter
8 cups water
2 tsp. salt
2 cups medium-ground corn meal
½ cup grated Parmigiano-Reggiano cheese

1.        Preheat oven to 350º F.

2.        Prepare a large (10x12 inch) baking dish by coating the pan with butter.

polenta3.jpg

3.       In a saucepan, bring the water to a boil, add the salt, and slowly add the corn meal, whisking until smooth and combined.

polenta4.jpg

4.        Reduce the heat to a simmer and continue stirring until the mixture becomes thick, about 10 minutes.

5.        Remove the pan from the heat and stir in the cheese, mixing well. Pour the polenta into the buttered pan.

polenta6.jpg

6.        Place into the oven, and bake for 25-30 minutes, stirring every 10-15 minutes until the polenta is soft.

7.        Remove from oven. Season with salt and pepper if needed, and then cover with foil to keep warm until ready to serve.

8.        To serve, spread the polenta on a platter or dinner plate and top with chicken and sauce.

TIPS & TRICKS

•     You can use any medium coarse ground corn meal for this recipe.

•     To grate the Parmigiano -Reggiano by hand is best. However, you can, and I do, use a food processor. Allow the cheese to sit on your counter for an hour to become slightly soft. Cut it into 2 inch pieces. With the motor running, add some of the cheese pieces. Work in small batches so the cheese can be ground before the motor has a chance to heat the cheese and change the consistency. Store extra cheese in a glass or plastic container in your fridge.

CLICK HERE FOR CHICKEN RECIPE
DOWNLOAD CREAMY POLENTA RECIPE
In March 2019 Class Tags Main, Polenta, Spring, Parmigiano-Reggiano cheese
Comment

Chicken with Artichokes & Mushrooms

March 31, 2019 Nancy Madok
chix:cover.jpg

Ingredients

½ cup olive oil
salt and black pepper
8-10 chicken thighs, bone in
2 medium onions, finely diced
1 pound mushrooms, washed and finely sliced
3 cloves garlic, crushed
16 oz. frozen artichoke hearts, defrosted
4-5 sprigs fresh thyme
1 cup white wine
2 cups chicken stock
2T parsley finely chopped

1. Preheat oven to 325º F.

2. Place a 6-quart Dutch oven with a lid on the stove. Turn heat to medium-high heat. Add ¼ cup of olive oil and heat.

chix3.jpg

3. Using a paper towel, pat dry the chicken. Season chicken pieces with salt and pepper.

4. Place the seasoned thighs into pan; do not overcrowd the pan. Brown both sides of the chicken, about 3 minutes a side. Once they are browned, remove from the pan. Set on platter and set aside. If necessary, add the remaining ¼ cup olive oil. Repeat with remaining thighs. Pour off all fat except for 2T.

5. Turn heat to medium. Add the onions, and cook until slightly soft, about 4-6 minutes. Add the mushroom and cook another 4-5 minutes.

6. Add the wine and scrape the bottom of the pan to remove all the brown bits. Add the stock and bring to a boil.

7. Place the chicken back into the pot, pushing the thighs down to submerge them in the sauce. Add the garlic, artichokes and thyme.

8. Cover with lid and place in a 325º F oven. Cook the chicken until the meat is tender enough to cut with a fork and easily comes away from the bone, about 45-55 minutes.

chix9.jpg

9. Remove the chicken and vegetables from the sauce and place on a platter. Discard the thyme and strain the sauce into a fat separator.

10. Pour the defatted sauce back into the pan to reheat and reduce slightly. Season with salt and pepper. Add the chicken and vegetable back into the sauce to reheat.

chix11.jpg

11. Serve the chicken and sauce over polenta. Top with chopped parsley.

Tips & Tricks:

• Cooking with meat on the bone is ideal for several reasons: It insulates and protects the meat from drying out and also adds loads of flavor.

• I use a clean pair of scissors to trim off any extra large pieces of skin/fat on the thighs before browning.

• To achieve a beautiful browned chicken thigh, make sure to pat them dry, season right before placing in pan and don’t overcrowd the pan. This way they brown rather than steam.

• This dish can be made in advance and reheated just before serving either on the stovetop or in oven.

• The flavor in this dish improves as it ages; feel free to make it a day or 2 before serving. It is a great crowd pleaser and easy to double.

• I like to use frozen artichokes instead of canned. They taste fresher to me. If you don’t have time to defrost them, its ok just put them directly in the pot.

DOWNLOAD CHICKEN W/ ARTICHOKES & MUSHROOM RECIPE
In March 2019 Class Tags Main, Artichokes, Mushrooms, Chicken, Spring, Thyme
Comment

Olive Oil Orange Cake

March 31, 2019 Nancy Madok
cake:cover.jpg
cake:ingred.jpg

Ingredients

1T butter, room temperature

1T all-purpose flour

3 eggs

1 cup sugar

3 cups all-purpose flour

1T baking powder

1T orange zest

3T orange juice

¾ cup good quality olive oil

2/3 cup milk

Confectioner’s sugar for dusting

4 oranges, peeled, sliced into ½ moons

2T granulated sugar

4T Cointreau or Grand Marnier

1. Preheat oven to 325º F. Using the 1T butter and 1T flour, grease and flour the bottom and sides of a10-inch angel food or Bundt cake pan.

cake 1.jpg
cake 2.jpg
cake 2a.jpg
cake 2b.jpg

2. In a mixing bowl, beat the eggs and sugar on medium-high speed for 1-2 minutes, until light in color.

cake 3.jpg

3. With the mixer on low, add the flour, baking powder, orange zest, juice, olive oil and milk; mix just until combined. Do not over mix! Use a spatula to finish combining, if needed. (Mixture will look lumpy similar to muffin batter)

cake 4.jpg

4. Pour the batter into the prepared pan, smooth the top. Bake for 40-50 minutes or until toothpick inserted in the middle comes out clean. Cool for 15 minutes, and then turn onto cooling rack to cool completely

5. When completely cool, dust with confectioner’s sugar.

6. In a small bowl, toss the orange slices, sugar and liqueur let sit for 10 minutes. Serve with cake.

cake 6a.jpg

Tips & Tricks:

• I love this cake because it’s so versatile. It’s just sweet enough to end a meal, but perfect to start your day with or as a pick-me-up with a cup of tea in the afternoon. Top it with macerated fruit. I used blood oranges, but you could use regular oranges, tangerines, or substitute the oranges and use berries (about 2 cups). You can add a dollop of whipped cream, ice cream or yogurt to make it extra special.

• You can substitute the orange zest and juice for lemons, especially Meyer lemons are great in this cake.

• Use an olive oil that has a nice fruity flavor. I prefer Italian or boutique olive oil from Napa or Temecula Calf are lovely, some are infused with citrus and add a nice additional citrus punch.

DOWNLOAD OLIVE OIL ORANGE CAKE
In March 2019 Class Tags Dessert, Powdered Sugar, Olive Oil, Grand Marnier, Cointreau, Oranges, Spring
Comment

Orange & Pistachio Semifreddo

April 15, 2018 Nancy Madok
semicover.jpg

Ingredients

1 cup heavy whipping cream
1 tsp. vanilla 

4 egg yolks, room temperature
4T granulated sugar

¼ cup Cointreau
1T orange zest
½ cup plus 1 tablespoon shelled pistachios, medium chop/dice

4 egg whites, room temperature
pinch of salt
¼ tsp. cream of tartar

¾ cup granulated sugar
½ cup water

semi1.jpg

1.    Line a 9x5-inch loaf pan with a 12x20-inch piece of plastic wrap; the wrap should hang over the long edges by 4 inches, and it will not completely cover the short ends. Press the plastic into the corners. Set aside.

semi2.jpg
semi2a.jpg

2.    Cream: Place the bowl and beaters of your mixer in the refrigerator for 15 minutes to chill. Then, beat the heavy whipping cream on high speed until the cream forms stiff peaks, about 4-6 minutes. Gently fold in the vanilla. Place back in the refrigerator. 

3.    Zabaglione: Place a medium saucepan filled with about 2 inches of water on the stove and bring to a boil. In a heat resistant medium-size bowl, beat the egg yolks and 4 tablespoons of sugar with a whisk or hand mixer until combined.

semi4a.jpg

4.    Place this bowl on top of the water-filled saucepan and turn the heat to medium (water should not touch the bottom of the bowl). Beat continuously until mixture is thick and pale yellow. The batter should make ribbons as it falls off the beater/whisk, about 5 minutes. (You may need to remove the bowl occasionally from the heat to prevent the eggs from scrambling.)

semi5.jpg

5.    Remove from heat and gently fold in the Cointreau, orange zest, and the ½ cup of pistachios. Set aside.

semi6a.jpg

6.    Meringue: In a clean mixing bowl with the beater, slowly beat the egg whites until foamy, about a minute. Then add the salt and cream of tartar. Increase the speed slightly and beat until soft peaks are formed, about 3-4 minutes. Turn off the mixer.

7.    In a small saucepan with a lid, over medium-high heat, add the granulated sugar and water.  Bring the mixture to a boil, swirling the pan until the sugar is dissolved. Do not stir!  Cover with the lid and boil to the thread stage*, about 5 minutes, to make sugar syrup.

semi8a.jpg

8.    Turn the mixer back on to low and slowly add the sugar syrup. Once the syrup is incorporated, increase the speed to high and beat until the mixture is cool and shiny, stiff peaks are formed.

semi9a.jpg

9.    Using a large spatula, gently fold in ¼ of the meringue into the zabaglione. When almost completely incorporated, add the remaining meringue. Continue folding the mixture until fully incorporated.

semi10.jpg

10.    Fold in the whipped cream.

semi11.jpg
semi11a.jpg

11.    Place the mixture into the prepared loaf pan and smooth out the top with an off set spatula. Cover the top with the plastic wrap and place in freezer for 8 hours.

semi12.jpg
semi12a.jpg
semi12b.jpg

12.    To serve, unwrap the loaf and invert the loaf pan on to a platter. Pull down slightly on the plastic wrap as you lift the loaf pan. Remove the plastic wrap. If there are wrinkles, dip a knife or offset spatula into a little warm water and run over the surface to smooth them.

13.    Garnish with the tablespoon of pistachios. Cut into slices and serve immediately.

TIPS & TRICKS

•    *We are cooking the sugar and water together to make a sugar syrup. To test if your syrup has cooked enough, take a small amount of the syrup and drop it into a cup of cold-water. Little threads should appear. 
•    Carefully add the sugar to your egg whites, trying not to hit the beater as you add the hot syrup. 
•    You can test the temperature of the meringue by placing your hand on the bottom of the mixing bowl. When it is cool to the touch, the meringue is ready.
•    This is called an Italian meringue. It also makes a fantastic icing for cakes & cupcakes.
•    This semifreddo can be made several days in advance. Store in your freezer until ready to serve. 


In April 2018 Class Tags Spring, Orange, Pistachio, Semifreddo, Dessert, Cointreau, Egg Whites
Comment

Bellini Cocktail

March 25, 2018 Nancy Madok

Ingredients

½ cup water
½ cup granulated sugar
1 16 oz. bag frozen peaches, defrosted
1 bottle prosecco or sparking wine , chilled

1.    In a small saucepan over medium heat, add the water and sugar. Stir until sugar is completely dissolved. Remove from heat and cool. Chill until ready to use.

2.    In your food processor or blender, blend the peaches and ¼ cup sugar syrup. Blend until smooth.

3.    Pass the pureed peaches though a strainer. If not sweet enough add more of the sugar syrup. Chill the puree until ready to serve

4.    Pour 1 or 2 tablespoons of peach puree into a champagne flute. Tilt the glass and slowly add sparking wine. 

5.    Stir and serve immediately.

TIPS & TRICKS

•    I make the simple sugar syrup and peach puree ahead of time and store them in glass jars for easy serving.
•    Traditionally, this cocktail is made with Prosecco, which I feel can tend to be on the sweeter side. I used a very good quality sparkling wine that was a little more brut, or dry. I thought that the brut flavor profile paired very nicely with the meal. 
•    This cocktail can also be made in a pitcher for easy serving


In March 2018 Class Tags Cocktail, Bellini, Peaches, Prosecco, Spring
Comment

Asparagus, Artichokes, & Hazelnuts

March 25, 2018 Nancy Madok
aspara.cover.jpg

Ingredients

1T Dijon mustard
3T red wine vinegar
¼ cup olive oil

2 bunches (2pounds) asparagus, ends trimmed off
1 12-oz bag frozen artichokes heart, thawed
¼ cup lightly chopped toasted hazelnuts
salt & pepper

1.    In a small bowl, whisk the mustard and vinegar until combined.

2.    Slowly add the olive oil drop by drop until it starts to emulsify. Once the sauce has thickened, you can increase adding the olive oil. Season with salt and pepper. Set aside.


3.    In large sauté pan with a lid over medium heat, add the asparagus and artichokes. Cover with ½ cup of water. Place the lid on and cook for 4-7 minutes until the vegetable are cooked, but still have a crunch to them.

4.    Remove from the heat, drain off the water. Return to the pan toss with the dressing. Season with salt and pepper.

5.     Place on a platter. Sprinkle on chopped hazelnuts.

aspara6.jpg

6.    Serve immediately with a sprinkle of fleur de sel.

TIPS & TRICKS

•    You can use other vinegars: champagne, apple cider or lemon juice.
•    I like to use medium-size asparagus (similar is size to a pen), but you can use pencil thin or thicker, if you prefer. Cooking time will vary.
•    You may serve this dish cold, like a salad, or warm. Just toss with the dressing at the last moment since the vinaigrette will change the color of the vegetables. 

In March 2018 Class Tags appetizer, starter, Asparagus, Artichokes, Hazelnuts, Spring
Comment

Torta Pasqualina

March 25, 2018 Nancy Madok
torta:cover.jpg

Ingredients

2 leeks
2 bunches Swiss chard
3T olive oil
1 medium onion, finely diced
3 cloves garlic, crushed
4 cups spinach
1 pound ricotta
½ cup grated Pecorino Romano cheese
¼ tsp. nutmeg
½ tsp. salt
black pepper
2 sheets puff pastry, defrosted
6 eggs

1.    Preheat oven to 350° F.

torta2a.jpg

2.    Using only the white and light green part, cut the leeks in half. Place under running water to rinse off any grit/dirt. Then, chop into medium dices. Place is small bowl set aside


3.    Wash the Swiss chard, remove the stems from the leaves, and chop into a fine dice; adds to leeks.


IMG_5454.jpg
IMG_5457.jpg

4.    Remove any large veins from the leaves and chop into bite-size pieces, set aside.

5.    In a large sauté pan with a lid over medium heat, add the olive oil; when warm add the onion, leeks and Swiss chard stems. Sauté 2-3 minutes.

6.    Add the garlic and continue cooking another 2-3 minutes. Add the spinach and Swiss chard leaves; cover with the lid.  Cook until all the greens are wilted, about 4-5 minutes. Remove from heat.


7.    Line a colander with a clean dishtowel. Dump the cooked greens into the colander and let cool.  Close the towel around the greens, and then squeeze out all the liquid.  The mixture should be very dry.


8.    In a medium bowl, combine the ricotta, Pecorino-Romano cheeses, nutmeg, salt, and 5 twists of pepper. Mix until well blended. 

9.    Add in the greens; mix until combined, set aside.


torta10.jpg

10.    Unroll one sheet of the puff pastry on a floured flat surface. Roll out into a 14x14-inch.


torta11.jpg

11.    Place the sheet in a 10-inch spring form pan, covering the bottom of the pans and the side of the pan. There will be extra dough hanging over the edges.


12.    Place the cheese-chard mixture inside the pastry-lined pan. Smooth out until it is even.


13.    With a spoon, make 5 egg size holes in the mixture. Crack an egg into each hole.


14.    Roll out the second sheet of puff pastry into an 11-inch. Place on top of the torta, pressing the pastry down on top of the filling.


15.    Press the top pastry into the sides and to top edges of the pan. Trim off any excess pastry. You can use this excess for little pastry decorations for the top or discard.

16.    Fold over the edges to making a little seal, pressing down to secure the top and bottom pastries together.


torta17.jpg

17.    Whisk together the remaining egg; brush the top of the torta.


torta18.jpg

18.    Bake for 40-45 minutes until is it lightly brown and the center is hot.
19.    Cool for 25-30 minutes before serving.


20.    Cut into slices and serve warm or room temperature. 


TIPS & TRICKS

•    You can use any color of Swiss chard. They all taste the same. I prefer the golden or green, as it blends in with the filling. 
•    You can use any puff pastry you like. Some brand’s sheets are round, other are square. What’s important is that you roll it out 14x14-inches so that it covers the bottom and sides of the pan. Also so that the top pastry covers the top and seals nicely.
•    This torta makes the most fantastic addition to breakfast or lunch. It’s a great snack and picnic food.
•    You can add cooked bacon, sausages or chopped ham to the filling 

In March 2018 Class Tags Main, Torta, Swiss Chard, Ricotta, Spinach, Egg, Puff Pastry, Spring
Comment

Very Berry Crumble Coffee Cake

March 25, 2018 Nancy Madok
cakecover.jpg

Ingredients

Crumble:
¾ cups brown sugar
½ cup all-purpose flour
¼ tsp. salt
¾ cups almonds, pecans or walnuts, rough chopped
3T unsalted butter, room temperature 

Cake:
½ tsp. salt
½ tsp. baking soda
2 tsp. baking powder
2½ cups cake flour
1½ stick unsalted butter, room temperature
1½ cups granulated sugar
3 eggs
2 tsp. vanilla
1¼ cup unflavored Greek yogurt
3 cups berries (strawberries, blackberries blue berries or raspberries), 
 fresh washed and hulled or frozen thawed

1.    Preheat oven to 350° F.

2.    Crumble: using your fingers or a spoon and in a small bowl, mix the brown sugar, all-purpose flour, salt, nuts and butter until it comes together into a crumbly mixture.


cake3.jpg

3.    Cake: in another small bowl, sift the, salt, baking powder, baking soda and cake flour. Set aside.


4.    In a bowl of your mixer, with the paddle over medium-high speed, cream together the butter and sugar until light and fluffy, about 3-4 minutes. Scrape the side of the bowl.


cake5a.jpg

5.    Lower the mixer speed to medium and add the eggs one at a time. Scrape the sides of the bowl after each egg.


6.    Add in the vanilla and yogurt and mix until incorporated.


7.    Slowly add the flour mixture mix until combined. Batter will be very dense.


8.    Spoon half the batter into a 9x13-inch baking pan and spread it out evenly. 


9.    Sprinkle the berries all over the batter.


10.    Then, sprinkle half the crumble over the berries

11.    Then top with remaining batter, carefully spreading the batter over the berries to cover it. Top with remaining crumble topping.


12.    Bake at 350° F for 45-50 minutes, or until golden brown.

13.    Cool the cake for 20 minutes. Cut into squares and serve warm or room temperature.


TIPS & TRICKS

•    I prefer to use frozen berries when fresh berries aren’t in season or     don’t look that good.
•    You can also prepare this cake in an angel food pan for a totally different look. Follow the above instruction, except increase the baking time to 50-55 minutes.


In March 2018 Class Tags Dessert, Crumble, Coffee Cake, Berries, Spring
Comment

Risotto with Mint, Peas & Pecorino Romano Cheese

April 3, 2017 Nancy Madok

Ingredients

4T olive oil
   1 medium yellow onion, finely diced
   1 leek, finely diced
   2 clove garlic, crushed
   ½ cup white wine
   14 ounces Arborio rice (2 cups)
   7 cups chicken or vegetable stock, heated
   1 cup fresh or frozen petite peas
   ½ cup grated Pecorino Romano cheese(more for serving)
   2 tsp. chopped mint
   1 tsp. lemon zest
   2T chopped flat parsley
   salt & pepper


1.    In a large sauté pan, over medium heat, add the olive oil; when warm add the onion and leek and sauté 3-4 minutes until they start to soften.  Add the garlic and sauté gently for 1 minute more.  Add the wine and continue stirring until the wine has almost disappeared.


2.    Add the rice and sauté 1 minute, stirring constantly. 

3.    While stirring, add one ladle of stock.  


4.    When the stock has disappeared, ( and you can draw a line in the rice) add another ladle of stock. 

5.    Continue adding stock one ladle at a time until the rice is cooked; about 20 minutes (you may not need all the stock). 

risotto7.jpg

6.    Add the peas and stir until well incorporated into the rice.

7.    Remove from the heat and, add the cheese, mint, lemon zest, and parsley.

risotto9.jpg

8.    Season with salt and pepper.  Serve immediately with extra cheese


Tips & Tricks

•    When washing the leeks cut it in half. Place the root end under running water (Like your giving the leek a shower) Carefully separate each layer letting the water pass though and remove any dirt and sand
•    For the freshest cheese buy a wedge. Cut into small cubes and grate it in your food processor or blender. Then store it in a glass jar in the refrigerator.
•    You can substitute the peas and mint for sautéed mushrooms & thyme for a totally different dish.


Featured
Risotto with Mint, Peas & Pecorino Romano Cheese
rack cover.jpg
Rack of Lamb with Mint Chimichurri Sauce
Blood Orange & Lemon Curd Tart
In April 2017 Class Tags April 2017 Class, appetizer, Risotto, Mint, Peas, Pecorino Romano Cheese, Pasta, Spring
Comment

Rack of Lamb with Mint Chimichurri Sauce

April 2, 2017 Nancy Madok
rack cover.jpg
rack1.jpg

Ingredients

Rub:
4 cloves garlic
2 cups loosely packed parsley leaves
1 cup mint leaves
4 teaspoons grated lemon zest
2T mustard
4T olive oil
4 racks of lamb, about 1½  pounds each
salt & pepper

Sauce:
4 cloves garlic
2 stalks green onion, cut into pieces
1½ cups parley leaves
½ cup mint leaves
1 tsp. lemon zest
½ cup lemon juice
½ cup olive oil
salt & pepper


1.    Preheat the oven to 450º F.

rack2.jpg

2.    Rub: In the bowl of the food processor while running add the garlic, then add the parsley and mint, and pulse until finely chopped.  Add the lemon zest, mustard, and olive oil and pulse until combined.  Set aside.


rack3.jpg

3.    Place the racks of lamb on a rimed baking sheet fat side up, and bones toward the center of the pan.  Sprinkle with salt and pepper.  Rub the lamb with the herb rub mixture from Step 2

4. Place the pan in the center rack of a 450º F oven and roast the lamb for 25 minutes.

rack4.jpg
rack 5.jpg

5. Remove the lamb from the oven and cover loosely with aluminum foil. Let rest for 15 minutes.  Then cut the racks into either single or double chops and serve with sauce.

Sauce:

rack 6.jpg

6. In a bowl of your food processor, while running, add the garlic, green onion, parsley and mint; pulse just until rough chopped.  Add the lemon zest, juice and olive oil.  Pulse just until combined.  Season with salt and pepper.

rack7.jpg

7. Transfer to serving bowl.  Serve with the lamb.


Tips & Tricks

•    Having the food processor running before you add your ingredients gives your food a nice fine chopped appearance.
•    The rub can be made a day ahead.  The herb mixture doesn’t need to cover the whole rack. Keep it on the thick meat part of the rack.
•    Sauce can be used with beef and chicken. Will keep in refrigerator 2-3 days.

Featured
Risotto with Mint, Peas & Pecorino Romano Cheese
rack cover.jpg
Rack of Lamb with Mint Chimichurri Sauce
Blood Orange & Lemon Curd Tart
In April 2017 Class Tags April 2017 Class, Main, Lamb, Mint, Chimichurri Sauce, Spring
Comment
Older Posts →

PRIVACY POLICY 2020

COPYRIGHT 2020 Cucina Casa M