• UnderConstruction
  • Home
  • Seasons
  • Classes
  • Tours
  • About
  • CONTACT
  • Menus
Menu

Cucina Casa M

Street Address
City, State, Zip
Phone Number

Your Custom Text Here

Cucina Casa M

  • UnderConstruction
  • Home
  • Seasons
  • Classes
  • Tours
  • About
  • CONTACT
  • Menus

Shrimp Scampi with Pasta

February 20, 2020 Nancy Madok
shrimp:ingred.jpg

Ingredients

1 pound shrimp, peeled, and deveined
5T butter
2T olive oil
1 shallot, finely diced
5 cloves garlic, finely diced
½ cup white wine
1 tablespoon lemon zest
½ cup lemon juice
1 pound fresh pasta
2T chopped flat parsley
salt & pepper
chili flakes-optional

shrimp#1.jpg

1. With a paper towel pat dry the shrimp and season with salt and pepper.

2. In a large sauté pan, over medium heat, heat 2 tablespoons of the butter. Once melted, add the shrimp and cook until they start to turn pink about 2 minutes (they will be undercooked). Remove from pan place on a plate and set aside.

3. Heat the remaining 3 tablespoons of the butter and olive oil, and then add the shallot and sauté 1 minute. Add the garlic and sauté for 1 minute more. Add the wine and lemon juice and cook for 1-2 minutes.

shrimp#4.jpg

4. Add the shrimp back into the pan and toss in the sauce to finish cooking, about another 2-3 minutes.

shrimp#5.jpg

5. Meanwhile, bring a large pot of water to a boil. Add 1 tablespoon of salt. Add the pasta and cook the pasta until just al dente. Drain and reserve ½ cup of the cooking water. Add the cooked pasta to the pan with the shrimp.

shrimp#6a.jpg

6. Add the lemon zest, and parsley, tossing until well coated, adding a little of the pasta cooking water if needed to thin out the sauce. Season with salt, pepper and chili flakes. Serve immediately.

TIPS & TRICKS

• You can keep the shrimp whole or cut them into pieces, as you prefer. I used 16/20 shrimp, which means that there are 16-20 pieces per pound. I like to use shrimp from the Gulf of Mexico.
• Have your mise en place, a French culinary term that means “to put in place” prepped and ready to go before you start cooking since the cooking time is so short. In other words, have all your ingredients prepped and organized before you begin.
• The recipe calls for fresh pasta, which normally take just 3-4 minutes to cook. You can substitute dried pasta (cooking time 8-10mins); just start cooking the pasta before you start cooking the shrimp.
• You can also substitute the pasta for couscous, cauliflower rice or quinoa.
• You could add scallops when you sauté the shrimp. Or add capers, chopped olives, chopped tomatoes or basil to add different flavors to the dish.
• This recipe doubles easily.

DOWNLOAD SHRIMP SCAMPI RECIPE
In February 2020 Class Tags Main, Spring, entree, shrimp, butter, garlic, white wine, lemon, pasta, chili flakes, parsley
Comment

Pork Tenderloin stuffed with Spinach, Ham, & Cheese

December 19, 2019 Nancy Madok
pork:cover.jpg
pork:ingred.jpg

Ingredients

2T Butter
1 shallot, finely chopped
1 pound baby spinach, washed, drained and slightly damp
3T olive oil
2 pork tenderloin, approx 1 ½ lb each
10 slices prosciutto d’ Parma
1 cup Parmigano-Reggiano cheese, sliced with a potato peeler into curls
salt & pepper
butcher twine
1 cup chicken stock

pork#1.jpg
pork#1a.jpg

1. Spinach: In a large pan with a lid over medium heat, add the butter; when warm, add the shallots and sauté for about 2-3 minutes, or until they just begin to soften. Add the spinach, toss, then cover with the lid and cook for 2-3 minutes.

pork#2.jpg
pork#2a.jpg

2. Remove the lid and turn the heat to medium-high. Toss the spinach for another 1-2 minutes until the greens are wilted. Season with salt and 4-5 twists of pepper.

3. Remove the spinach from pan and place in a colander lined with a clean kitchen towel. Allow the spinach to cool slightly, Twist the spinach in the towel and using your hands squeeze out any excess water. Then chop then spinach finely and set aside.

4. Pre heat the oven to 400º F.

5. Pork: Place one of the pork tenderloins onto a cutting board. Slip your boning knife under the shiny silver skin and remove it from the meat. There is no need to remove the little bits of fat.

6. Holding the knife parallel to the tenderloin, make a cut though the center, but not going all the way though to the other side. The pork will fold open like a book. Flip the meat over and place a piece of plastic wrap on top and gently pound the tenderloin out until you reach an over all thickness of ¼ inch. Set aside and repeat to the other tenderloin.

pork#7.jpg

7. Lay the pounded tenderloin back on the cutting board. Place 5 of the prosciutto slices on top of the pork, over lapping slightly as you go.

pork#8.jpg

8. Place one half of the spinach mixture evenly down the center of the loin; top with one half of the cheese.

pork#9.jpg
pork#6d.jpg

9. Carefully roll the tenderloin up. Use butcher twine to secure it closed. Repeat with other tenderloin. Season the outside with salt & pepper.

10. Place a large ovenproof skillet on the stove on medium-high heat. Add the 3 tablespoons of olive oil. Once the oil is very hot, add the tenderloins. Sear each side of tenderloin until golden brown; about 2-3 minutes a side.

11. Carefully place the skillet into the 400º F oven and roast until the internal temperature reaches135-140º F inside, about 15-20 minutes, depending on the thickness of the tenderloin.

12. Transfer the meat to a carving board; loosely tent with aluminum foil and let rest for 10-15 minutes.

13. While the meat is rest place the pan on the stove over medium -high heat. CAREFUL THE HANDLE IS HOT!! Add the chicken stock and deglaze the pan scraping the bottom to get all the brown bits. Set aside.

14. Remove the string and slicing the tenderloin, place on a plate or platter. Spoon the pan sauce on top of the meat. Serve with the dauphinious potatoes.

TIPS & TRICKS

• Spinach can be sautéed a day or 2 in advance.
• The pork can be pounded the day ahead then assembled early in the morning of your party. Wrap the stuffed tenderloin in plastic or parchment. Pat dry with paper towels before searing to insure you get a beautiful brown sear.
• Left over pork makes a great lunch or sandwich.

DOWNLOAD STUFFED PORK TENDERLOIN RECIPE
In December 2019 Holiday Tags Winter, Fall, Main, meat, Pork, Tenderloin, Spinach, Ham, Parmigiano-Reggiano cheese, prosciutto
Comment

Grilled Shrimp & Beef Kebobs with Avocado with Tzatziki Sauce

May 22, 2019 Nancy Madok
beef:cover.jpg

Ingredients

2 pounds Top Sirloin
2 pounds Shrimp

Rub:
1T black peppercorns
2T coriander seeds
3T cumin seeds
6 cloves garlic, crushed
1T chili powder
1T salt
1 tsp. dried mustard
1 tsp. paprika

Sauce ingredients Below.

beef#1.jpg

1. Cut the Top Sirloin into 1½-2 inch pieces. Place them into a medium-sized bowl and set aside.

2. Peel, remove tails, and devein the shrimp. Then set into a separate medium bowl and place in refrigerator until ready to use.

beef#3a.jpg

3. Rub: In a small dry skillet over low heat, add the black pepper corns, coriander, and cumin seeds. Toast until fragrant. Place in a spice grinder, or mortar and pestle, and grind until fine.

beef#4.jpg

4. Place the ground spices in a small bowl. Add the garlic, chili powder, salt, mustard, and paprika. Mix until combined.

5. Set aside 3T of the spice mixture. Pour the remaining spice mixture over the meat and toss until well coated. Let marinate for at least one hour (but can be marinated and refrigerated up to 8 hours in advance. Just remove from refrigerator an hour before serving)

6. 30 minutes before grilling, remove the shrimp from the refrigerator and toss with the remaining spice mixture. After 30 minutes, pat the shrimp dry with a paper towel and thread onto skewers.

7. Preheat your BBQ grill.

8. Place the meat on a cutting board and pat dry with paper towels. Then thread onto the skewers, making sure not to overcrowd the meat on the skewers.

beef#9.jpg

9. When the grill is hot, place the meat kebobs on the grill over medium heat for 3-4 minutes a side for medium rare. Remove from heat and place on a platter.

10. Place the shrimp on the grill. Grill until pink, about 3-4 minutes a side. Then place on platter.

11. Remove the meat and shrimp from the skewer and serve with sauce immediately.

SAUCE PREP:

sauce:ingrd.jpg

Ingredients

2 large ripe avocado, peeled and pitted
2 tsp. lime zest
3T lime juice
½ cup Greek yogurt
1 cup Persian or English cucumber cut into ½” cubes
1 shallot, finely chopped
1/2 cup fresh dill, finely chopped
4-5 dashes hot sauce (to taste)
Salt & pepper

1. In the bowl of a food processor, place the avocados and pulse on and off until mixture is smooth. Add juice, yogurt, and pulse until smooth.

sauce#2.jpg

2. Add the cucumber, shallot, the lime zest, and dill. Pulse until combined, but still has some texture. If the sauce is a little too thick add ¼-½ cup of water until you reach the desired consistency.

sauce#3jpg.jpg

3. Season with salt and pepper. Add a few dashes of hot sauce if desired.

sauce#4.jpg

4. Place in a bowl and serve with beef and shrimp kebobs.

TIPS & TRICKS

• I love this rub. I make a double or triple batch and the store it in my fridge to be used for other dishes. It is fantastic on chicken, lamb, or other beef & shrimp recipes.

• The top sirloin can be marinated for up to 8 hours. You don’t want to go much longer because the salt begins to change the texture of the meat.

• You can also leave the sirloin whole instead of cutting in to cubes.

• Some secrets to grilling: Pre heat your grill. Place you meat down on the hot grill and don’t touch it. The meat will release from the hot grill when it is ready to turn. After cooking the meat, always allow it to sit a few moments on a platter to rest before cutting and serving.

• The shrimp will turn pink as they start to cook. Turn them over and cook for another 3-4 minutes. The time will vary depending how cool your grill is (it will be cooler after cooking the meat compared to if you put the shrimp on first).

• The shrimp and sauce make a fantastic appetizer.

• Sauce can be made 2 days in advance.

DOWNLOAD SHRIMP & BEEF KABOBS RECIPE
In May 2019 Class Tags Spring, Main, Top Sirloin, Shrimp, Peppercorns, Coriander seeds, Cumin Seeds, paprika, Avocado, Shallot, Greek Yogurt, English Cucumber, Dill, Hot Sauce, Cholula, Tabasco
Comment

Herb Crusted Leg of Lamb, Mint Salsa Verde

April 15, 2019 Nancy Madok
lamb:cover.jpg
lamb:salsa: ingrd.jpg

Ingredients

Lamb:
10 cloves of garlic, peeled
½ packed cup mint leaves
4T fresh thyme leaves
1 packed cup parsley Italian leaves
1 T lemon zest
5 T Olive oil
1 4-5 pound leg of lamb
salt and pepper

Mint Salsa Verde:
2 clove garlic, peeled
1 cup fresh mint leaves, packed
1 cup fresh Italian parsley leaves, packed
1 shallot, finely diced
2 T capers, rinsed
1 T lemon zest
¼ cup lemon juice
2/3 cup olive oil
salt & pepper

1. In bowl of the food processor, with the motor running, add the garlic and process until chopped. Add the herbs, parsley, lemon zest, and process into a smooth paste. Scrape down the sides of the bowl. Add the olive oil; pulse until combined.

2. Remove the meat from the netting; wash and pat dry. Place the leg of lamb on a cutting board, using a boning knife to “butterfly” the thickest part of the leg areas so that the overall thickness of the meat is the same. If necessary, trim any large pieces of fat off the leg.

lamb3.jpg
lamb3c.jpg
lamb3d.jpg

3. Place on a baking sheet. Spread the herb mixture all over both sides of the leg of lamb. Roll the lamb up into a roll. Using butcher twine, secure the roll. Refrigerate for 8 hours or over night.

4. Pre-heat oven to 450° F.
5. Remove the lamb from the refrigerator 1 hour before cooking and let rest at room temperature.

lamb6.jpg

6. Transfer the leg of lamb to a rack in a roasting pan. Sprinkle with the salt and pepper. Add enough water to cover the bottom of pan (2-4 cups) and place in a 450° F oven. Close the oven door and immediately lower the oven temperature to 350° F. Roast for 1 hour and 10 minutes (20 minutes a pound) until the meat reaches 130-135° F in the center for medium rare. Check the temperature at 1 hour and every fifteen minutes thereafter until the desired temperature is reached.

7. Remove the lamb from the pan, place onto a platter, and cover with foil. Let rest for at least 15 minutes. Pour the pan drippings into fat separator. Once separated, pour into a small saucepan and reheat.

lamb8.jpg

8. Slice the lamb, place it on a platter, and serve with mint salsa verde

Tips & Tricks

• Rub the marinade all over the lamb and let it sit uncovered in your fridge over night is best for maximum added flavor.

• I feel lamb has gotten a bad rap a lot of people think that is gamey tasting meat. It’s not, the meat has a delicious mild flavored. If there were any hint of gamey taste it would be in the fat. So remove any large pieces from the center of the meat, but leave a fat cap on the outside of the roast to keep it moist as it cooks. Lamb is high in iron, zinc & vitamin B12.

• Since the size of the boneless legs of lamb vary from low 4 to high 5 pounds a leg. I recommend you cook it 20 minutes a pound, checking the meat at a hour to insure that it is not overcooked.

• Left over lamb, is fantastic in sandwiches. Try it in a pita with tzatziki sauce

Mint Salsa Verde
Makes 2 cups

Preparation:

1. In bowl of a food processor, with the motor running, add the garlic, mint, and parsley leaves. Process until finely chopped, but still has texture.

2. Add the shallots, capers, lemon zest, and juice. Pulse until chopped and combined. Scrape down the sides of the bowl.

3. With machine running, slowly add the olive oil. Mix until smooth.

4. Season with salt & pepper

Tips & Tricks

• I make this sauce right after I make the marinade for the lamb, so I don’t have to wash the food processor twice.

• It can be made 3 days in advance and last a week in your fridge.

• It is wonderful on rack of lamb or on grilled or sautéed fish.

• Replace the mint with oregano and thyme and the sauce is wonderful on other grilled meats.

DOWNLOAD LEG OF LAMB MINT SALSA RECIPE
In April 2019 Tags Main, lamb, mint, salsa, Spring, Garlic, thyme, parsley, lemon zest, Shallots
Comment

Creamy Polenta

March 31, 2019 Nancy Madok
polenta:cover.jpg
polenta:ingred.jpg

Ingredients

2T butter
8 cups water
2 tsp. salt
2 cups medium-ground corn meal
½ cup grated Parmigiano-Reggiano cheese

1.        Preheat oven to 350º F.

2.        Prepare a large (10x12 inch) baking dish by coating the pan with butter.

polenta3.jpg

3.       In a saucepan, bring the water to a boil, add the salt, and slowly add the corn meal, whisking until smooth and combined.

polenta4.jpg

4.        Reduce the heat to a simmer and continue stirring until the mixture becomes thick, about 10 minutes.

5.        Remove the pan from the heat and stir in the cheese, mixing well. Pour the polenta into the buttered pan.

polenta6.jpg

6.        Place into the oven, and bake for 25-30 minutes, stirring every 10-15 minutes until the polenta is soft.

7.        Remove from oven. Season with salt and pepper if needed, and then cover with foil to keep warm until ready to serve.

8.        To serve, spread the polenta on a platter or dinner plate and top with chicken and sauce.

TIPS & TRICKS

•     You can use any medium coarse ground corn meal for this recipe.

•     To grate the Parmigiano -Reggiano by hand is best. However, you can, and I do, use a food processor. Allow the cheese to sit on your counter for an hour to become slightly soft. Cut it into 2 inch pieces. With the motor running, add some of the cheese pieces. Work in small batches so the cheese can be ground before the motor has a chance to heat the cheese and change the consistency. Store extra cheese in a glass or plastic container in your fridge.

CLICK HERE FOR CHICKEN RECIPE
DOWNLOAD CREAMY POLENTA RECIPE
In March 2019 Class Tags Main, Polenta, Spring, Parmigiano-Reggiano cheese
Comment

Chicken with Artichokes & Mushrooms

March 31, 2019 Nancy Madok
chix:cover.jpg

Ingredients

½ cup olive oil
salt and black pepper
8-10 chicken thighs, bone in
2 medium onions, finely diced
1 pound mushrooms, washed and finely sliced
3 cloves garlic, crushed
16 oz. frozen artichoke hearts, defrosted
4-5 sprigs fresh thyme
1 cup white wine
2 cups chicken stock
2T parsley finely chopped

1. Preheat oven to 325º F.

2. Place a 6-quart Dutch oven with a lid on the stove. Turn heat to medium-high heat. Add ¼ cup of olive oil and heat.

chix3.jpg

3. Using a paper towel, pat dry the chicken. Season chicken pieces with salt and pepper.

4. Place the seasoned thighs into pan; do not overcrowd the pan. Brown both sides of the chicken, about 3 minutes a side. Once they are browned, remove from the pan. Set on platter and set aside. If necessary, add the remaining ¼ cup olive oil. Repeat with remaining thighs. Pour off all fat except for 2T.

5. Turn heat to medium. Add the onions, and cook until slightly soft, about 4-6 minutes. Add the mushroom and cook another 4-5 minutes.

6. Add the wine and scrape the bottom of the pan to remove all the brown bits. Add the stock and bring to a boil.

7. Place the chicken back into the pot, pushing the thighs down to submerge them in the sauce. Add the garlic, artichokes and thyme.

8. Cover with lid and place in a 325º F oven. Cook the chicken until the meat is tender enough to cut with a fork and easily comes away from the bone, about 45-55 minutes.

chix9.jpg

9. Remove the chicken and vegetables from the sauce and place on a platter. Discard the thyme and strain the sauce into a fat separator.

10. Pour the defatted sauce back into the pan to reheat and reduce slightly. Season with salt and pepper. Add the chicken and vegetable back into the sauce to reheat.

chix11.jpg

11. Serve the chicken and sauce over polenta. Top with chopped parsley.

Tips & Tricks:

• Cooking with meat on the bone is ideal for several reasons: It insulates and protects the meat from drying out and also adds loads of flavor.

• I use a clean pair of scissors to trim off any extra large pieces of skin/fat on the thighs before browning.

• To achieve a beautiful browned chicken thigh, make sure to pat them dry, season right before placing in pan and don’t overcrowd the pan. This way they brown rather than steam.

• This dish can be made in advance and reheated just before serving either on the stovetop or in oven.

• The flavor in this dish improves as it ages; feel free to make it a day or 2 before serving. It is a great crowd pleaser and easy to double.

• I like to use frozen artichokes instead of canned. They taste fresher to me. If you don’t have time to defrost them, its ok just put them directly in the pot.

DOWNLOAD CHICKEN W/ ARTICHOKES & MUSHROOM RECIPE
In March 2019 Class Tags Main, Artichokes, Mushrooms, Chicken, Spring, Thyme
Comment

Standing Rib Roast of Beef

December 17, 2018 Nancy Madok
IMG_3534.jpeg
meat:horseradish1.jpg

Ingredients

8 cloves garlic, crushed
2 tsp. dried thyme
2T salt
2T cracked black pepper
4 cups beef stock
one 4 -5 bone standing rib roast (about 10-12 pounds total)
1 cup heavy whipping cream
1 jar prepared horseradish

1. Preheat oven to 450° F.

meat2.jpg
meat2a.jpg
meat2b.jpg

2. In a small bowl, combine the garlic, thyme, salt, and pepper to create a coarse paste. Rub the paste all over the roast. Let sit 1 hour at room temperature.

meat3.jpg

3. Place the roast on a rack of a roasting pan bones faced down. Pour stock into bottom of pan and place in 450° F oven for 15 minutes.

meat4.jpg

4. After 15 minutes, turn the oven down to 350° F. DO NOT OPEN DOOR. Continue to cook the roast about another 1 hour and 45 minutes, then check the internal temperature. It should be 115-120º F deep in the center of the roast. If not, return the roast to the oven and continue roasting, checking every 15 minutes until your reach temperature.

5. Remove roast from pan and place on a platter; tent loosely with foil and let rest at least 30 minutes.

meat6.jpg

6. Pour the pan drippings from the roasting pan into a fat separator. Pour de-fatted drippings into a gravy boat to serve with the roast, retaining the fat in the separator for use in preparation of the Yorkshire pudding.

meat7.jpg
meat7a.jpg

7. To carve the roast set it on its side. Using a knife, cut along the bones to separate them from the meat. Slice in between the ribs; place the ribs on the platter. Place the meat fat side up on the cutting board and slice into slices, Place the slices on the platter and serve with au jus (dripping), whipped horseradish cream and Yorkshire pudding.

meat:horseradish1.jpg
meat:horseradish1a.jpg

Horseradish Cream

1. In a bowl with a whisk attachment, beat the heavy cream until soft peaks are formed. Fold in 4 tablespoons of horseradish. Give it a taste; if you want it spicier, add an additional tablespoon at a time until desired spiciness is achieve.

TIPS & TRICKS

• If you can rub the paste all over the roast 1-4 days before cooking and place on a rack uncovered in your fridge, it will improve the flavor of the meat and also develop a more beautiful crusty brown exterior.

• By cooking the roast to 115-120° F in the oven and then letting it rest, the internal temperature will continue to rise. We call this “carry over cooking”. It will bring the internal temperature to 125-130° F which will give you a rare center and a mostly medium rare roast. If you want it a little more done, cook it to 125-130° F in the oven, which will give you a more medium roast.

DOWNLOAD RIB ROAST OF BEEF RECIPE
In December 2018 Class Tags Winter, Christmas, Holiday, Rib Roast, Beef, Main, entree
Comment

Perfectly Roasted Turkey

November 16, 2018 Nancy Madok
turkey :cover.jpg
turkey:ingred.jpg

Ingredients

1 14-16 pound turkey
1T dried sage
3 tsp. salt
1 tsp. black pepper
3 slices bacon, cut in half
fresh thyme & sage leaves
olive oil
3 cups chicken stock

turkey1:2.jpg

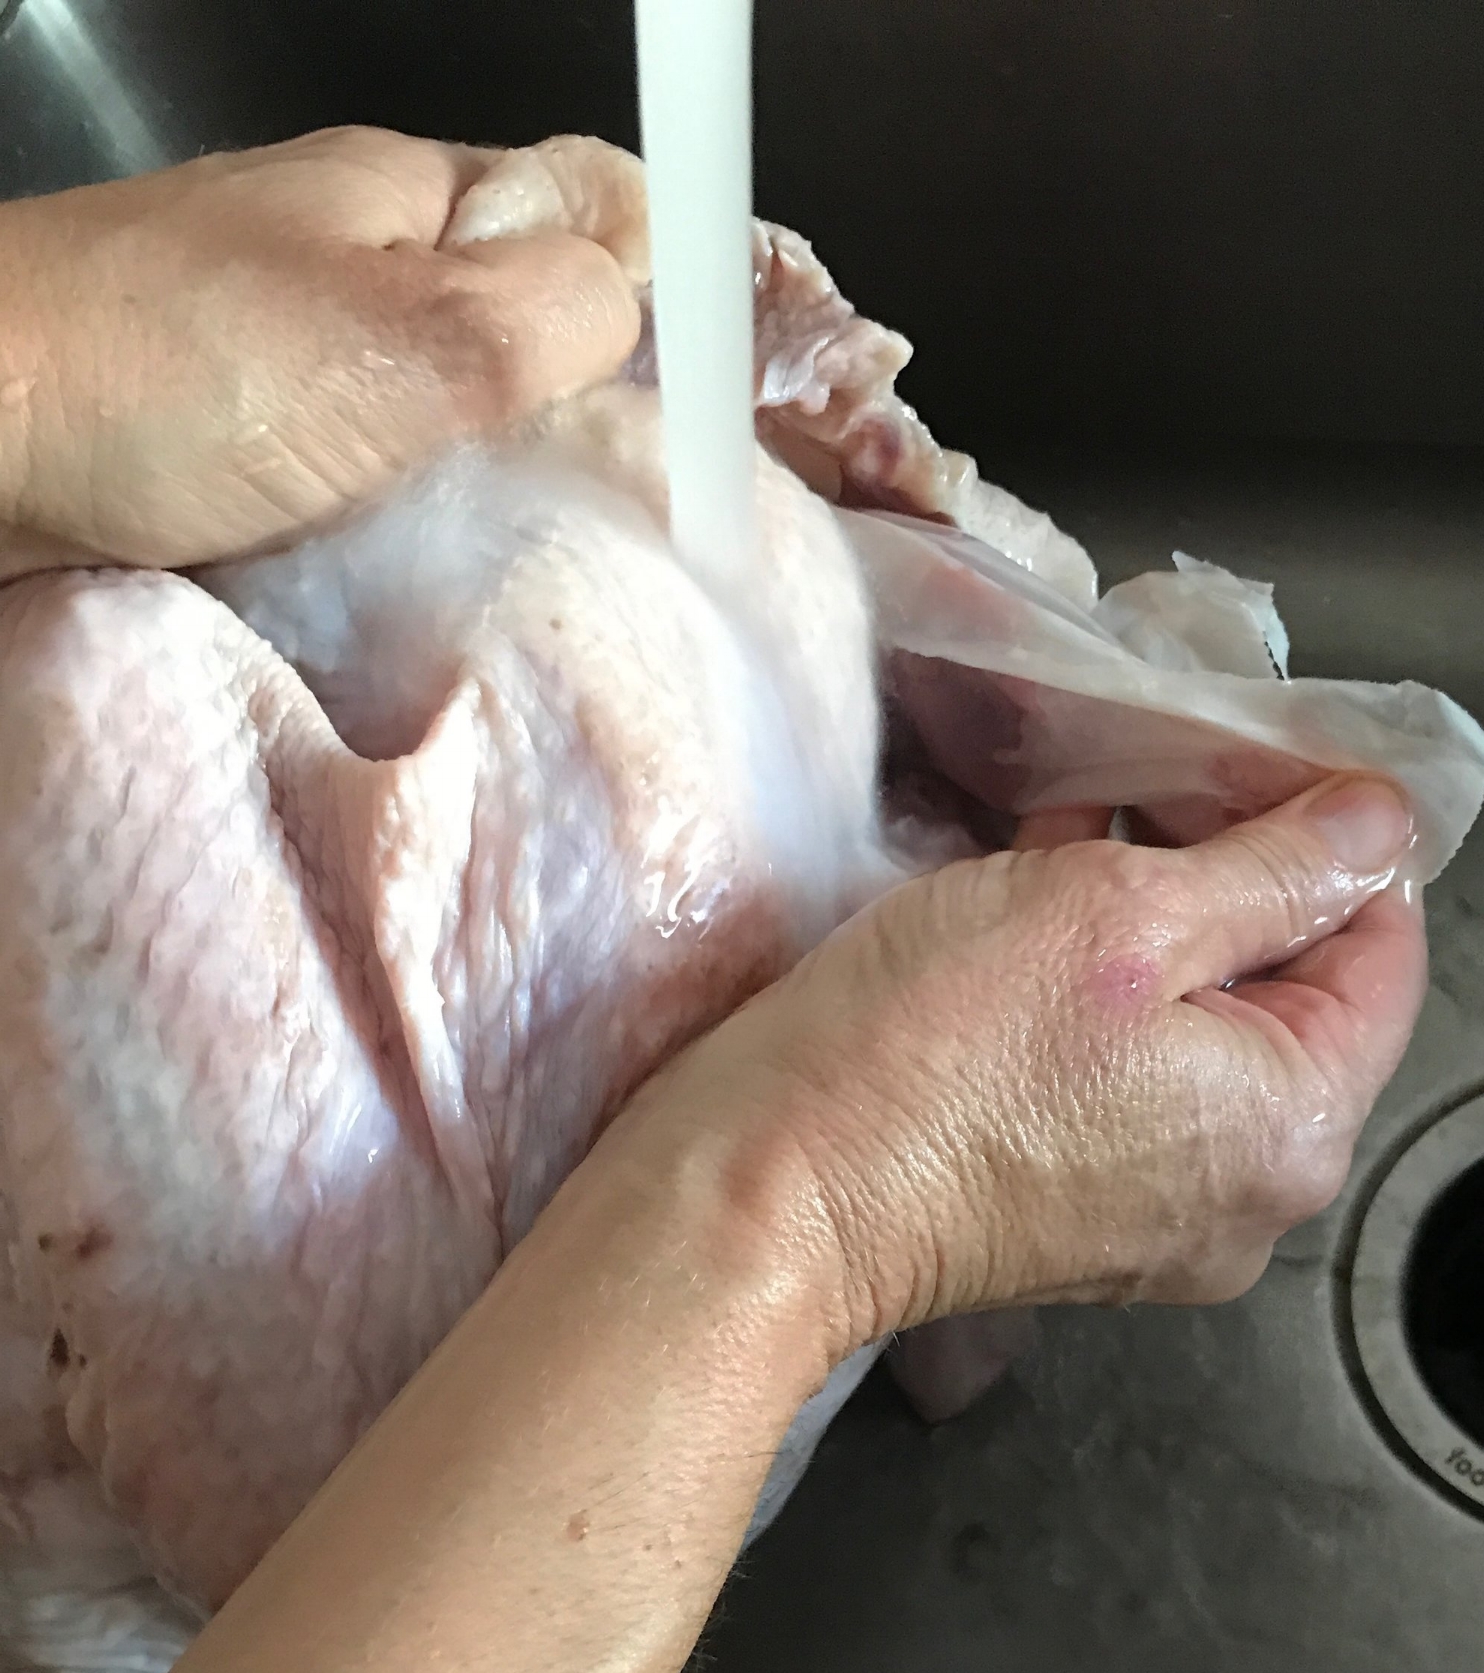
1. Wash the turkey inside and out, removing the little bag of goodies.

2. Pat the turkey dry.

turkey3.jpg

3. In a small bowl, combine the dry sage, salt and pepper

turkey4.jpg

4. Using your fingers, separate the skin from the breast meat. Sprinkle with spice blend. Place 3 half slices of bacon, thyme, and sage leaves under the skin of each breast.

turkey5.jpg
turkey5a.jpg

5. Rub the bird with olive oil, then rub with spice `mixture.

6. Let stand on the counter for 1 hour.

7. Preheat oven to 425° F.

turkey8.jpg

8. Loosely stuff the cavity of the turkey with stuffing, not too stuffed.

turkey9jpg.jpg

9. Place the stuffed turkey on the rack in a roasting pan, and then pour the stock into the pan.

turkey10.jpg

10. Place uncovered turkey in a preheated 425º F oven for 30 minutes. After 30 minutes, cover the roasting pan with foil. Using potholders, crimp and press the foil into the edges of the pan making a tight seal and return to oven and reduce the heat to 350º F and continue roasting for 3-3½ more hours.

turkey11.jpg

11. Check the internal temperature; it should be 160-165º F deep in breast. If it is not 165º F, recover with the foil and continue cooking, checking every 30 minutes until the internal temperature reaches 160-165º F.

12. Remove foil; baste with pan drippings, if necessary place back in oven and brown an additional 5-10 minutes. Remove from the oven.

13. Rest the turkey at least 30 minutes before carving. The turkey will remain warm for about 1½ hours

turkey14.jpg
turkey14a.jpg

14. To carve the turkey, remove the stuffing, then use a carving knife; remove the leg and thigh. Then separate the leg from the thigh. Remove the meat from the bones and slice into bite-size chunks and place on platter. Repeat with other leg.

turkey14b.jpg
turkey14c.jpg
turkey15.jpg
turkey15a.jpg
turkey15b.jpg

15. Cut down the breastbone to remove the breast meat from the bone. Remove the bacon and herbs from under the skin. Slice into slices of the desired thickness and place on platter. Repeat with other side. Enjoy!

turkey15c.jpg

TIPS & TRICKS

• I wash the turkey (step #2) the night before then place in a clean garbage bag.

• On Thanksgiving Day, 6 hours before serving, I take the turkey out of the refrigerator and start the recipe from step #3. This allows the turkey to sit an hour on the counter. Then 4 hours to roast and an additional hour in case it needs longer roasting time and time to rest before carving.

• The cooked turkey can sit up 1½ hour before carving. The meat will still be warm. Serve with plenty of hot gravy.

DOWNLOAD ROASTED TURKEY RECIPE
In Thanksgiving 2018 Class Tags Main, Thanksgiving, Turkey, Fall, Bacon, Sage
Comment

Sautéed Chicken with Tomatoes & Arugula

September 30, 2018 Nancy Madok
chix:cover.jpg

Ingredients

1½ pounds cherry or grape tomatoes, cut into bite-size pieces

6T oil-packed sun dried tomatoes, chopped and drained; set aside 5T of the oil

2 large shallots, thinly sliced

4T capers, drained

2 cloves garlic, crushed

3T sherry, champagne vinegar

½ cup fresh basil, torn into bite size piece

Salt & pepper

8 large skinless, boneless chicken breast halves

Olive oil

1 pound arugula, washed

2T lemon juice

1. Cut the tomatoes into bite size pieces. Chop the sundried tomatoes and place in a medium size bowl.

2. Peel and slice the shallots into thin rings. Add to the tomatoes.

3. Combine the tomatoes, shallots, capers, garlic, vinegar, and 3 tablespoons of the sundried tomato oil. Mix together and season with salt and pepper. Let the mixture sit 10-15 minutes so flavors can combine. Right before serving, add the basil. Stir until combined.

chix4.jpg

4. Put a chicken breast on a cutting board. Place your hand flat on top of the chicken.

chix5.jpg

5. Using a sharp knife, slice the rounded side of the chicken breast working toward the other side, making sure not to cut all the way thought to the other side. Unfold the breast it should looks like a “butterfly”.

chix6a.jpg

6. Take a piece of plastic wrap and place on top of the chicken. Lightly pound the chicken with a mallet until chicken breasts are of uniform thickness. If the piece is very large, cut the pounded piece in half. Set aside and repeat with each breast.

7. Place a sauté pan on medium-high heat; add enough oil to cover the bottom of the pan.

8. Pat three or four chicken breasts dry with a paper towel; season with salt and pepper.

9. Place the chicken into the pan, being careful not to overcrowd the pan. Cook for 2-3 minutes until the chicken is brown and it releases and turns easily. Flip the breasts and cook the other side another 2-3 minutes until cooked through.

10. Transfer chicken breasts to a platter. If needed, add more oil to the pan. Continue cooking the breasts until all the chicken has been cooked.

11. Toss the arugula with the remaining 2 tablespoons of the sundried tomato oil and lemon juice. Season with salt and pepper.

12. To serve, place the arugula on a plate or platter. Top with sautéed chicken. Spoon the tomato mixture over the top. Serve immediately.

TIPS & TRICKS

• Use any small tomatoes, whether they are red, yellow, or green. I like the cherry & grapes, but you could use chopped tomatoes too.

• Try to use sundried tomatoes with no sulfates. (I’ll save those for my wine! ☺)

• You don’t need to wash of the capers; the brine adds the perfect amount of saltiness.

• If you can’t find sherry vinegar, use champagne or balsamic. It adds just the perfect balance of acidity.

• This sauce is positively addictive, and goes well with so many things. Try it on top of pork, beef, or even a grill piece of fish. YUM.

In September 2018 Class Tags cherry tomatoes, shallots, Chicken, Main, Arugula, Basil, Capers
Comment

Perfect Grilled Steak with Bleu Cheese Butter

July 27, 2018 Nancy Madok
steak cover.jpg

Ingredients

8 1½ inch thick New York Steaks
Salt & pepper

Butter:
8oz unsalted butter, cut into pieces, room temperature
4oz Bleu, Gorgonzola, or Roquefort Cheese, cut into pieces
2T chives, finely chopped
½ tsp. black pepper, ground
Salt

1.    Butter:  In the bowl of a food processor, add the butter, Bleu cheese. Pulse until combined.


2.    Add the chives and pepper. Pulse on and off until well combined.  Season with salt.


steak3.jpg

3.    Tear off a piece of plastic wrap, about 12x12 inches. Place the butter in the center of the wrap, fold the edge over, and shape into a log shape. Twist the ends closed. Place in the refrigerator until firm.

4.    Steak: Preheat your BBQ Grill for approximately 20 minutes.  

5.    Remove the meat from the packaging. Pat dry with a paper towel and let sit at room temperature for 30 minutes before grilling.


6.    Season well with salt and pepper immediately prior to grilling. 


7.    Place steaks on a preheated grill. Leave the grill lid open and grill for about 6-7 minutes. Turn steaks over and grill for about another 4-5 minutes. Then check the internal temperature. Remove at 110-115º F for rare.


8.    Remove steaks from grill and place on platter. Top steaks with slices of Blue cheese butter. Loosely cover with a piece of aluminum foil. Allow the meat to rest 5-10 minutes. This will allow the butter to melt and the meat will carry over cook an additional 10-15º making the finished cooking temperature 125ºF for a perfect-rare steak. 


steak9.jpg

9.    Spread the melted butter over the steaks.

10.  Serve the steak whole or slice into slices and serve on the platter. Serve immediately


TIPS & TRICKS

•    The Bleu cheese butter can be made ahead and kept in the refrigerator a week. It also freezes beautifully.
•    I use a board scraper to help shape it into a log. 
•    You can serve the butter on top of fish or chicken too! It makes a quick delicious sauce.
•    Just like you preheat your oven, you need to preheat your grill! It is important to get the steel grill grates very hot in order to sear and char your steak. To achieve the fancy crosshatch pattern that steaks have in restaurants, place the steak at a 45-degree angle to the grill grates. Cook for about 4 minutes then rotate the steak 90 degrees for an additional 3 minutes. This will produce the seared crosshatch pattern. Turn steaks over and finish grilling. Serve with the pattern side up. 
•    Note: every grill is different and you must get to know your own grill’s temperature zones and settings. Each grill has a “hot spot” where the food will cook more quickly. It is important to learn where yours is. 
•    When you remove a piece of meat from cooking, it does not stop cooking immediately. It continues to “carry over cooking.” The internal temperature can rise 10-15º degrees, so you should remove the meat before it reaches its ideal temperature and allow the “carry over” to bring it up to its perfect doneness.
•    If you prefer your meat more medium-rare, cook till 120-125º F on the grill and allow it to carry over until it reaches 130-140º F.

In July 2018 Class Tags New York Steak, Steak, Bleu Cheese, Gorgonzola, Roquefort Cheese, Chives, Main, Summer
Comment

Torta Pasqualina

March 25, 2018 Nancy Madok
torta:cover.jpg

Ingredients

2 leeks
2 bunches Swiss chard
3T olive oil
1 medium onion, finely diced
3 cloves garlic, crushed
4 cups spinach
1 pound ricotta
½ cup grated Pecorino Romano cheese
¼ tsp. nutmeg
½ tsp. salt
black pepper
2 sheets puff pastry, defrosted
6 eggs

1.    Preheat oven to 350° F.

torta2a.jpg

2.    Using only the white and light green part, cut the leeks in half. Place under running water to rinse off any grit/dirt. Then, chop into medium dices. Place is small bowl set aside


3.    Wash the Swiss chard, remove the stems from the leaves, and chop into a fine dice; adds to leeks.


IMG_5454.jpg
IMG_5457.jpg

4.    Remove any large veins from the leaves and chop into bite-size pieces, set aside.

5.    In a large sauté pan with a lid over medium heat, add the olive oil; when warm add the onion, leeks and Swiss chard stems. Sauté 2-3 minutes.

6.    Add the garlic and continue cooking another 2-3 minutes. Add the spinach and Swiss chard leaves; cover with the lid.  Cook until all the greens are wilted, about 4-5 minutes. Remove from heat.


7.    Line a colander with a clean dishtowel. Dump the cooked greens into the colander and let cool.  Close the towel around the greens, and then squeeze out all the liquid.  The mixture should be very dry.


8.    In a medium bowl, combine the ricotta, Pecorino-Romano cheeses, nutmeg, salt, and 5 twists of pepper. Mix until well blended. 

9.    Add in the greens; mix until combined, set aside.


torta10.jpg

10.    Unroll one sheet of the puff pastry on a floured flat surface. Roll out into a 14x14-inch.


torta11.jpg

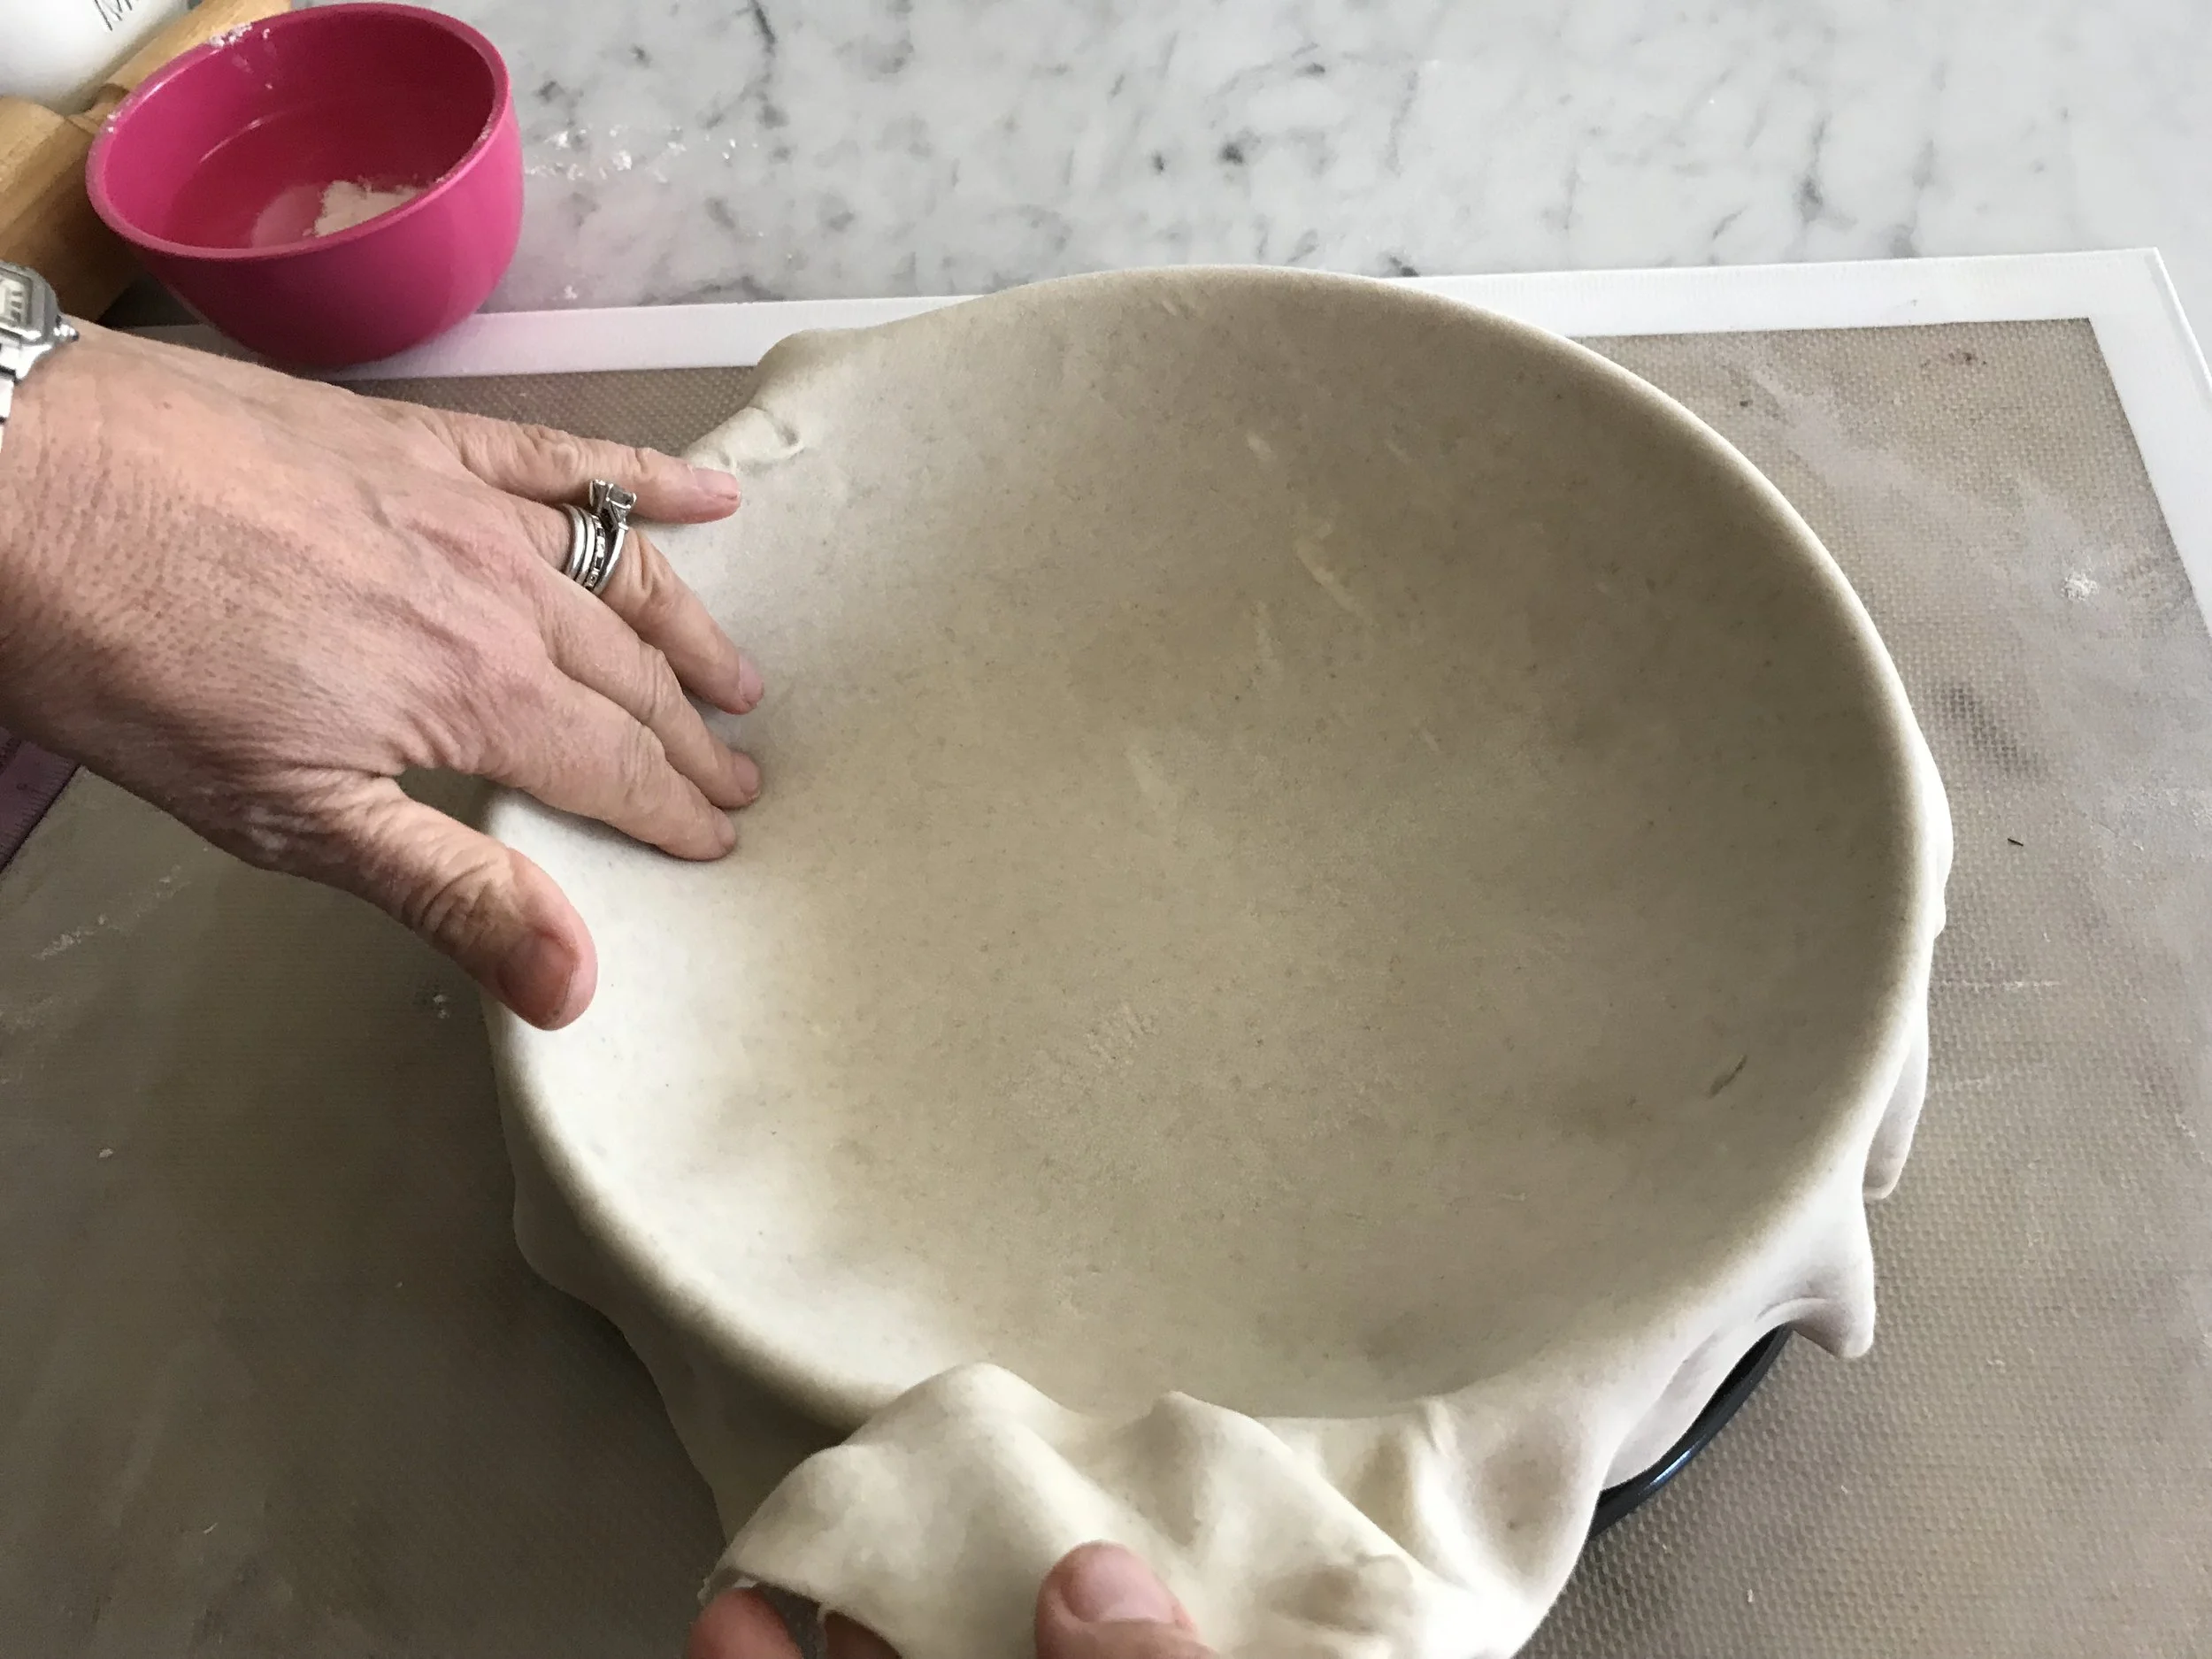
11.    Place the sheet in a 10-inch spring form pan, covering the bottom of the pans and the side of the pan. There will be extra dough hanging over the edges.


12.    Place the cheese-chard mixture inside the pastry-lined pan. Smooth out until it is even.


13.    With a spoon, make 5 egg size holes in the mixture. Crack an egg into each hole.


14.    Roll out the second sheet of puff pastry into an 11-inch. Place on top of the torta, pressing the pastry down on top of the filling.


15.    Press the top pastry into the sides and to top edges of the pan. Trim off any excess pastry. You can use this excess for little pastry decorations for the top or discard.

16.    Fold over the edges to making a little seal, pressing down to secure the top and bottom pastries together.


torta17.jpg

17.    Whisk together the remaining egg; brush the top of the torta.


torta18.jpg

18.    Bake for 40-45 minutes until is it lightly brown and the center is hot.
19.    Cool for 25-30 minutes before serving.


20.    Cut into slices and serve warm or room temperature. 


TIPS & TRICKS

•    You can use any color of Swiss chard. They all taste the same. I prefer the golden or green, as it blends in with the filling. 
•    You can use any puff pastry you like. Some brand’s sheets are round, other are square. What’s important is that you roll it out 14x14-inches so that it covers the bottom and sides of the pan. Also so that the top pastry covers the top and seals nicely.
•    This torta makes the most fantastic addition to breakfast or lunch. It’s a great snack and picnic food.
•    You can add cooked bacon, sausages or chopped ham to the filling 

In March 2018 Class Tags Main, Torta, Swiss Chard, Ricotta, Spinach, Egg, Puff Pastry, Spring
Comment

Duck Breast with Honey & Oranges

March 5, 2018 Nancy Madok
duckcover2.jpg
duckingred.jpg

Ingredients

2 duck breasts (4 pieces) 
4 oranges, either cara cara or navel
3T soy sauce
2T olive oil oil
2T honey
3T red wine vinegar
Salt & pepper
½ cup Moscato Wine
2 T butter, cold


duck1.jpg

1.    Zest one orange, then cut it in half and juice it. Measure out ½ cup of juice, and pour into a small bowl. Add the zest, set aside.


2.    With the remaining 3 oranges, use a knife to cut off the top and bottom of the oranges.

3.    Working from top to bottom, use your knife to remove the peel and the white membrane from the orange. Use your knife to make 2 small cuts to remove the flesh from each small section. Place into a bowl. Repeat with remaining oranges. Cover the bowl with plastic wrap and refrigerate until ready to make sauce.

duck4.jpg

4.    Whisk in the soy sauce, oil, honey, and vinegar to the orange juice.   Pour into a gallon-sized zip-lock bag, add the duck breasts, and seal. Marinate for 8 hours in the refrigerator.


5.    Remove the duck breasts from the marinade. Reserve the marinade.

duck6.jpg

6.    Pat the duck breasts dry with a paper towel.

duck7.jpg

7.    With a knife, make several diagonal cuts/scores into the fat/skin side, making sure not to cut all the way though the meat.


duck8.jpg

8.    Season the duck breasts with salt and pepper.

duck9.jpg

9.    In a large sauté pan over medium heat, place the duck breasts fat/ skin side down. Cook until the fat melts and the skin browns, about 8-10 minutes.


duck10.jpg

10.    Remove the duck breasts from the pan, placing them on a plate. Pour off the fat.

duck11.jpg

11.    Return the duck breasts to the pan and cook skin side up for an additional 5-7 minutes for medium rare.

12.    Remove the duck breasts from the pan and place on a platter. Cover loosely with foil and let rest while you make the sauce.


13.    Pour off any remaining fat from the pan.

duck14.jpg

14.    Add the wine to the pan. Deglaze the pan by stirring and scraping up any brown bits. Cook the sauce for 2-3 minutes so that it reduces slightly.


15.    Add the reserved marinade, and turn the heat to high. Bring the sauce to a boil. Cook for 3-4 minutes, or until the sauce has slightly thickened.

duck16a.jpg

16.    Remove the sauce from the heat. Swirl in the  cold butter. Season with salt and pepper. Add the orange sections.


duck17.jpg

17.    Place the duck breasts on a cutting board. Pour any drippings that had collected on the platter into the sauce. Then, thinly slice the duck breast at an angle and place back on the platter. Drizzle some of the sauce on top of the meat. Serve extra sauce on the side. Serve immediately. 

TIPS & TRICKS

•    Cara cara oranges have a sweet and tangy taste as well as a beautiful red flesh.
•    It will take 20-25 minutes for the duck and sauce to cook. 
•    The duck breast has the texture of red meat, so cook it until it’s medium rare. Remember that it continues to “cook” as it rests. 
•    The meat is very rich in flavor, so even though the breasts are small one per person is enough.
•    Serve with roasted potatoes.


In February 2018 Class Tags Winter, Duck, Honey, Oranges, Main, Soy Sauce, Moscato Wine
Comment

Coq au Vin with Mashed Potatoes

February 13, 2018 Nancy Madok
coq cover.jpg
coq ingred.jpg

Ingredients

Coq au Vin Ingredients

8-10 pieces chicken, or 1 whole 4-pound chicken cut into parts
3 cups red wine
3-4 thyme springs
2 bay leaves

¼ pound lardons or thickly sliced bacon, sliced into ¼ inch wide slices
½ pound mushrooms, washed and sliced
20 pearl onions, peeled or 1 cup frozen
1-cup chicken stock
3 cloves garlic crushed
Salt & pepper

3T butter room temperature
3T all-purpose flour

3pounds Yukon Gold potatoes
5T unsalted butter


Mashed Potatoes Ingredients

3 pounds Yukon Gold potatoes, peeled and cut into cubes
5T unsalted butter
Salt and pepper

coq#1.jpg

1.    Place the chicken in a bowl or zip lock bag. Add the wine, thyme, and bay leaves. Place in the refrigerator and marinate for least 2 hours, but overnight is better.

2.    Pre-heat oven to 350º F.

coq#3.jpg

3.    In a Dutch oven or deep pan with a lid, over medium-high heat, sauté the bacon until crisp for about 5 minutes. Using a slotted spoon, remove from the pan and set aside.


4.    Add the mushroom slices to the pan. Sauté until golden brown, about 5-6 minutes. Using a slotted spoon, remove from the pan and set aside.


coq#5a.jpg

5.    Remove the chicken from the wine. Reserve the wine and herbs. Pat the chicken dry. Season with salt and pepper.


6.    Workings in batches, add the chicken pieces, skin side down, to the pan. Make sure to not overcrowd the pan. Sauté chicken until golden brown, about 4-5 minutes. Turn the chicken and repeat on the other side. Remove from pan. Repeat with remaining chicken pieces. Pour off any extra fat.


7.    Add the wine and stock to the pot. Deglaze the pan by scraping up all the little brown bits from the bottom of the pan. Bring the liquid to a boil.


coq#8.jpg

8.    Then add the garlic, bacon, mushrooms, onions, and chicken pieces back to the pan. Cover pan with a lid and place in a 350º F oven for 40-45 minutes until chicken is cooked. If using chicken breasts, add them to the pot after cooking the dark meat for 20 minutes in the oven.


coq#9.jpg

9.    In a small bowl, mix the butter and flour. Using a spoon or your finger, mix until it forms a paste. Set aside.

coq#10.jpg

10.    Remove the chicken to a platter. Set aside. Remove the thyme and bay leaves. Discard the herbs.


11.    Pour the sauce thought a strainer into a fat separator. Set the vegetables/bacon aside.

12.    Let the sauce sit about 5 minutes to allow the fat to rise to the top. Pour the defatted sauce back into the pan. Remember pan is hot!!!


coq#13.jpg

13.    Place the pan on the stove on medium-high heat and bring to a boil. Then, slowly whisk the flour paste into the sauce a little at a time. Cook until slightly thickened, about 4-6 minutes. Adjust the seasoning.


coq#14.jpg

14.    Return the chicken and vegetables/bacon to the pan to warm. Serve over mashed potatoes. 


Mashed Potatoes Recipe

1.    Place potatoes in a pot filled with water and bring to a boil. Cook until tender, about 20 minutes. Drain the potatoes and reserve 1 cup of the cooking liquid.


coq-pot#2.jpg

2.    Place potatoes back into pot and mash. Add butter and ½ of the cooking liquid. If too thick, add the reserved liquid. Season with salt and pepper.


TIPS & TRICKS

•    Traditionally, this dish is prepared with a whole rooster/chicken. You can use a whole chicken cut into pieces. I like to use bone in, skin on thigh meat. It makes for easy serving. Cooking chicken with the bone in and skin on helps protect the meat from drying out and adds loads of flavor. Your guest can simply remove the skin before eating if they wish. 
•    Marinating the chicken in wine overnight makes the chicken more flavorful. 
•    This dish is best made the day ahead, as the flavors improve with time.
•    I like to use Yukon gold potatoes with this dish because they are so buttery and dense, and they hold up very well to the chicken and sauce. 

In January 2018 Class Tags Chicken, Main, Coq au Vin, Potatoes, Red Wine, Thyme, Winter
Comment

Filet of Beef, Mushrooms, Spinach & Bleu Cheese in Filo

December 17, 2017 Nancy Madok
filet cover shot.jpg
filetingred.jpg

Ingredients

Beef:
8 Filet Mignon steaks, 6 oz. each and/or about 1¾ inch thick
2T unsalted butter
2T olive oil
8 oz. bleu cheese,( bleu, Roquefort, Gorgonzola) room temperature, crumbled
16 sheets filo dough, thawed
¾ cup melted butter
salt & pepper

Spinach:
2T olive oil
1 shallot, finely chopped
1 pound baby spinach, washed, drained and slightly damp

Mushroom Duxelles:
1½ pound mushrooms, button, belle, chanterelle
2 shallots
2 cloves garlic
2T Butter

filet1.jpg

1.    Place a large sauté pan or cast iron skillet over medium-high heat; heat the butter and oil. Pat dry then season the fillets with salt and pepper.  Place the filets in the pan (do not overcrowd the pan).


filet2.jpg

2.    Sear the steaks until they are nice a brown, about 1-2 minutes. Flip the meat and repeat on the other side. Remove to a platter lined with paper towels. Repeat with the remaining filets. Cover and refrigerate for at least 1 hour.


3.    Spinach: In a large sauté pan with a lid over medium heat, add the 2 tablespoons of olive oil; when warm, add the shallots and sauté for about 2-3 minutes, or until they just begin to soften. 


4.    Add the spinach, toss, then cover with the lid and cook for 2-3 minutes.

filet5.jpg

5.    Remove the lid and turn the heat to medium-high. Toss the spinach for another 1-2 minutes until the greens are wilted. Season with salt and 4-5 twists of pepper. Remove from pan and let cool.

filet6.jpg
filet6a.jpg

6.    Once the spinach is cool, place in a kitchen towel and squeeze out any excess water, then chop and set aside. 

filet7.jpg

7.    Mushrooms: With a damp towel or vegetable brush, gently wipe the mushrooms to remove any dirt. Remove the dead ends from the stems.


8.    In a bowl of a food processor with the motor running, add the shallots and garlic; pulse until finely chopped.

9.    Add the mushrooms and pulse until finely chopped.

10.    In a large sauté pan, heat the butter over medium heat. Add the mushroom mixture, stir and cook until the mushrooms become soft and all liquid as been absorbed, approximately 8-10 minutes. Season with salt and pepper. Remove from pan and let cool completely.

11.    Filo Package: Remove the filo dough sheets from the box and cut in half. Cover with a clean dishtowel to keep them from drying out.


filet12.jpg

12.    Lay a single rectangle of filo dough horizontally on a clean surface. Using a pastry brush, coat the surface with melted butter.


13.    Lay a second sheet vertical over the first sheet. Brush with butter.


filet14.jpg

14.    Lay a third sheet at a 45-degree angle upper corner to the left. Brush with butter.


15.    Lay a fourth sheet at a 45-degree angle upper corner to the right. Brush with butter.

16.    Remove the filets from the refrigerator. Blot a filet with a paper towel and place in the center of the filo dough.  On the top of the filet, spread 1 tablespoon of the sautéed spinach.

17.    Top with 1 tablespoon of the mushroom mixture, then top with a tablespoon of the bleu cheese.

filet18.jpg

18.    Gather the edges of the filo dough together, forming a little package.  Pull the corners open slightly as if making a “poof”. Place on a baking sheet. Repeat with the remaining filets. Cover loosely with plastic wrap. Chill until ready to bake.


19.    Preheat oven to 400º F.

filet20.jpg
filet20a.jpg

20.    Remove the filo packages from the refrigerator about 20 minutes before baking. Bake at 400º for 10 minutes, and then rotate the pan.  Cook for an additional 10 minutes. Center of the filet should be 130º F for medium rare. Serve immediately.


filetendshot.jpg

TIPS & TRICKS

•    The filets should be all about the same size/ thickness to insure they all cook at the same time. 
•    Dry and season the filets right before cooking. Do not over crowd the pan otherwise the meat will not brown it will steam.
•    The filets, spinach, and mushrooms can all be prepared a day ahead. The “packages” can be assemble the morning and cooked later that day. 
•    If you don’t like bleu cheese you can substitute a goat or a Boursin cheese. 
•    If you wish your filet cooked a little more. Increase the cooking time by 5 minutes for an internal temperature of 140º for medium. If the tops of the packages start to brown too much. Loosely place a piece of aluminum foil loosely on top. 

In December 2017 Holiday Tags Beef, Winter, Mushrooms, Spinach, Filo, Bleu Cheese, Main
Comment

Perfectly Roasted Turkey

November 21, 2017 Nancy Madok
turkey16.jpg

Ingredients

1 14-16 pound turkey
1T dried sage
2 tsp. salt
1 tsp. black pepper

3 slices bacon, cut in half
fresh thyme & sage leaves
olive oil
3 cups chicken stock

1.    Preheat oven to 425° F.

turkey2.jpg

2.    Wash the turkey inside and out, removing the little bag of goodies.
 

turkey3.jpg

3.    Pat the turkey dry.
4.    In a small bowl, combine the dry sage, salt and pepper
 

turkey5.jpg

5.    Using your fingers, separate the skin from the breast meat. Sprinkle with salt and pepper. Place 3 half slices of bacon, thyme, and sage leaves under the skin of each breast.
 

turkey6.jpg
turkey6a.jpg

6.    Rub the bird with olive oil, then rub with sage, salt and pepper mixture.
7.    Let stand on the counter for 1 hour.

8.    Stuff the cavity of the turkey with stuffing, not too stuffed.

9.    Place the stuffed turkey on the rack in a roasting pan, and then pour the stock into the pan.

10.    Place uncovered turkey in a preheated 425º F oven for 30 minutes. After 30 minutes, cover the roasting pan with foil. Using potholders, crimp and press the foil into the edges of the pan making a tight seal and return to oven and reduce the heat to 350º F and continue roasting for 3½ more hours.

turkey11.jpg

11.    Check the internal temperature; it should be 160-165º F deep in breast.  If it is not 165º F, recover with the foil and continue cooking, checking every 30 minutes until the internal temperature reaches 160-165º F.
 

turkey13.jpg

12.    Remove foil; baste with pan drippings, and brown an additional 5-10 minutes. Remove from the oven.

13.    Rest the turkey at least 30 minutes before carving.

14.    To carve the turkey use a carving knife remove the leg and thigh. Then separate the leg from the thigh. Remove the meat from the bones and slice into chunks and place on platter. Repeat with other leg. 

15.    Remove the wings.

16.    Cut down the breastbone to remove the breast meat from the bone. Remove the bacon and herbs from under the skin. Slice into chunks and place on platter. Repeat with other side. Enjoy!

TIPS & TRICKS

•    I wash the turkey (step #2) the night before and then place it in a clean garbage bag. 
•    On Thanksgiving Day 6 hours before serving I take the turkey out of the refrigerator and start the recipe from step #3. This allows the turkey to sit an hour on the counter. Then it gives the bird 4 hours to roast. That leaves an additional hour to spare in case it needs longer roasting time and time to rest before carving.
•    The cooked turkey can sit up 1½ hour before carving. The meat will still be warm. Serve with plenty of hot gravy.


In Nov 2017 Thanksgiving Tags Winter, Turkey, entree, Main
Comment

Rack of Lamb with Mint Chimichurri Sauce

April 2, 2017 Nancy Madok
rack cover.jpg
rack1.jpg

Ingredients

Rub:
4 cloves garlic
2 cups loosely packed parsley leaves
1 cup mint leaves
4 teaspoons grated lemon zest
2T mustard
4T olive oil
4 racks of lamb, about 1½  pounds each
salt & pepper

Sauce:
4 cloves garlic
2 stalks green onion, cut into pieces
1½ cups parley leaves
½ cup mint leaves
1 tsp. lemon zest
½ cup lemon juice
½ cup olive oil
salt & pepper


1.    Preheat the oven to 450º F.

rack2.jpg

2.    Rub: In the bowl of the food processor while running add the garlic, then add the parsley and mint, and pulse until finely chopped.  Add the lemon zest, mustard, and olive oil and pulse until combined.  Set aside.


rack3.jpg

3.    Place the racks of lamb on a rimed baking sheet fat side up, and bones toward the center of the pan.  Sprinkle with salt and pepper.  Rub the lamb with the herb rub mixture from Step 2

4. Place the pan in the center rack of a 450º F oven and roast the lamb for 25 minutes.

rack4.jpg
rack 5.jpg

5. Remove the lamb from the oven and cover loosely with aluminum foil. Let rest for 15 minutes.  Then cut the racks into either single or double chops and serve with sauce.

Sauce:

rack 6.jpg

6. In a bowl of your food processor, while running, add the garlic, green onion, parsley and mint; pulse just until rough chopped.  Add the lemon zest, juice and olive oil.  Pulse just until combined.  Season with salt and pepper.

rack7.jpg

7. Transfer to serving bowl.  Serve with the lamb.


Tips & Tricks

•    Having the food processor running before you add your ingredients gives your food a nice fine chopped appearance.
•    The rub can be made a day ahead.  The herb mixture doesn’t need to cover the whole rack. Keep it on the thick meat part of the rack.
•    Sauce can be used with beef and chicken. Will keep in refrigerator 2-3 days.

Featured
Risotto with Mint, Peas & Pecorino Romano Cheese
rack cover.jpg
Rack of Lamb with Mint Chimichurri Sauce
Blood Orange & Lemon Curd Tart
In April 2017 Class Tags April 2017 Class, Main, Lamb, Mint, Chimichurri Sauce, Spring
Comment

En Papillotes of Fish with Lemon & Greens

March 2, 2017 Nancy Madok
fish ingred..jpg

Ingredients

8 fish fillets, -6 oz. (salmon, halibut, Maui Maui, grouper or any firm fish)
salt, pepper
1 cup preserved lemons, medium diced
1 cup sundried tomatoes packed in oil, drained (reserve the oil) and julienne
2 shallots finely diced
4T chopped flat leaf parsley
2 cups white wine
4 cups baby spinach
2 cups arugula
1 medium head fennel, cored and thinly sliced
salt and pepper
parchment paper

fish1.jpg

1.    Preheat oven to 425° F.  Set two baking sheets aside.

2.    Fold 8 sheets of 20-inch long parchment paper in half to resemble a     book. Using scissor to cut each paper into a heart shape. Set aside.

3.    Place a fish fillet on one half of paper near the folded edge.

4.    Sprinkle with salt & pepper.


fish5.jpg

5.    Place on top of the fish one tablespoon each of the preserved lemon,  and the sundried tomatoes, a sprinkle of shallots and the chopped parsley

fish6.jpg

6.    Drizzle 3 tablespoon wine on top.

7.    Working from one corner closest to the fold, make a series of small  folds working around the edges of the parchment. Pressing firmly to  “seal “ in the fish.  Place the packet on a baking sheet.  Repeat with the  remaining fish.


8.    Place the baking sheets in a 425º F oven and cook for 12 minutes.

fish7.jpg

9.   When the fish is almost finished baking, in a small bowl, whisk together the lemon juice, and oil. Season with salt and pepper. In Medium bowl toss the spinach, arugula and fennel with the dressing (you may not use all of the vinaigrette; adjust to desired amount of coating of the greens).  Add salt and pepper, if needed

fish9.jpg
fish9a.jpg

10.  When the fish is done, Place each papillotes on a plate.  Cut or tear back the paper, place a spoon of greens on top of then fish. Cover with the paper and allow the greens to slightly wilt. Serve immediately.


TIPS AND TRICKS

•    Always roast 2 chickens. They make great leftovers. 
•    Trussing the chickens makes it cook more evenly and is easier to turn.
•    I remove the cooked rosemary sprigs before serving but stir the chopped cooked lemons into the vegetables. 


March 2017 CLASS
Preserved Lemons
Preserved Lemons
Winter Vegetable Soup with Pistou
En Papillotes of Fish with Lemon & Greens
Chocolate Cheesecake
In March 2017 Tags Fish, Papillotes, Lemon, Main, Winter
Comment

Roasted Chicken & Vegetables with Rosemary & Preserved Lemon

February 2, 2017 Nancy Madok
chix cover.jpg
chix ingred.(1).jpg

Ingredients

2 medium yellow onions
4-6 medium carrots
2 heads fennel, frons removed
1 pound Yukon gold potatoes, wash
Two chickens, about 4-5 pounds each
2 tsp each: sea salt and black pepper, mixed together
2 preserved lemons, flesh & skin cut into small dice ** recipe attached
several sprigs fresh rosemary
4T olive oil
1 cup chicken stock
kitchen twine


chix2.jpg

1.    Preheat oven to 425º F.
2.    Peel and cut the carrots into thick slices about 1inch thick and onions into quarters. Set aside.

chix3jpg.jpg

3.    Cut the potatoes and fennel into quarters Set aside. 


chix4.jpg

4.    Wash and pat dry chickens.  Rub the outside of bird with 2 tablespoons of olive oil.

chix5.jpg

5.    Carefully separate the skin from the breast meat; rub the salt & pepper mixture underneath the skin and all over the birds.  Place ¼ of 1 lemon and a sprig of rosemary under each side under the skin. Place the remaining ½ lemon and a sprig of rosemary in cavity.


chix6.jpg

6.    Tuck the wings behind the “shoulders”. 

chix7e.jpg

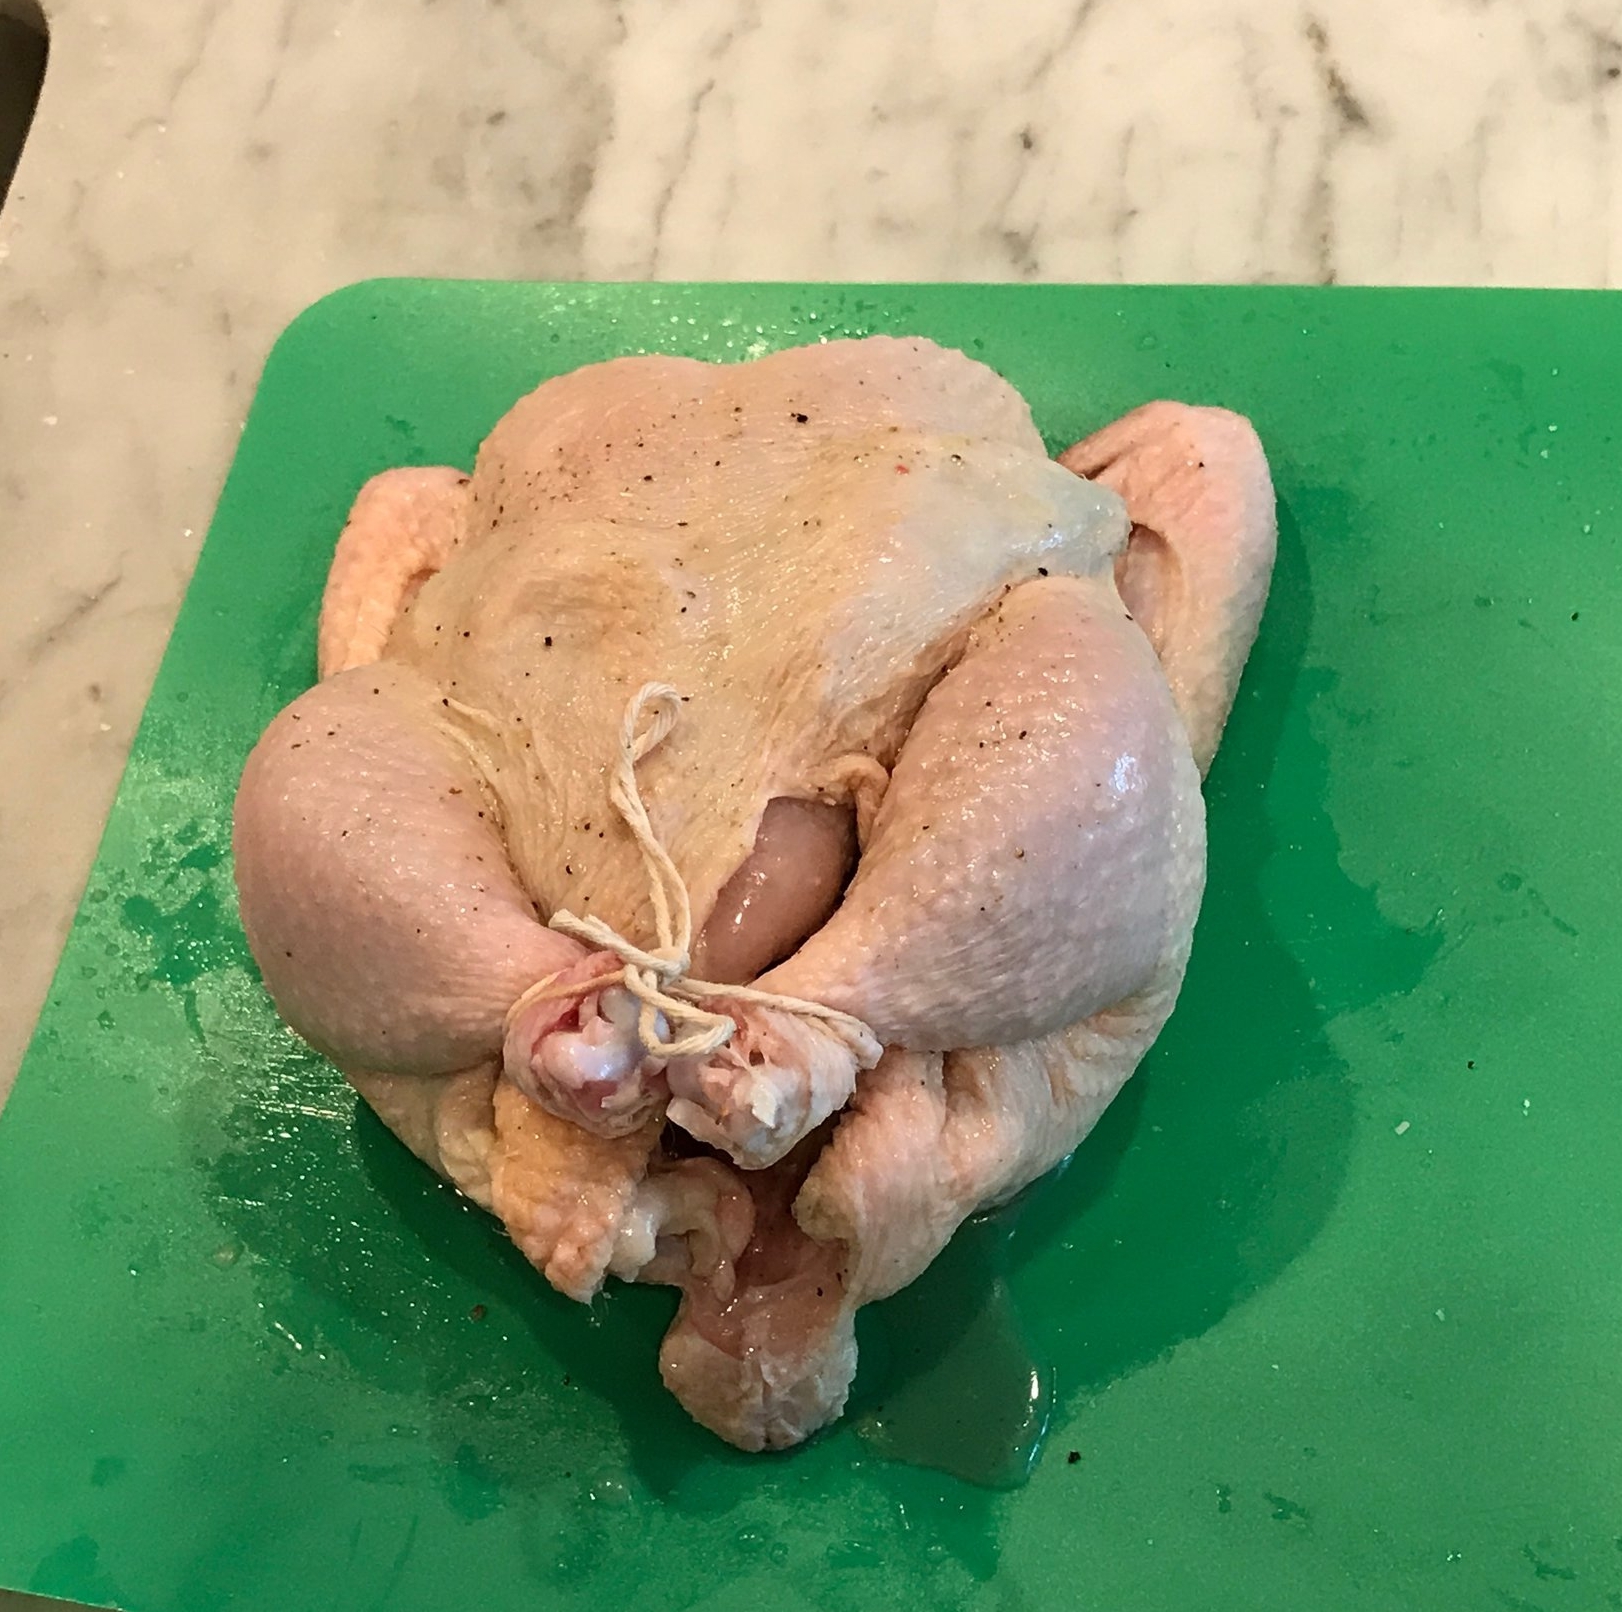
7.    Truss with kitchen twine.  Repeat with the other chicken.


chix8jpg.jpg

8.    Lay the chickens on their tummy on a rack in roasting pan. Add stock and the vegetables to the pan and roast the chickens in 425º F oven for 20 minutes.  

9.    Turn chickens to their side, and roast for 20 minutes.  Turn chicken to other side, and roast for 20 minutes. 

10.     Place chicken on their backs, baste with juices, and roast for about 20 minutes more or until internal temperature is 170° F


chix10.jpg

11.    Transfer the chickens to a platter, cover loosely with foil, and let rest for 15 minutes.


chix11.jpg

12.    Carve the chicken and place on a plate or platter top with the roasted vegetables and pan drippings. 

TIPS AND TRICKS

•    Always roast 2 chickens. They make great leftovers. 
•    Trussing the chickens makes it cook more evenly and is easier to turn.
•    I remove the cooked rosemary sprigs before serving but stir the chopped cooked lemons into the vegetables. 


FEBRUARY 2017 CLASS
Wintergreens with Roasted Beets, Fennel & Gorgonzola with Apple Cider Vinaigrette
Roasted Chicken & Vegetables with Rosemary & Preserved Lemon
Apple & Walnut Crostata
Lemon Preserve Recipe
Preserved Lemons
Preserved Lemons
In February 2017 Class Tags February 2017 Class, Main, Vegetables, Rosemary, Lemon, Winter, preserved lemons, Chicken
Comment

Perfect Pizzas - Part 1 - Sauce

September 3, 2016 Nancy Madok
pizza sauce3.jpg
pizza sauce ingred.jpg

Ingredients

2T olive oil
2 cloves garlic, crushed
1 28 oz. can whole tomatoes
3-4 basil leaves salt & pepper

pizza sauce1.jpg

1.    Place a small sauté pan over medium-low heat, add the oil and heat until slightly warm.  Add the garlic and cook 1-2 minutes, until soft and being careful not to burn the garlic

pizza sauce2.jpg

2.    Add the tomatoes; using a wooden spoon, break the tomatoes into small pieces.  Raise the heat to medium- high.  

pizza sauce3.jpg

3.    Add the basil and cook until the sauce thickens slightly, about 5-7 minutes. Season with salt and pepper. Sauce can be used chunky or pureed.

pizza cover.jpg

Continue to Part 2 of Recipe

Part 2 - Pizza Dough and Toppings
Featured
caesarcover.jpg
Caesar Salad
pizza sauce3.jpg
Perfect Pizzas - Part 1 - Sauce
Pizza clas cover shot.jpg
Perfect Pizzas - Part 2 - Dough
tiramisu:covershot.jpg
Tiramisu
In Sept 2016 Pizza Class Tags Pizza, Main, Sauce, tomato, Fall
Comment

Perfect Pizzas - Part 2 - Dough

September 2, 2016 Nancy Madok
Pizza clas cover shot.jpg
pizza ingred.jpg

Ingredients

1 package active yeast
1½ cups water  
4 cups all-purpose flour
1½ tsp salt
2T olive oil

Toppings:
2-3 cups assorted toppings: sliced pepperoni, mushrooms, sun-dried tomatoes, olives; goat cheese, fresh mozzarella, basil leaves. pizza sauce ( see below)
¼ cup corn meal

1.    Preheat oven to 500°F.  Place pizza stone on the middle rack inside the oven.

pizza2.jpg

2.    Heat the water to 110° F water

pizza2A.jpg

2b.  dissolve the yeast and set aside.

3.    Place the flour and salt in the bowl of a food processor and pulse a few times to mix together.

pizza4.jpg

4.    With the food processor running, add the water-yeast mixture in a steady stream.  

pizza5.jpg

5.    Turn off the machine and add the oil.  Pulse a few times to mix in the oil.

pizza6.jpg

6.    Scrape the dough out of the bowl onto a floured board.  

pizza7.jpg

7.    Gather any bits of dough and flour and quickly knead into a large ball.

pizza8.jpg

8.    Cut the dough into 4 equally sized pieces.

pizza9jpg.jpg

9.     Roll each piece into a tight, smooth ball, cover with a clean dishtowel and set aside to rise until double in size, about 45 minutes.

pizza10A.jpg

10.    Place a ball of dough on a lightly-floured board and, using your fingertips, press it into a flat cake about ½ inch thick. 

pizza10B.jpg

10b.   Lift the dough and, using your hands, gently stretch and rotate the dough in a circular motion until the dough is about ¼ inch thick

pizza11.jpg

11.    Sprinkle corn meal onto the peel. 

pizza11A.jpg

11b.  Lay the shaped pizza dough onto the peel.

pizza12jpg.jpg

12.    Top with sauce and toppings.

13.    Carefully slide the pizza off of the peel and onto the pizza stone in the oven.  Bake until the edges are crispy and underside is brown, about 6-7 minutes.

14.    Remove the pizza with the peel or spatula, place onto a cutting board and let sit 2-3 minutes before cutting.  Repeat with remaining dough.

pizza cover.jpg
PART 1 - PERFECT PIZZAS SAUCE

TIPS & TRICKS

•    You can make the pizza dough and refrigerate it up to a day in advance. Just cover the towel tray with plastic wrap. When ready to use remove the tray from the refrigerator and allow to rise about 45-50 minutes.
•    Pizza sauce can be made in advance. It will last 3-4 days in refrigerator. It can also be frozen.
•    Make sure the sauce is cool before you top the dough with it. Otherwise the dough will stick to the peel.

Featured
caesarcover.jpg
Caesar Salad
pizza sauce3.jpg
Perfect Pizzas - Part 1 - Sauce
Pizza clas cover shot.jpg
Perfect Pizzas - Part 2 - Dough
tiramisu:covershot.jpg
Tiramisu
In Sept 2016 Pizza Class Tags Main, Pizza, Fall
Comment

PRIVACY POLICY 2020

COPYRIGHT 2020 Cucina Casa M