• UnderConstruction
  • Home
  • Seasons
  • Classes
  • Tours
  • About
  • CONTACT
  • Menus
Menu

Cucina Casa M

Street Address
City, State, Zip
Phone Number

Your Custom Text Here

Cucina Casa M

  • UnderConstruction
  • Home
  • Seasons
  • Classes
  • Tours
  • About
  • CONTACT
  • Menus

Chocolate Orange Mousse, with Berries

February 20, 2020 Nancy Madok
mousse:ingred.jpg

Ingredients

6 oz. bittersweet chocolate, chopped
2T unsalted butter, cut into 8 pieces
¼ cup orange liquor
3 large egg whites, room temperature
pinch of salt
3T super fine sugar
1 cup cold heavy cream
1 cup raspberries, washed
Confectioner’s sugar for dusting

1. Place the chocolate in a medium-size heat-proof bowl and set the bowl on top of a pot of boiling water. Turn the heat off. Stir until the chocolate is melted, remove from heat, stir in the liquor and the butter. Stir until the chocolate is completely mixed and smooth. Set aside to cool slightly.

mousse#2a.jpg

2. In a bowl of your mixer, over medium speed beat the egg whites with salt until they form soft peaks, about 2 -3 minutes. While still beating, sprinkle in the sugar by the spoonful and continue beating until soft, shining peaks are formed, about another 2-3 minutes. Set aside.

3. In a clean bowl, whip the cream until it is fairly thick and holds a soft peak.

mousse#4b.jpg

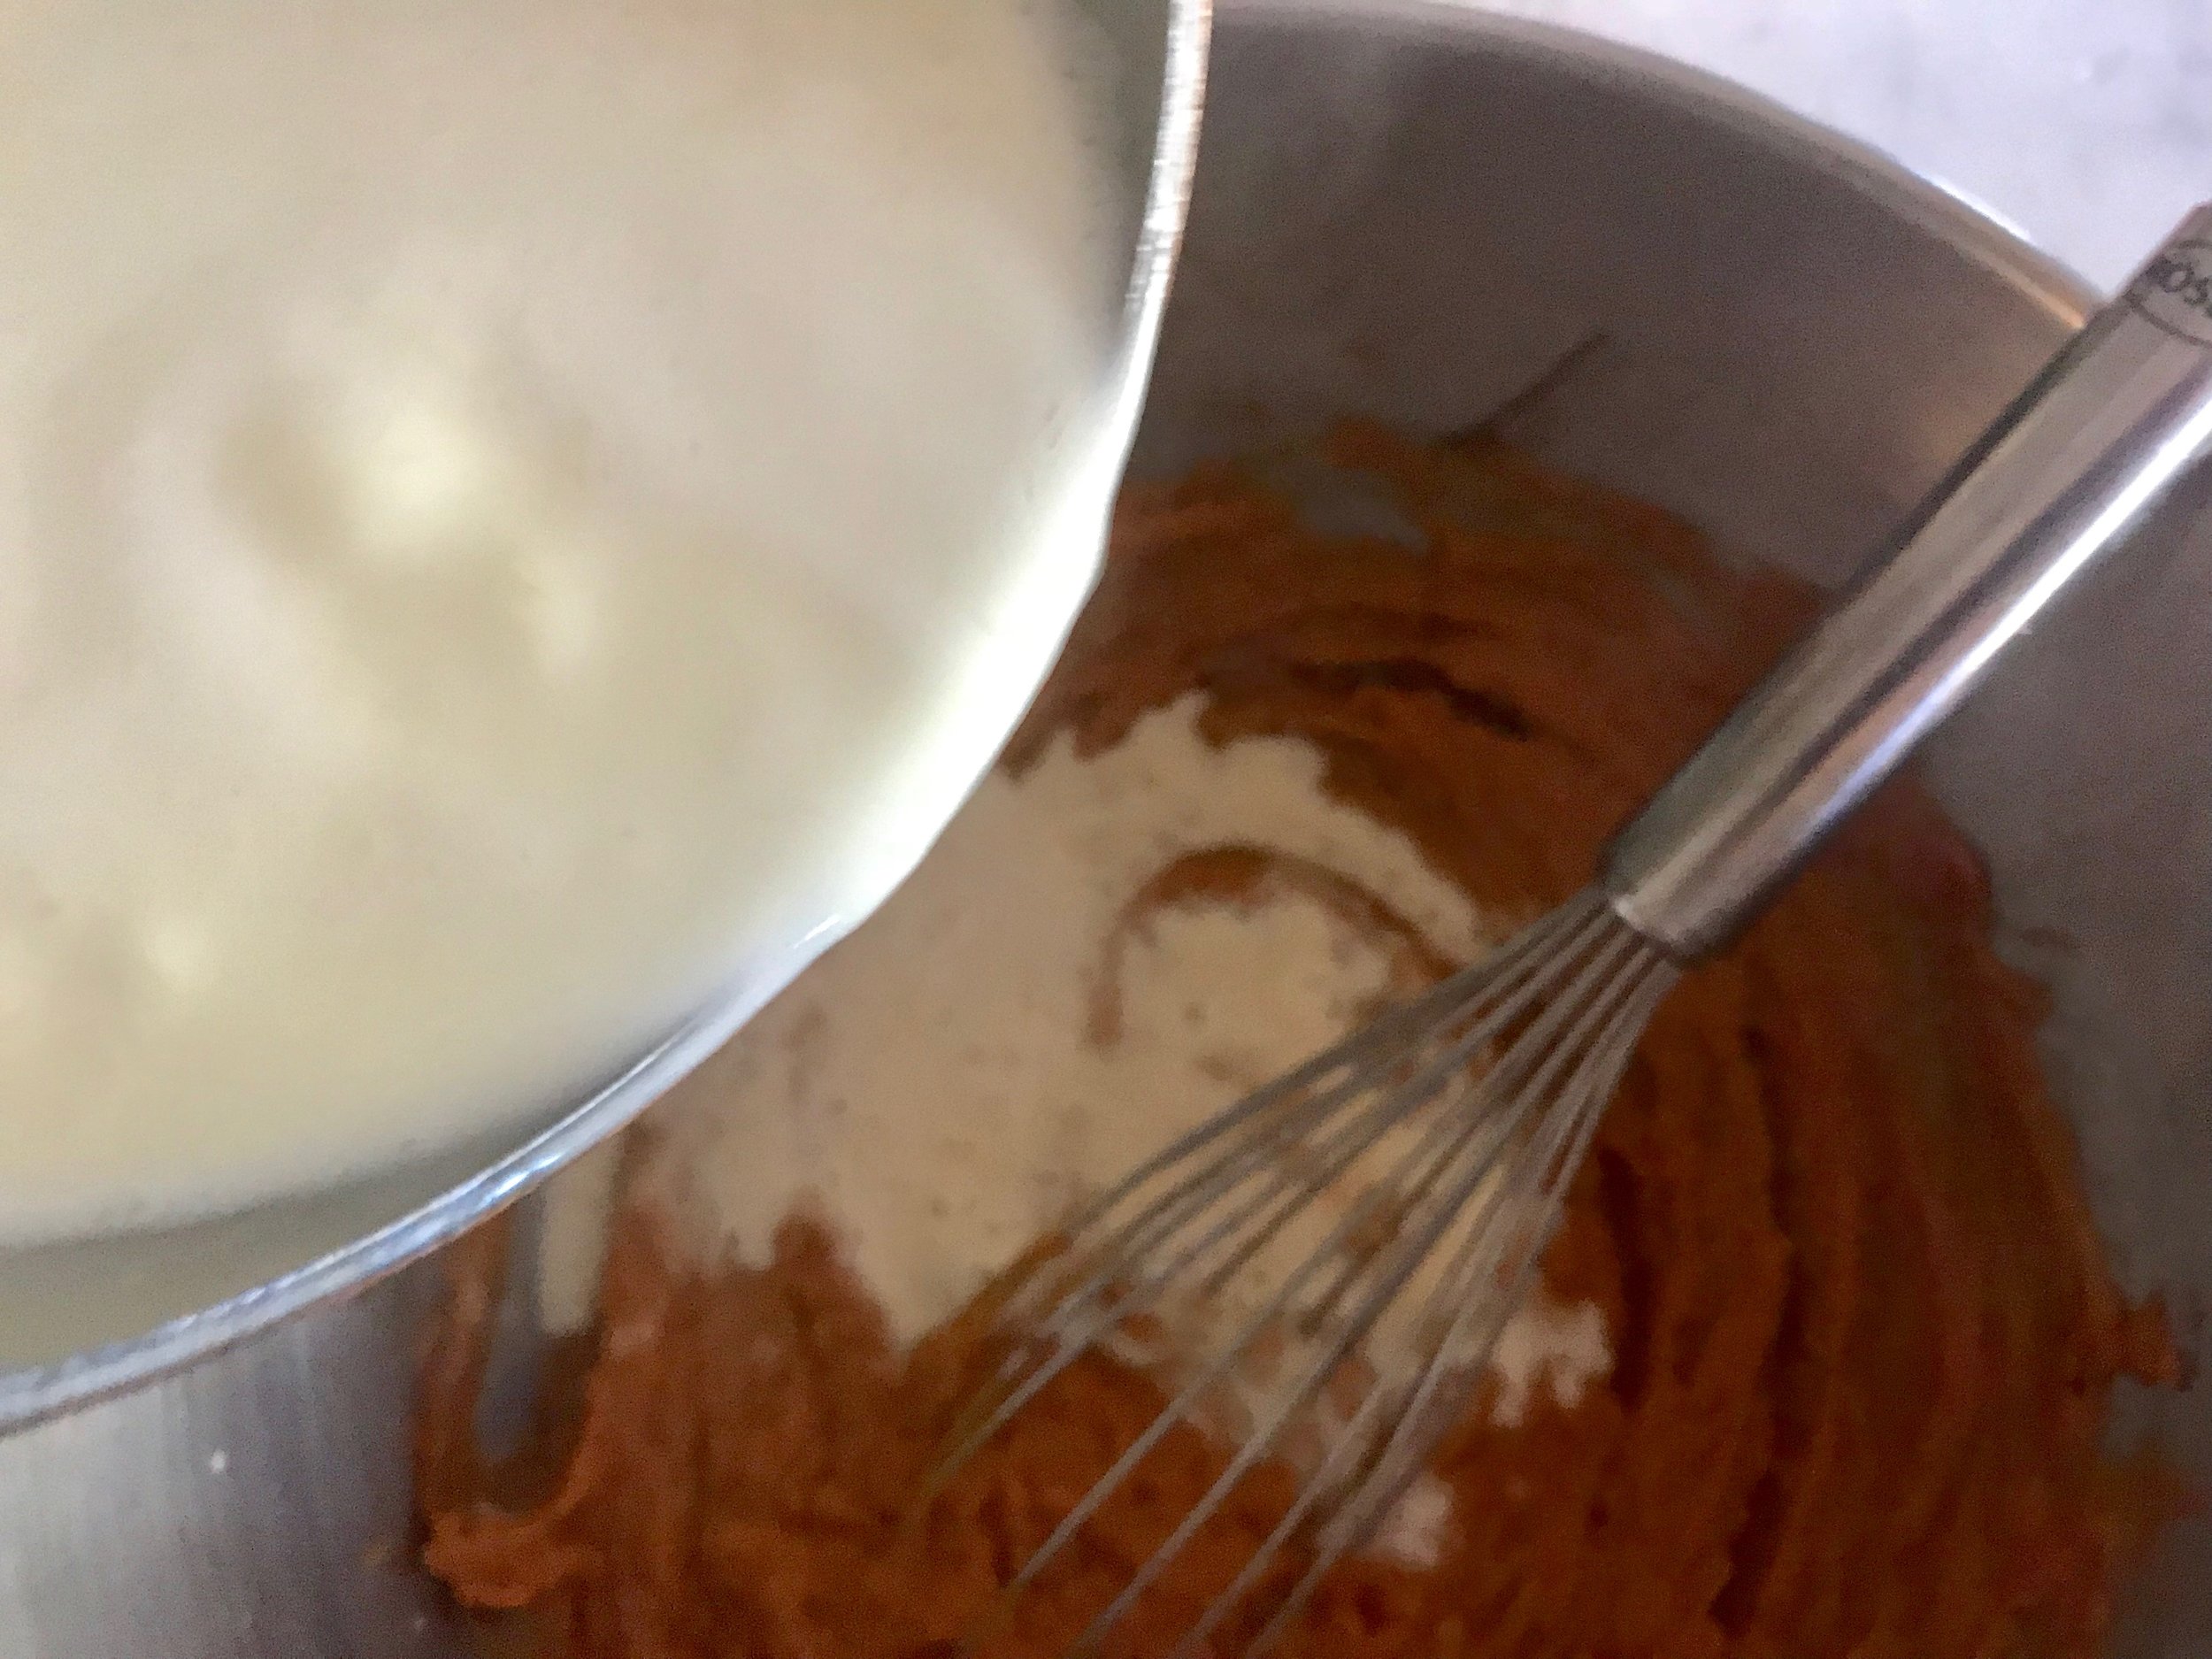
4. Using a large spatula, gently fold about 1/3 of the egg whites into the chocolate mix until slightly incorporated. Fold in the remaining whites. Now fold in the whipped cream gently folding until all the cream is blended in.

5. Spoon or pipe the mousse into serving dishes and refrigerate for at least an hour to firm up.

mousse#6.jpg

6. When ready to serve, sprinkle a few raspberries on top of the mousse. Dust with confectioner’s sugar and serve with meringue kiss cookies on the side.

TIPS & TRICKS

• Use a good dark 60% cacao chocolate.
• You can use Grand Marnier, triple sec, or Cointreau for the orange liquor. I prefer the Cointreau; it adds a clean, light orange flavor.
• Egg whites separate best when they are cold. They beat up best when they are room temperature. They can sit on your counter for hours.
• Take care when separating the egg whites to insure that there is no egg yolk in the whites. Egg yolks have fat, and fat will cause the whites to not whip up. Make sure your mixing bowl is really clean.
• Chocolate mousse can be made two days in advance. Just cover the dishes with plastic wrap. Remove the mousse from the fridge 30 minutes before serving to remove a little of the chill.

DOWNLOAD CHOCOLATE ORANGE MOUSSE

This is a Companion recipe to
Meringue Kisses recipe.
Click photo below to go to recipe.

kisses:cover.jpeg
In February 2020 Class Tags Dessert, Spring, Chocolate, Mousse, Orange, Grand Marnier, Raspberries, Heavy Whipping Cream, Egg Whites, Triple sec, Cointreau
Comment

Meringue Kisses

February 20, 2020 Nancy Madok
kisses:ingred.jpg

Ingredients

4 egg whites at room temperature
¼ tsp. Cream of Tartar
pinch of salt
1 cup superfine sugar
red food color

1. Preheat oven to 200° F.

2. Line 2 baking sheet with parchment paper, set aside.

kisses#3.jpg

3. In the bowl of an electric mixer, beat the eggs whites with the cream of tartar and a pinch of salt at medium speed until they are foamy, about 2-3 minutes.

kisses#4.jpg

4. Add the sugar, 1 tablespoon at a time, allowing time for it to dissolve into the whites. After all the sugar has been added, increase the speed to “high” and continue beating until the egg whites are stiff and shiny, about 8-10 minutes (the whipped egg whites should stick straight up when the whisk is turned upside down).

5. Add a drop or two of food coloring. Mix until combined.

kisses#6.jpg

6. Scoop the egg whites into a piping bag. Pipe the meringue into kisses.

7. Place the sheet pans in the 200° F oven. Bake the meringues for an hour. Turn off the heat to the oven and let the meringues sit and cool inside the oven for about an hour. Cookies should come off easily from the paper.

8. Store in a cool, dry place until ready to use.

TIPS & TRICKS

• The meringue cookies can be colored with different colors and can be flavored with a teaspoon of vanilla or peppermint extract.
• If after 1 hour of baking and 1 hour of “cooling” the cookies still stick to the parchment. Turn the oven back on to 200 degrees. Once it reaches temperature turn the heat off and put the cookies back in the oven and allow them to sit another hour or until they are completely dry.
• The meringue cookies can be made up to two weeks in advance. Store them in an airtight container.

DOWNLOAD MERINGUE KISSES RECIPE

This is a Companion recipe to
Chocolate Orange Mousse, with Berries recipe.
Click photo below to go to recipe.

mousse:cover.jpg
In February 2020 Class Tags Dessert, Spring, Egg Whites, cream of tartar, Sugar, Red Food Color
Comment

Chocolate Salami - Salame al Cioccolato

January 29, 2020 Nancy Madok
salami:ingred .jpg

Ingredients

8oz. dark chocolate, 60% cacao or more, chopped
2T cocoa powder, sifted
7T butter, softened
2/3 cup super-fine granulated sugar
3 egg
1 tsp. vanilla extract
7 oz. tea biscuits, digestive cookies, or Marie biscuits
¾ cup shelled pistachios, toasted and coarsely chopped
¾ cup raw almonds, toasted and coarsely chopped
3T Confectioners’ sugar

1. Place the chocolate in a medium-size, heatproof bowl and set the bowl on top of a pot of boiling water. Turn the heat off. Stir until the chocolate is melted. Remove from heat and set aside to cool slightly. Add the cocoa powder.

2. Place the cookies/biscuits in a bowl or plastic bag and break into small pieces, about the size of a dime.

3. In a medium bowl of you mixer (or by hand), beat the butter and sugar together until light and fluffy, about 2-3 minutes. Add the eggs and mix until combined. Note: the mixture will look broken.

4. Stir the vanilla, and cooled chocolate; mix until combined.

5. Fold in the broken cookies and nuts and mix well.

salamI#6.jpg

6. On your counter, tear off a large piece of plastic wrap, or parchment paper about 15 inches long, place half the batter down the middle of the plastic in a log shape. Roll the plastic up around the batter and, using your hands, roll it back and forth then twist the end closed. Now using your hands roll it back in forth to create a smooth cylinder similar to salami. Repeat with remaining batter.

7. Place the chocolate salami in the refrigerator for at least 3 hours.

8. Once the salami is set, place on a clean piece parchment paper on your counter. Unwrap the salami and place onto the paper; dust the salami with Confectioner’s sugar. Reroll in the parchment and place back into the refrigerator.

9. When ready to serve, unwrap, slice to desired thickness, and place onto a platter.

TIPS & TRICKS

• Super-fine sugar, also called baking sugar, can be made at home. Just place granulated sugar in a food processor and process until the sugar is as fine as sand. Voilà!! Super-fine sugar!!
• You can use any cookie, tea biscuit, or vanilla wafer-style cookie. I like the Marie biscuits because they are crunchy and just slightly sweet.
• To toast nuts, place them on a baking sheet in a 350° F oven for 5 minutes. Give the pan a shake and toast for an additional 3 minutes until slightly brown. Be careful: they burn easily! Chop as desired.
• You can use any nuts: hazelnuts, macadamia or walnut; all substitute very nicely.
• You could also substitute one of the nuts for dried fruits, figs, candies orange peel, or cranberries. All are delicious additions.
• I roll the salami into 2 logs, but you could roll it into 1 large one and slice it and serve it on a plate with a fork for dessert.
• Since this cookie has raw eggs, it is best enjoyed within a few days.

DOWNLOAD CHOCOLATE SALAMI RECIPE
In January 2020 Class Tags Dark Chocolate, Dessert, Winter, Butter, Tea Bisquits, Tea Biscuits, pistachios, Almonds
Comment

Candy Cane Cheesecake

December 19, 2019 Nancy Madok
cake:cover.jpg
cake: ingred.jpg

Ingredients

Crust:
1½ cups chocolate cookie crumbs
4oz butter, melted

Filling:
24 oz. cream cheese, room temperature
¾ cups granulated sugar
4 eggs
1 tsp. peppermint extract

Topping:
1 pint sour cream
2T granulated sugar
1 tsp. peppermint extract
¼ cup crushed candy canes

1. Pre-heat oven to 350° F.

2. Crust: In a small bowl, combine the chocolate cookie crumbs and the melted butter. Stir until the mixture comes together. Using your fingers, press the mixture into the bottom and sides of a 10-inch spring form pan. Set aside.

cake#3.jpg

3. Filling: In a large bowl of your mixer, add the cream cheese and sugar; beat at medium speed until creamy and smooth. Add the eggs, one at a time, beating after each one until combined. Add the peppermint extract.

4. Pour the mixture into the prepared pan and bake for 30-35 minutes in a 350° F oven until the cake is set. Remove from oven and cool for 30 minutes.

5. Topping: Re-Heat oven to 475° F.

6. While the filling of the cheesecake is cooling, in a small bowl, combine the sour cream, sugar and extract. Stir until combined.

7. Place the mixture on top of the cooled cheesecake, spreading it out evenly.

8. Place the cheesecake in the 475° F oven for 5 minutes.
9. Remove from the oven and let the cheesecake to cool; once completely cooled, place in the refrigerator for 12 hours to set and chill.

10. Remove the cheesecake one hour before serving to let the cake come to come up to room temperature. Immediately before serving, top the cake with the crushed candy canes. Cut into slices, enjoy!

NOTE ** Cake needs to chill 12 hours **

TIPS & TRICKS

• 1 sleeve of graham crackers yields 1 cup of crumbs.
• Mix the eggs on low speed and scrape the sides of the bowl down after each addition to ensure that all the cheese gets incorporated into the batter.
• Cheese is best served at room temperature, o make sure to remove the cake from the refrigerator an hour before serving so that the flavors are smooth and creamy.
• Top the cheesecake with the peppermint at the last moment because the candies will melt/bleed on to the top. If you’re not enjoying the whole cake at one time, just top each slice before serving.
• You could top the cake with junior mints, York peppermint patties, or shaved chocolate to serve it year round.

DOWNLOAD CANDY CANE CHEESECAKE RECIPE
In December 2019 Holiday Tags Winter, Dessert, Candy Cane, Cheesecake, Peppermint Extract, Fall, cream cheese
Comment

Raspberry & Peach Short Cake

June 28, 2019 Nancy Madok
cake:ingred.jpg

Ingredients

Pastry
2½ cups all-purpose flour
1/3 cup granulated sugar
1T baking powder
¼ tsp. salt
1 tsp. zest of orange
4 oz. butter cut into pieces, chilled
1 cup heavy cream
1egg, beaten
sugar to sprinkle on top

Topping
2 cup raspberries berries, washed
2 cups peaches peeled and sliced
3T granulated sugar
½ cup Amaretto Liquor
2 cups heavy cream
¼ cups Confectioner’s sugar
1tsp vanilla

1. Preheat oven to 400° F.

2. Pastry: In a large bowl add the flour, sugar, baking powder, salt, and orange zest mix, until combined.

3. With a pastry blender, a fork or your fingers work the butter into the dry ingredients until it is small pieces

cake#4.jpg
cake#4a.jpg

4. Add the heavy cream and stir just until the mixture come together, don’t over mix.

cake#5b.jpg

5. Turn the dough onto a lightly floured surface; roll dough out ½ inch thick. Cut with a 3-inch biscuit cutter and place on a parchment lined baking sheet. Brush with the beaten egg and sprinkle with sugar.

cake#6.jpg

6. Bake at 400° F for 15 minutes, or until golden brown. Remove from oven and set aside to cool.

cake#7.jpg

7. Topping: In a small bowl, toss the berries and peaches with the sugar and Amaretto and allow to sit and hour.

8. In a mixing bowl, beat the heavy cream, confectioner’s sugar, and vanilla until soft peaks form.

9. Assemble: Spilt the short cake biscuits in half, place the bottom on plate or platter, top with boozy fruit, whipped cream and then the top with biscuit top.

10. Serve and enjoy!

TIPS & TRICKS

• Shortcake is best made the day you will eat it.

• I like to stir in the heavy cream with a spoon, but finish incorporating it with hands which seems to work better for me.

• Rolling out the dough to a ½ inch thick will yield 10 cakes, then gather the remaining dough bits and shape into 2 additional cakes. If you wish thicker short cakes, just roll out the dough not as thin.

• I topped the short cakes, with Swedish pearl sugar, which doesn’t melt in the oven. It adds a nice crunch and looks pretty. You can purchase it at: www.kingarthurflour.com You can also top the cakes with turbinado, demerara, or even plain granulated sugar. It will give you a little sweetness to the top of the cake but will melt away and not add the pretty white crystal.

• The fruit is best tossed with the liqueur and sugar 1-2 hours before serving, any longer and the fruit will macerate into small pieces, which tastes good but isn’t really attractive, any left over fruit/sauce is great on yogurt or ice cream.

• Substitute any summer fruit for this recipe. Berries and stone fruit are wonderful.

• You can also use frozen fruit. Defrost on a baking sheet, this way the fruit keeps its shape.

• You can substitute different liqueurs too. Cointreau, Cassis, or rum are delicious.

Download Raspberry & Peach Short Cake RECIPE
In June 2019 Class Tags Summer, Dessert, Raspberries, Peaches, Orange, amaretto, Shortcake, Heavy Whipping Cream, Vanilla
Comment

Strawberry Semifreddo

May 22, 2019 Nancy Madok
freddo:cover.jpg
freddo:ing.jpg

Ingredients

Berries:
2 cup strawberries, washed, hulled & cut in half
3T granulated sugar

Cream:
1cup heavy whipping cream
1tsp. vanilla

Zabaglione:
4 egg yolks, room temperature
4T granulated sugar

Meringue:
4 egg whites, room temperature
pinch of salt
¼ tsp. cream of tartar
¾ cup granulated sugar
½ cup water
1 bar semisweet chocolate

1. Line a 9x5-inch loaf pan with a 12x20-inch piece of plastic wrap; the wrap should hang over the long edges by 4 inches, and it will not completely cover the short ends. Press the plastic into the corners. Set aside.

2. Berries: Place the berries and sugar into the bowl of the food processor and process until puréed. Strain the purée though a medium strainer into a small bowl, set aside.

3. Cream: In a mixing bowl with a whisk attachment beat the heavy whipping cream over high speed until the cream forms stiff peaks, about 4-6 minutes. Gently fold in the vanilla. Place back in the refrigerator.

4. Zabaglione: Place a medium saucepan filled with about 2 inches of water on the stove and brings to a boil. In a heat resistant medium-size bowl, beat the egg yolks and 4 tablespoons of sugar with a whisk or hand mixer until combined.

5. Place this bowl on top of the water-filled saucepan, turn the heat to medium (water should not touch the bottom of the bowl). Beat continuously until mixture is thick, pale yellow, and the batter should make ribbons as it falls off beater/whisk, about 5 minutes. (You may need to remove the bowl occasionally from the heat to prevent the eggs from scrambling).

freddo#6.jpg

6. Remove the zabaglione from heat and gently fold in the strawberry purée. Set aside.

freddo#7.jpg

7. Meringue: In a clean mixing bowl with the whisk attachment, slowly beat the egg whites until foamy, about a minute, then add the salt and cream of tartar; increase the speed slightly and beat until soft peaks are formed, about 3-4 minutes. Turn off the mixer.

8. In a small saucepan with a lid, over medium-high heat, add the granulated sugar and water. Bring the mixture to a boil, swirling the pan until the sugar is dissolved. Do not stir! Cover with the lid and boil to the thread stage*, about 5 minutes, to make a sugar syrup.

Freddo#9a.jpg

9. Turn the mixer back on low and slowly add the sugar syrup. Once the syrup is incorporated, increase the speed to high and beat until the mixture is cool and shiny, stiff peaks are formed.

freddo#10.jpg

10. Using a large spatula, gentle fold in ¼ of the meringue into the zabaglione. When almost completely incorporated add the remaining meringue, continue folding the mixture until fully incorporated. Fold in the whipped cream.

11. Place the mixture into the prepared loaf pan, smooth out the top with an off set spatula: cover the top with the plastic wrap and place in freezer for 8 hours.

12. To serve, unwrap the loaf and invert the loaf pan on to a platter. Pull down slightly on the plastic wrap as you lift the loaf pan. Remove the plastic wrap. If there are wrinkles, dip a knife or offset spatula into a little warm water and run over the surface to smooth out any wrinkles

freddo#13.jpg

13. Garnish with chocolate curls.

14. Cut into slices and serve immediately.

TIPS & TRICKS

• *We are cooking the sugar and water together to make sugar syrup. To test if your syrup has cooked it enough, take a small amount of the syrup and drop it into a cup of cold-water. Little threads should appear. Of if you have a candy temperature cook until 230°

• Carefully add the sugar to you egg whites, trying not to hit the beaters as you add the hot syrup.

• You can test the temperature of the meringue by placing your hand on the bottom of the mixing bowl. When it is cool to the touch, the meringue is ready.

• This is called an Italian meringue. It also makes a fantastic icing for cakes & cup cakes.

• The semifreddo can be made several days in advance. Store in your freezer until ready to serve.

• Use the freshest sweetest strawberries, or you can substitute frozen. You can also make the with raspberries or a combo of berries.

• To make chocolate curls, place bar of chocolate in microwave for just a few seconds. Then using a potato peeler make the curls. You can make them ahead and top semifreddo before serving

DOWNLOAD STRAWBERRY SEMIFREDDO RECIPE
In May 2019 Class Tags Spring, Dessert, Strawberries, Whipping Cream, egg whites, cream of tartar, Egg yolks
Comment

Carrot Cake With Honey Cream Cheese Icing

April 15, 2019 Nancy Madok
cake:cover.jpg

Ingredients

Cake:
1 T Butter, soften
2 T flour
3 cups all purpose flour
1½ tsp. baking soda
2 tsp. cinnamon
½ tsp. salt
2 cups grated carrots
1 cup chopped pecans, toasted*
1 ½ cups granulated sugar
3 eggs
¾ cups vegetable oil
1 cup can crush pineapple w/ juice
¾ cup Greek nonfat yogurt
2 tsp. vanilla

Frosting:
2 8 oz. packages cream cheese, softened
1 stick butter, softened
1 T orange zest
¾ honey
½ cup confectioners’ sugar
¼ cup chopped pecans

1. Pre-heat the oven to 350º F.

2. Butter and flour two 9-inch round cake pans. Line the bottom with parchment paper and set aside.

3. In a medium bowl, sift the flour, baking soda, cinnamon, and salt together, add the carrots and nuts and toss until well coated with the flour mixture. Set aside.

4. In a mixer set on medium speed, mix together the sugar and the eggs until well combined. Add the oil, pineapple, yogurt, and vanilla. Mix well, scrape down the side of the bowl.

5. With the mixer on low, add carrot nut ingredients. Mix just until combined.

6. Pour batter into the prepared pans and bake at 350º F for 35-40 minutes or until toothpick comes out clean.

7. Place cake pans onto a cooling rack and allow to cool for 10 minutes before unmolding. Allow to completely cool before frosting.

8. Frosting: In a medium bowl, cream together the cream cheese, butter, and honey until creamy and smooth, about 3 minutes. Add in the sugar and orange zest. Beat until smooth.

9. Place one layer of completely cooled cake on the platter. ( if you wish use a cake cutter to remove/cut off the cake edges) Spread ½ the frosting on top. Place the remaining cake on top and frost with remaining frosting.

10. Decorate with chopped nuts. Serve and enjoy.

*To roast nuts: preheat oven 350º F. Place nuts on a baking sheet and bake for 5 minutes. Shake the pan and continue baking until nuts are toasted, about 3-5 minutes more. Let them cool. The roasted nuts can be stored in an airtight container for weeks.

Tips & Tricks

• The cake can be made the day ahead and placed in zip lock gallon bags or covered very well.

• You may frost the cake in advance, just place in fridge, and remove 1 hour before serving so the frosting can soften slightly.

• You may cook this cake in a 9x11 square pan or as cup cakes (check the cupcakes after baking 20 mins.)

Download Carrot Cake Recipe
In April 2019 Tags Dessert, Spring, Carrot, cream cheese, honey, Greek Yogurt, Pecans
Comment

Olive Oil Orange Cake

March 31, 2019 Nancy Madok
cake:cover.jpg
cake:ingred.jpg

Ingredients

1T butter, room temperature

1T all-purpose flour

3 eggs

1 cup sugar

3 cups all-purpose flour

1T baking powder

1T orange zest

3T orange juice

¾ cup good quality olive oil

2/3 cup milk

Confectioner’s sugar for dusting

4 oranges, peeled, sliced into ½ moons

2T granulated sugar

4T Cointreau or Grand Marnier

1. Preheat oven to 325º F. Using the 1T butter and 1T flour, grease and flour the bottom and sides of a10-inch angel food or Bundt cake pan.

cake 1.jpg
cake 2.jpg
cake 2a.jpg
cake 2b.jpg

2. In a mixing bowl, beat the eggs and sugar on medium-high speed for 1-2 minutes, until light in color.

cake 3.jpg

3. With the mixer on low, add the flour, baking powder, orange zest, juice, olive oil and milk; mix just until combined. Do not over mix! Use a spatula to finish combining, if needed. (Mixture will look lumpy similar to muffin batter)

cake 4.jpg

4. Pour the batter into the prepared pan, smooth the top. Bake for 40-50 minutes or until toothpick inserted in the middle comes out clean. Cool for 15 minutes, and then turn onto cooling rack to cool completely

5. When completely cool, dust with confectioner’s sugar.

6. In a small bowl, toss the orange slices, sugar and liqueur let sit for 10 minutes. Serve with cake.

cake 6a.jpg

Tips & Tricks:

• I love this cake because it’s so versatile. It’s just sweet enough to end a meal, but perfect to start your day with or as a pick-me-up with a cup of tea in the afternoon. Top it with macerated fruit. I used blood oranges, but you could use regular oranges, tangerines, or substitute the oranges and use berries (about 2 cups). You can add a dollop of whipped cream, ice cream or yogurt to make it extra special.

• You can substitute the orange zest and juice for lemons, especially Meyer lemons are great in this cake.

• Use an olive oil that has a nice fruity flavor. I prefer Italian or boutique olive oil from Napa or Temecula Calf are lovely, some are infused with citrus and add a nice additional citrus punch.

DOWNLOAD OLIVE OIL ORANGE CAKE
In March 2019 Class Tags Dessert, Powdered Sugar, Olive Oil, Grand Marnier, Cointreau, Oranges, Spring
Comment

Chocolate Bread Pudding

February 28, 2019 Nancy Madok
puddin:cover.jpg

Ingredients

1 baguette
1T butter room temperature
4 cups milk
2 cups heavy whipping cream
¾ cups granulated sugar
¼ tsp. salt
16 oz. dark chocolate, (60-70 % cacao) chopped
6 eggs
2 tsp. vanilla
Powdered sugar for dusting

1. Cut the bread into ½ inch cubes (8cups) and place on a baking sheet and allow it to sit out on counter and dry out overnight or place the sheet pan in a 325° F oven for 10-15 minutes to dry them out.

2. Take the tablespoon of butter and a paper towel and butter the bottom and sided of an 8x11-baking dish. Set aside.

3. In a saucepan over medium heat, add the milk, heavy cream, sugar, and salt. Stir until the sugar has dissolved and the milk is warmed through about 4- 6 minutes.

4. Turn off the heat and add the chocolate. Let sit until chocolate has melted, about 3-5minutes. Stir until well blended.

5. In a large bowl, add the eggs and vanilla and beat until combined. Add a small amount of the warm chocolate mixture to the eggs and stir until the egg mixture is tempered, then add the rest of the chocolate mixture. Stir until combined. Add the bread pieces.

6. Place a plate on top of the bread to keep it submerged

7. Let the pudding mixture sit at room temperature for 1 hour. Pre-heat the oven to 325º F.

8. Put a kettle or saucepan of water on high heat and bring to a boil.

9. Place the baking pan into a roasting pan. Pour the pudding mixture into the buttered baking dish.

10. Place the roasting pan on the middle rack of your 325º F. oven, carefully fill the roasting pan with the boiling water so that is come ½ way up the side of the pudding dish.

11. Bake for 45-50 minutes until edges are set but center is slightly loose.

12. Remove from oven careful remove pudding from water bath and place on cooling rack and cool for 20 minutes.

13. Dust with powdered sugar and serve immediately

Tips & Tricks

• This recipe is perfect for using old dried out bread. You can use any type you have: French, Italian, challah, and even leftover biscuits. Just cut it into cubes, measure out 8 cups, and allow it to dry out.

• When selecting chocolate look for the percentage of cacao in the chocolate. It should be marked right on the front package. The higher the percentage of cacao in the chocolate, the more intense the chocolate flavor and less sugar.

DOWNLOAD BREAD PUDDING RECIPE
In February 2019 Class Tags Winter, Dessert, Pudding, Chocolate, Heavy Whipping Cream, Dark Chocolate, Powdered Sugar
Comment

Amaretto, Almonds & Pear Trifle

December 17, 2018 Nancy Madok
trifle:cover.jpg
trifle:ingrd.jpg

Ingredients

Custard:
2½ cups cup milk
½ cup heavy cream
6 egg yolks
3T cornstarch
½ cup sugar
pinch of salt
1T vanilla paste or extract
1T butter, cold

Trifle:
2 cups pears, peeled, seeded and cut into cubes (about 2-3 pears). Use Bartlett, Anjou, or Comic
1 cup frozen raspberries, defrosted
1 cup sliced almonds toasted
½ cup toasted, shredded coconut
1pkg ladyfinger biscuits/cookie, (24 biscuits)
1 cup apricot jam
½ cup Amaretto liquor
1 cup heavy whipped cream
3T confectioner’s sugar
12 half pint jars with lids

1. Custard: In a medium saucepan, over medium heat, heat the milk, cream until hot, but not boiling.

trifle2.jpg
trifle2a.jpg
trifle2b.jpg

2. In a mixing bowl, combine the egg yolks, cornstarch, sugar, salt and vanilla. Whisk together until light in color and well blended. Add a cup of the hot milk to the egg mixture and whisk until combined. Now pour the warmed egg mixture into the hot milk, whisking constantly.

trifle3.jpg

3. Return the pan to the stove and stir until mixture thickens, about 6-8 minutes.

trifle4.jpg
trifle4a.jpg
trifle4b.jpg

4. Remove from heat and pass through a fine strainer. Stir in the butter and let cool completely. Place a piece of parchment or plastic wrap directly on top of the custard so that it doesn’t form a skin.

trifle5.jpg

5. In a small bowl, combine the pears and raspberries. Mix until combined. Set aside.

trifle6.jpg

6. In a small bowl, combine the toasted nuts and coconut. Mix until combined and set aside.

trifle7.jpg

7. In a bowl with a whisk/beater, whip the heavy cream and sugar until soft peaks are formed. Set aside.

trifle8.jpg
trifle8a.jpg

8. Place the ladyfinger biscuits on a baking sheet pan and spread each one with jam. Sprinkle the amaretto on top of the biscuits.

trifle9.jpg

9. Break a biscuit in half and place the pieces, jam side up on the bottom of a jar, pushing them down.

trifle10.jpg
trifle10a.jpg

10. Add a tablespoon of the custard, then a tablespoon of the pear-berry mixture.

trifle11.jpg

11. Sprinkle some of the nut-coconut mixture on top.

trifle12.jpg

12. Repeat with another layer of biscuit, custard, and fruit.

trifle13.jpg
trifle13a.jpg

13. Top with the whipped cream. Decorate the top with nut-coconut mixture. Cover with lid. Repeat with the remaining jars.

14. Refrigerate 3 hours (or overnight is better) before serving.

trifle15.jpg

15. To serve, tie a bow around each jar, place on dessert plate and serve.

Notes:

• Nuts: To roast nuts: preheat oven 350º F. Place nuts on a baking sheet and bake for 5 minutes. Shake the pan and continue baking until nuts are toasted, about 3-5 minutes more. Let them cool. The roasted nuts can be store in an airtight container for weeks.

• Coconut: To toast coconut: preheat oven 350º F. Place coconut on a baking sheet and bake for 8-10 minutes, or until coconut is slightly brown (not all the coconut will become brown).

TIPS & TRICKS

• Trick to test if custard is cooked enough: stir the custard with a wooden spoon. It should be thick enough to coat the back of the spoon, and when you draw a line with your finger, it holds. Custard can be made 2 days ahead.

• In the winter months, I like to use a combination of pears and frozen berries, or you can use just the frozen berries. In the summer months, I use fresh berries and stone fruits or a combination of both. This is just the best dessert for a crowd!

• Chopped walnuts, pecans, also work well too!

• You can use pound cake instead of ladyfinger biscuits.

• Change the jam to match your fruit. Strawberry and raspberry work as well.

• As you change the fruit and jams, you can change the liquor. Traditionally trifle is made with sherry, but you could also use Cointreau, cassis, or Bourbon.

• The trifle is traditionally served in a trifle bowl. I thought it would be fun and festive to have each guest have his or her own little dessert to resemble a present. You can also make the trifle in a large glass bowl. You might not need to break the biscuit into pieces if the container you are using is larger than the jars.

• The trifle cans be assemble 2 days ahead.

DOWNLOAD AMARETTO ALMONDS PEAR TRIFLE RECIPE
In December 2018 Class Tags Winter, Christmas, Dessert, amaretto, Almonds, pears
Comment

Pumpkin Spice Crème Brûlée

November 16, 2018 Nancy Madok
brulee:cover.jpg
brulee:ingrd.jpg

Ingredients

3 cups heavy whipping cream
½ cup granulated sugar
5 egg yolks
1 can (15oz. pure pumpkin)
1T vanilla bean paste or vanilla extract
1 tsp. cinnamon
½ tsp. nutmeg
½ tsp. ginger
½ cup granulated sugar (for topping)

1. Pre-heat the oven to 325° F. Place oven rack in center of the oven.

brulee2.jpg

2. Place ten ¾ cup ramekins in a large ceramic or metal roasting pan. (you may need 2 pans)

brulee3.jpg

3. In a medium saucepan over medium heat, add the cream, and sugar. Let the sugar dissolve; heat the mixture until its come to a simmer.

4. Bring a teakettle or a saucepan full of water to a boil and set aside.

brulee5.jpg
brulee5a.jpg

5. In a medium bowl, whisk the egg yolks, pumpkin, vanilla and spices until blended. Slowly add the hot cream mixture and whisk until well blended.

brulee6.jpg

6. Pour the mixture into each ramekin to about ¾ full. Place the roasting pan holding the ramekins onto the oven rack, and then fill the pan with enough hot water to come halfway up the sides of the ramekins, being careful not to get any water into the custard. Bake the custard until the center is almost set, about 30-35 minutes.

brulee7.jpg

7. Remove ramekins from the pan, place on a cooling tray, and cool for 30 minutes. Place into refrigerator and chill at least 4 hours.

brulee8.jpg
brulee8a.jpg

8. When ready to serve, sprinkle 1-2 teaspoon of sugar onto the top of the custard in each ramekin. Using a blowtorch or the broiler, melt the sugar until bubbly and light brown, but be careful not to burn the sugar. Serve!

brulee8b.jpg

TIPS & TRICKS

• Pour the pumpkin mixture back into the measuring cup for easy filling of the ramekins.

• If you use ½ cup ramekins and the recipe yield 12 serving.

• You can make the custard 3 days is advance.

• Freeze the egg whites for another use.

• Place the pan with the filled ramekins in the over before filling the pan with hot water.

• Use a kitchen towel to careful grab the cooked custard and remove them from the water.

Download Pumpkin Creme Brulee Recipe
In Thanksgiving 2018 Class Tags Dessert, Fall, Thanksgiving, Whipping Cream, Cinnamon, Nutmeg, Ginger, Brulee
Comment

Peach Clafouti

September 30, 2018 Nancy Madok
peach:cover.jpg

Ingredients

1 tsp. butter room temperature

3-4 yellow or white peaches

3 large eggs

1/3 cup sugar

1/3 cup flour

1 tsp vanilla extract or paste

2T Amaretto Liqueur

¼ cup heavy or whipping cream

½ cup milk

2T butter, melted

½ cup sliced almonds

Confectioner’s sugar

1. Heat oven to 350º F.

2. Using a paper towel, smear the butter all over the inside of a 4-6 cup baking dish.

3. Place enough water to cover the peaches in a saucepan. Then set on high heat until it comes to a boil. Turn off the heat.

peach4.jpg

4. Place the peaches in the water for 2-3 minutes; remove from the water with a slotted spoon and place in a bowl of ice. Toss the peaches around until slightly cooled.

5. Using a paring knife, peel the peaches. Remove the pit and cut into medium dice pieces so that you have about 4 cups of fruit. Place in the buttered dish.

6. In a large bowl, whisk the eggs and sugar until lightly frothy and the sugar is dissolved.

7. Add the flour, vanilla, and Amaretto. Whisk until smooth.

8. Whisk in the milk, heavy cream, and melted butter.

9. Pour the batter on top of the fruit.

10. Sprinkle the almonds on top.

11. Bake until puffed and brown and skewer comes out clean, about 40 minutes.

12. Dust with confectioner’s sugar. Serve warm.

TIPS & TRICKS

• Depending on the size of your peaches, you might only need 3; but I always buy an extra one in case one is mealy or there is a surprise inside. Yellow peaches have the classic peach, slightly acidy tart taste, while the white ones are very floral and sweet. Both are delicious!

• As the seasons change you can use pears, berries, nectarines, plums, or cherries which are the classic fruit used in the clafouti.  I invite you to try them all.

• Use can also change up the liqueur to match the fruits. A little brandy pairs perfectly with the pears or plums, while Cointreau or Grand Marnier works lovely with the nectarines and berries.

• If you don’t have heavy cream, you can use ¾ cup of milk. I use whole milk.

In September 2018 Class Tags Dessert, Clafouti, Peaches, A, amaretto, Almonds, Whipping Cream, Fall
Comment

Apricot Galette

July 27, 2018 Nancy Madok
apricotcover.jpg

Ingredients

Pastry
1½ cup all purpose flour
¼ tsp. salt
½ tsp. granulated sugar
1 stick, 8T butter, cut into cubes and cold
8T ice cold water

Filling:
1½ pounds apricots
3T ground raw almonds
5T granulated sugar
1 egg, beaten


1.    Pastry: In a food processor, add the flour, salt, and sugar. Pulse a few times until combined. Add the butter and then pulse until the mixture has bits of butter the size of peas.  


2.    Add the cold water and pulse just until the mixture starts to come together. It will look shaggy.

3.    Dump the dough onto a piece of plastic film. Use the plastic to bring the dough together.  Flatten the dough into a disk and chill for at least 1 hour.


4.    Preheat oven to 400° F. If you have a pizza stone, place it on a rack in the middle of the oven.

5.    On a lightly floured surface, roll the dough out into a circle about 14 inches diameter. Then transfer the dough to a parchment-lined baking sheet pan. Place in refrigerator for 10 minutes. 

6.    Fruit: Cut the apricots in half and remove the pit. (If they are large, cut into quarters).

7.    Remove the pastry from the refrigerator. Sprinkle the ground almonds onto the dough, leaving a 2-inch border.  


8.    Place the apricots skin-side up on top of the almonds, fitting them closely against each other. Sprinkle the 3tablespoons of sugar over the apricots.


9.    Fold the dough border over the fruit, forming pleats and making sure that there are no holes. Brush with beaten egg and sprinkle with the remaining 2 tablespoons sugar.

10.    Place the tart into the 400° F oven onto the pizza stone for 40-45 minutes, until brown and bubbling.

11.    Remove the tart from the baking sheet by pulling on the parchment paper and sliding the paper and the tart onto a cooling rack. Cool for 20-30 minutes until the fruit juices have set.  

12.    When cool, cut into slices. It’s even better served with whipped cream or ice cream.

TIPS & TRICKS

•    I make several recipes of the pastry dough, wrap them in the plastic film, and then place them in a freezer zip lock bag. They will last in your freezer for six months. When ready to use, remove one from the freezer and allow to defrost in the refrigerator. Then follow the recipe from step #4.
•    You can substitute the apricots with other stone fruit, such as peaches, nectarines, or plums. 
•    You can buy ground almonds or just take a ¼ cup of whole raw almond and “grind” them in your food processor. The nuts add a little texture to the crust and help absorb some of the fruit juice.
•    You can substitute turbinado sugar for the granulated sugar for a little extra crunch.
•    Cooking the galette on the pizza stone helps makes the crust very crisp.
•    Sliding the galette on to the cooling rack helps keep the crust from getting soggy while it cools.
•    Galette is best severed warm to room temperature. 


In July 2018 Class Tags Apricots, Galette, Dessert, Summer, Almonds, Pastry
Comment

Triple Berry Nut Crumble

June 25, 2018 Nancy Madok
berry:cover.jpg

Ingredients

6 cups berries: blackberries, blueberries, raspberries, or strawberries, washed and cut into pieces
½ cup granulated sugar

Crumble:
1¼ cup all purpose flour
2/3 cup golden brown sugar
Pinch of salt
10 tablespoons cold butter, cut into pieces.
1½ cups coarsely chopped toasted nuts: walnuts, pecans, or almonds
1 pint vanilla ice cream 

1.    Preheat oven to 350º F.

2.    In a medium-size bowl, toss the berries with the granulated sugar until well combined. Pour into a 10”x12” baking dish.


3.    In a small bowl, combine the flour, brown sugar, salt, and butter. Using your fingers, mix until it resembles cornmeal. Toss in the nuts.


4.    Sprinkle the crumble on top of the berries and bake in a 350° F oven for about 50-60 minutes, or until brown and bubbling.


5.    Remove from oven and cool for at least 15 minutes before serving into individual bowls. 

6.    Can be served with ice cream, or a drizzle of heavy cream.


Roasted Nuts:

1.    Preheat oven 350º F. Place nuts on a baking sheet and bake for 5 minutes. Shake the pan and continue baking until nuts are toasted, about 3-5 more minutes.  Set aside.

TIPS & TRICKS


•    The crumble topping can be made ahead and just placed on top of berries before baking. 
•    This dish is best served warm.
•    I make several crumble topping’s ahead and place in Ziploc bags in my freezer. Then I just have to shop & prepare the berries. This makes this desert even easier!!
•    You can substitute other summer fruits. Peaches, nectarines, apricots work wonderfully in this recipe.
•    I pre-scoop my ice cream. Take a baking sheet lined with parchment paper. Scoop soften ice cream onto the baking sheet. Placed the sheet pan into freezer. Remove the pre-scooped ice cream balls a few minutes before serving dessert. (Once the ice cream balls have frozen solid you can transfer them to a Ziploc bag if you’re short on freezer space.)

In June 2018 Grill Class Tags Summer, Dessert, Blackberries, Blueberries, Raspberries, Strawberries
Comment

Orange & Pistachio Semifreddo

April 15, 2018 Nancy Madok
semicover.jpg

Ingredients

1 cup heavy whipping cream
1 tsp. vanilla 

4 egg yolks, room temperature
4T granulated sugar

¼ cup Cointreau
1T orange zest
½ cup plus 1 tablespoon shelled pistachios, medium chop/dice

4 egg whites, room temperature
pinch of salt
¼ tsp. cream of tartar

¾ cup granulated sugar
½ cup water

semi1.jpg

1.    Line a 9x5-inch loaf pan with a 12x20-inch piece of plastic wrap; the wrap should hang over the long edges by 4 inches, and it will not completely cover the short ends. Press the plastic into the corners. Set aside.

semi2.jpg
semi2a.jpg

2.    Cream: Place the bowl and beaters of your mixer in the refrigerator for 15 minutes to chill. Then, beat the heavy whipping cream on high speed until the cream forms stiff peaks, about 4-6 minutes. Gently fold in the vanilla. Place back in the refrigerator. 

3.    Zabaglione: Place a medium saucepan filled with about 2 inches of water on the stove and bring to a boil. In a heat resistant medium-size bowl, beat the egg yolks and 4 tablespoons of sugar with a whisk or hand mixer until combined.

semi4a.jpg

4.    Place this bowl on top of the water-filled saucepan and turn the heat to medium (water should not touch the bottom of the bowl). Beat continuously until mixture is thick and pale yellow. The batter should make ribbons as it falls off the beater/whisk, about 5 minutes. (You may need to remove the bowl occasionally from the heat to prevent the eggs from scrambling.)

semi5.jpg

5.    Remove from heat and gently fold in the Cointreau, orange zest, and the ½ cup of pistachios. Set aside.

semi6a.jpg

6.    Meringue: In a clean mixing bowl with the beater, slowly beat the egg whites until foamy, about a minute. Then add the salt and cream of tartar. Increase the speed slightly and beat until soft peaks are formed, about 3-4 minutes. Turn off the mixer.

7.    In a small saucepan with a lid, over medium-high heat, add the granulated sugar and water.  Bring the mixture to a boil, swirling the pan until the sugar is dissolved. Do not stir!  Cover with the lid and boil to the thread stage*, about 5 minutes, to make sugar syrup.

semi8a.jpg

8.    Turn the mixer back on to low and slowly add the sugar syrup. Once the syrup is incorporated, increase the speed to high and beat until the mixture is cool and shiny, stiff peaks are formed.

semi9a.jpg

9.    Using a large spatula, gently fold in ¼ of the meringue into the zabaglione. When almost completely incorporated, add the remaining meringue. Continue folding the mixture until fully incorporated.

semi10.jpg

10.    Fold in the whipped cream.

semi11.jpg
semi11a.jpg

11.    Place the mixture into the prepared loaf pan and smooth out the top with an off set spatula. Cover the top with the plastic wrap and place in freezer for 8 hours.

semi12.jpg
semi12a.jpg
semi12b.jpg

12.    To serve, unwrap the loaf and invert the loaf pan on to a platter. Pull down slightly on the plastic wrap as you lift the loaf pan. Remove the plastic wrap. If there are wrinkles, dip a knife or offset spatula into a little warm water and run over the surface to smooth them.

13.    Garnish with the tablespoon of pistachios. Cut into slices and serve immediately.

TIPS & TRICKS

•    *We are cooking the sugar and water together to make a sugar syrup. To test if your syrup has cooked enough, take a small amount of the syrup and drop it into a cup of cold-water. Little threads should appear. 
•    Carefully add the sugar to your egg whites, trying not to hit the beater as you add the hot syrup. 
•    You can test the temperature of the meringue by placing your hand on the bottom of the mixing bowl. When it is cool to the touch, the meringue is ready.
•    This is called an Italian meringue. It also makes a fantastic icing for cakes & cupcakes.
•    This semifreddo can be made several days in advance. Store in your freezer until ready to serve. 


In April 2018 Class Tags Spring, Orange, Pistachio, Semifreddo, Dessert, Cointreau, Egg Whites
Comment

Very Berry Crumble Coffee Cake

March 25, 2018 Nancy Madok
cakecover.jpg

Ingredients

Crumble:
¾ cups brown sugar
½ cup all-purpose flour
¼ tsp. salt
¾ cups almonds, pecans or walnuts, rough chopped
3T unsalted butter, room temperature 

Cake:
½ tsp. salt
½ tsp. baking soda
2 tsp. baking powder
2½ cups cake flour
1½ stick unsalted butter, room temperature
1½ cups granulated sugar
3 eggs
2 tsp. vanilla
1¼ cup unflavored Greek yogurt
3 cups berries (strawberries, blackberries blue berries or raspberries), 
 fresh washed and hulled or frozen thawed

1.    Preheat oven to 350° F.

2.    Crumble: using your fingers or a spoon and in a small bowl, mix the brown sugar, all-purpose flour, salt, nuts and butter until it comes together into a crumbly mixture.


cake3.jpg

3.    Cake: in another small bowl, sift the, salt, baking powder, baking soda and cake flour. Set aside.


4.    In a bowl of your mixer, with the paddle over medium-high speed, cream together the butter and sugar until light and fluffy, about 3-4 minutes. Scrape the side of the bowl.


cake5a.jpg

5.    Lower the mixer speed to medium and add the eggs one at a time. Scrape the sides of the bowl after each egg.


6.    Add in the vanilla and yogurt and mix until incorporated.


7.    Slowly add the flour mixture mix until combined. Batter will be very dense.


8.    Spoon half the batter into a 9x13-inch baking pan and spread it out evenly. 


9.    Sprinkle the berries all over the batter.


10.    Then, sprinkle half the crumble over the berries

11.    Then top with remaining batter, carefully spreading the batter over the berries to cover it. Top with remaining crumble topping.


12.    Bake at 350° F for 45-50 minutes, or until golden brown.

13.    Cool the cake for 20 minutes. Cut into squares and serve warm or room temperature.


TIPS & TRICKS

•    I prefer to use frozen berries when fresh berries aren’t in season or     don’t look that good.
•    You can also prepare this cake in an angel food pan for a totally different look. Follow the above instruction, except increase the baking time to 50-55 minutes.


In March 2018 Class Tags Dessert, Crumble, Coffee Cake, Berries, Spring
Comment

Gâteau au Chocolat Fondant de Nathalie (Natalie’s Chocolate Cake)

March 5, 2018 Nancy Madok
cake cover.jpg
cake ingred.jpg

Ingredients

½ cup raw hazelnuts
7 oz. bittersweet chocolate, cut into pieces
1¾ sticks unsalted butter
1¼ cup granulated sugar.
5 eggs
2T Frangelico
1T all-purpose flour
Confectioner’s sugar

1.    Pre-heat oven to 350° F.

2.    Place the hazelnuts on a rimmed baking sheet. Place in the 350° F oven and roast for 5-7 minutes until they are slightly brown and fragrant.

cake3.jpg
cake3a.jpg

3.    Remove from the oven and place nuts on a clean kitchen towel. Gently rub the nuts to remove their outer skins. Let the nuts cool, then roughly chop them. Set aside.

4.    Increase the oven temperature to 375° F

5.    Place the chocolate and butter into a medium bowl. Using either the microwave or a double boiler, melt the chocolate and butter. Stir until combined.

cake6.jpg

6.    Add the granulated sugar. Stir until well combined and chocolate has slightly cooled.


cake7.jpg
cake7a.jpg

7.    Add the eggs one at a time, stirring until each egg is completely combined. Mixture will start to thicken.

cake8.jpg

8.    Stir in the Frangelico and then the flour.


cake9.jpg

9.    Pour the batter into a 10-inch spring form pan.


10.    Bake in 375° F oven for 20-25 minutes. The sides should be firm, but center should still have a little jiggle.


11.    Cool at least 8 hours or overnight so that the cake will set and firm up. 

12.    Before serving, dust the top of the cake with confectioner’s sugar. Sprinkle the chopped hazelnuts on top.


13.    Remove the sides of the pan, cut, and serve


TIPS & TRICKS

•    Recipe adapted from Trish Deseine.
•    Allow the cake to sit at least 8 hours, or overnight, in a cool place. The cake will firm up and have a wonderful fudge texture. 
•    Using a wooden spoon to mix the cake really helps blend in the eggs completely. Do not use a whisk because we don’t want to add any air to the batter. 
•    Substitute the Frangelico with Cointreau for a slight orange flavor. You can also garnish the cake with fresh berries and whipped cream.
•    Cake will slightly collapse and may crack as is cools. Don’t worry; confectioner’s sugar will cover it all.  

In February 2018 Class Tags Cake, Dessert, Winter, Fondant, Frangelico, Chocolate
Comment

Pear Tarte Tatin

February 13, 2018 Nancy Madok
tart cover.jpg
tart ingred..jpg

Ingredients

6-7 pears (Anjou, Bosc, or Comic) ripe, but firm
1 sheet puff pastry, defrosted
Flour for dusting
4T salted butter
¾ cup granulated sugar
Vanilla ice cream


1.    Pre-heat oven to 400° F.

tart #2.jpg

2.    Peel, core, and then cut 6 of the pears into quarters. Set aside. It’s ok if they get brown (There’s an extra if one is bruised or mushy).

3.    On your kitchen counter, roll out the puff pastry into an 11x11 inch square.


tart #4.jpg

4.    Cut off the corners to make an 11-inch circle (I use a dinner plate as a guide).

Tart#5.jpg

5.    Place pastry on a parchment-lined baking sheet and refrigerate for 30 minutes.


Tart#6.jpg
Tart#6b.jpg

6.    Place a 10-inch frying pan over medium heat. Melt the butter, and then add the sugar. Stir until the mixture becomes a light caramel color, about 6-8 minutes. The mixture might become grainy and the butter may separate, but don’t worry. It will all come together in the end.

tart#7.jpg

7.    Remove from heat and arrange the pears on their flat side into a tight circular design. Place 2-3 pear pieces into to the middle of the pan and place the remaining pears on top. Use fork to help stabilize the pears as you place them. Be careful: the caramel is hot!!!!


tart#8.jpg
tart#8a.jpg

8.    Return the pan to the stove. Turn the heat up to medium-high and continue cooking until the caramel thickens and turns a deep golden amber color, about 8-10 minutes. (Spooning the caramel on top of the pears is a good way to check that the caramel is browning but not burning). Remove from the heat. Let cool at least 30 minutes, but the longer the better.


9.    Remove the chilled dough from the refrigerator and carefully place the dough in the pan, pressing the dough down on top of the pears.

10.    Fold the edges under the pears and press down.


11.    Place in 400˚ F oven and bake for 30-35 minutes or until golden brown. Check after 20 minutes. If pastry is browning too quickly, loosely place a piece of aluminum foil on top.

tart#12jpg.jpg

12.    Remove the tart from oven. The tart will be very juicy. Using a paper towel, so you don’t burn your hand, gently press on the dough to hold the tart in the pan.


tart#12.jpg

13.    Then, carefully pour the juice into a small saucepan (I place the saucepan in the sink so that gravity is working with me).

tart#14.jpg
tart#14a.jpg

14.    Let the tart cool for 20 minutes before carefully flipping the tart onto a serving dish.


tart#15.jpg

15.    Place the small saucepan back on the heat and boil down the juice until it forms a thick caramel syrup, about 2-3 minutes. Pour on top of the tart.


16.    Cut into slices and serve warm with vanilla ice cream.

tart#16.jpg

TIPS & TRICKS

•    Pears are picked unripened and shipped to stores. Pears take 3-5 days to ripen, so you need to plan ahead to make this dish. Test the pears by gently pressing near the stem. If it gives slightly, the pears are ripe, but still firm, which is perfect for this dish. 
•    Plan on an extra pear in case one of the pears is too soft or bruised inside to use. 
•    When making the caramel, do not multitask! ☺ It is very hot and you can burn yourself very badly (Speaking from experience!!).
•    Caramel is very temperamental. Weather, temperature, and humidity can affect it. If the caramel should separate or become grainy, do not worry. Once you add the pears and boil the caramel it will become smooth.
•    By allowing the pan and caramel to cool before placing the pastry on top, the pastry will be puffier after it is baked. 
•    The tart can be made up to step 8 early in the day and baked off later. 

In January 2018 Class Tags Winter, Dessert, pears, tarte, Puff Pastry, vanilla ice cream
Comment

Chocolate Tart with Peppermint

December 17, 2017 Nancy Madok
tartcovershot.jpg
tartingred.jpg

Ingredients

CRUST:
1½ cups chocolate cookie crumbs** (about 30 cookies)
6T unsalted butter, melted

FILLING:
12 oz. bittersweet chocolate, cut into pieces
2 cups heavy cream
¼ tsp. salt
2 tsp. peppermint extract
2 eggs
¼ cup crushed peppermint candy

1.    Pre-heat oven to 250° F.

tart2.jpg
tart2a.jpg

2.    Crust: In a bowl, combine the chocolate cookie crumbs and the melted butter. Stir until the mixture comes together.  Using your fingers, press the mixture into the sides then the bottom of a 10-inch removable-bottom tart pan. Set aside.

tart3.jpg

3.    Filling: Place the chocolate in a medium size bowl. Set aside. In a small saucepan, heat the heavy whipping cream until it is hot and almost boils.  Pour the hot cream over the chocolate; make sure all the chocolate is submerged. Cover with a plate or lid and let it sit for 10 minutes.


4.    Whisk vigorously until the chocolate is smooth and silky.  Add the salt and peppermint extract.

tart4.jpg

5.    In a small bowl, beat the eggs together. Add a little of the chocolate mixture to temper the eggs.


tart5.jpg

5B. Mix well, then pour the egg mixture into the chocolate mixture. Stir until combined. 

tart6.jpg

6.    Pour the mixture into the tart pan.


IMG_3841.jpg

7.    Bake for 30-35 minutes in a 250° F oven until the sides of the tart are set but the center still very jiggly.  Remove from oven and let cool completely. Place in the refrigerator and chill 3-4 hours to set. 


tart8.jpg
tart8a.jpg

8.    When ready to serve, remove tart from refrigerator 30 minutes before serving. Right before serving sprinkle the crushed candy cane on top.  Slice into slices and enjoy.

tartfinished.jpg

TIPS & TRICKS

•    **To make crumbs: place cookies in a food processor and pulse until they are the consistency of fine sand.
•    Use the bottom of a dry measuring cup to help press the cookie crumbs into the bottom of the pan. 
•    Use extract and candies made with real peppermint oil if possible for a wonderful intense peppermint flavor. If using peppermint oil start with 1 tsp. and adjust flavor as needed.
•    The center of the tart will be very jiggly when removed from oven. Do not worry it will become firm as it cools. 
•    Tart can be made 2 days. Just top with peppermint right before serving because peppermint candies will melt/dissolve. 

In December 2017 Holiday Tags Winter, Dessert, Tart, Chocolate, Peppermint
2 Comments

Cranberry, Ginger & Pear Tart

November 21, 2017 Nancy Madok
tart cover.jpg
tartingred.jpg

Ingredients

Pastry:
1½ cup all-purpose flour
1 tsp. granulated sugar
¼ tsp. salt
½ cup unsalted butter cut into ½ inch cubes and cold
8T iced, cold water

Filling:
3 large ripe pears, Anjou or Bartlett
2 cups fresh cranberries
½ cup walnuts, toasted* 
¼ cup granulated sugar
2T crystalized ginger cut into small dice
½ tsp cinnamon
pinch of salt

Topping:
3T all-purpose flour
¼ cup walnuts, toasted* cut into small dice
¼ cup brown sugar
2T crystalized ginger cut into small diced
2T butter, softened

1.    Preheat oven to 400º F.

2.    Pastry:  In a food processor, add the flour, sugar and salt; pulse a few times until combined. Add the butter and pulse until the mixture has pea size bits of butter. Add the cold water and pulse just until the mixture just starts to come together.


tart3.jpg

3.    Dump the dough onto a piece of plastic film, using the plastic to gather the dough and flatten into a circle, and chill for at least an hour.


4.    On a lightly floured surface, roll dough out into a circle slightly larger than your 10-inch tart pan, and then transfer the dough to the pan.

5.    Careful push the dough into the sides of the pan.  Trim off any excess dough. 


6.    Prick the bottom of the tart with a fork and line with parchment paper and pie weights.

7.    Bake at 400º F oven for 20 -25 minutes until till dough is set. Remove the tart from the oven, take out the pie weights and the parchment, and return the tart pan to the oven for an additional 5-10 minutes, until golden brown.

8.    Remove from oven and set aside to cool.

9.    Lower oven temperature to 350º F.

10.    Filling:  Peel the pears, core and slice into ¼ inch-thick slices and place into a medium-size bowl.


tart11.jpg

11.    In a food processor, coarsely chop the cranberries.  Add the walnuts. Pulse few times. Add mixture to the pears.


12.    Add the sugar, ginger, cinnamon, and salt to the cranberry-pear mixture.

tart12b.jpg

12b. Tossing to combine. Spoon the filling into the crust.

13.    Topping: In a small bowl, mix the flour, walnuts, brown sugar, and ginger. Add the butter, combine with your fingers or fork, and sprinkle oven the filling.

14.    Place tart into the oven and bake at 350º F until the fruit is tender and the crust is brown, about 30-40 minutes. If crust starts to get too brown before the fruit inside is done, cover with foil.

15.    When tart is done, remove from oven and place onto a cooling rack.  Serve the tart warm or cool.

*    To roast nuts: preheat oven 350º F.  Place nuts on a baking sheet and bake for 5 minutes.  Shake the pan and continue baking until nuts are toasted, about 3-5 minutes more.  Let them cool. The roasted nuts can be store in an airtight container for weeks.

TIPS & TRICKS

•    Pastry can be made ahead of time and kept frozen for up to 3 months in an air tight container or zip lock bag. Defrost in the refrigerator when needed.
•    The tart is best enjoyed the day it is made, but you can:
•    Bake the crust the day ahead. Cover with plastic wrap and store on the counter. Don’t refrigerate.
•    Topping can be made ahead.
•    Except for the pears, the filling ingredients can be prepared ahead. The day of serving, peel the pears and combine with the other filling ingredients. Then fill the crust and bake. 


In Nov 2017 Thanksgiving Tags Dessert, Winter, pears, cranberries, cinnamon, Tart
Comment
Older Posts →

PRIVACY POLICY 2020

COPYRIGHT 2020 Cucina Casa M