• UnderConstruction
  • Home
  • Seasons
  • Classes
  • Tours
  • About
  • CONTACT
  • Menus
Menu

Cucina Casa M

Street Address
City, State, Zip
Phone Number

Your Custom Text Here

Cucina Casa M

  • UnderConstruction
  • Home
  • Seasons
  • Classes
  • Tours
  • About
  • CONTACT
  • Menus

Chocolate Tart with Peppermint

December 17, 2017 Nancy Madok
tartcovershot.jpg
tartingred.jpg

Ingredients

CRUST:
1½ cups chocolate cookie crumbs** (about 30 cookies)
6T unsalted butter, melted

FILLING:
12 oz. bittersweet chocolate, cut into pieces
2 cups heavy cream
¼ tsp. salt
2 tsp. peppermint extract
2 eggs
¼ cup crushed peppermint candy

1.    Pre-heat oven to 250° F.

tart2.jpg
tart2a.jpg

2.    Crust: In a bowl, combine the chocolate cookie crumbs and the melted butter. Stir until the mixture comes together.  Using your fingers, press the mixture into the sides then the bottom of a 10-inch removable-bottom tart pan. Set aside.

tart3.jpg

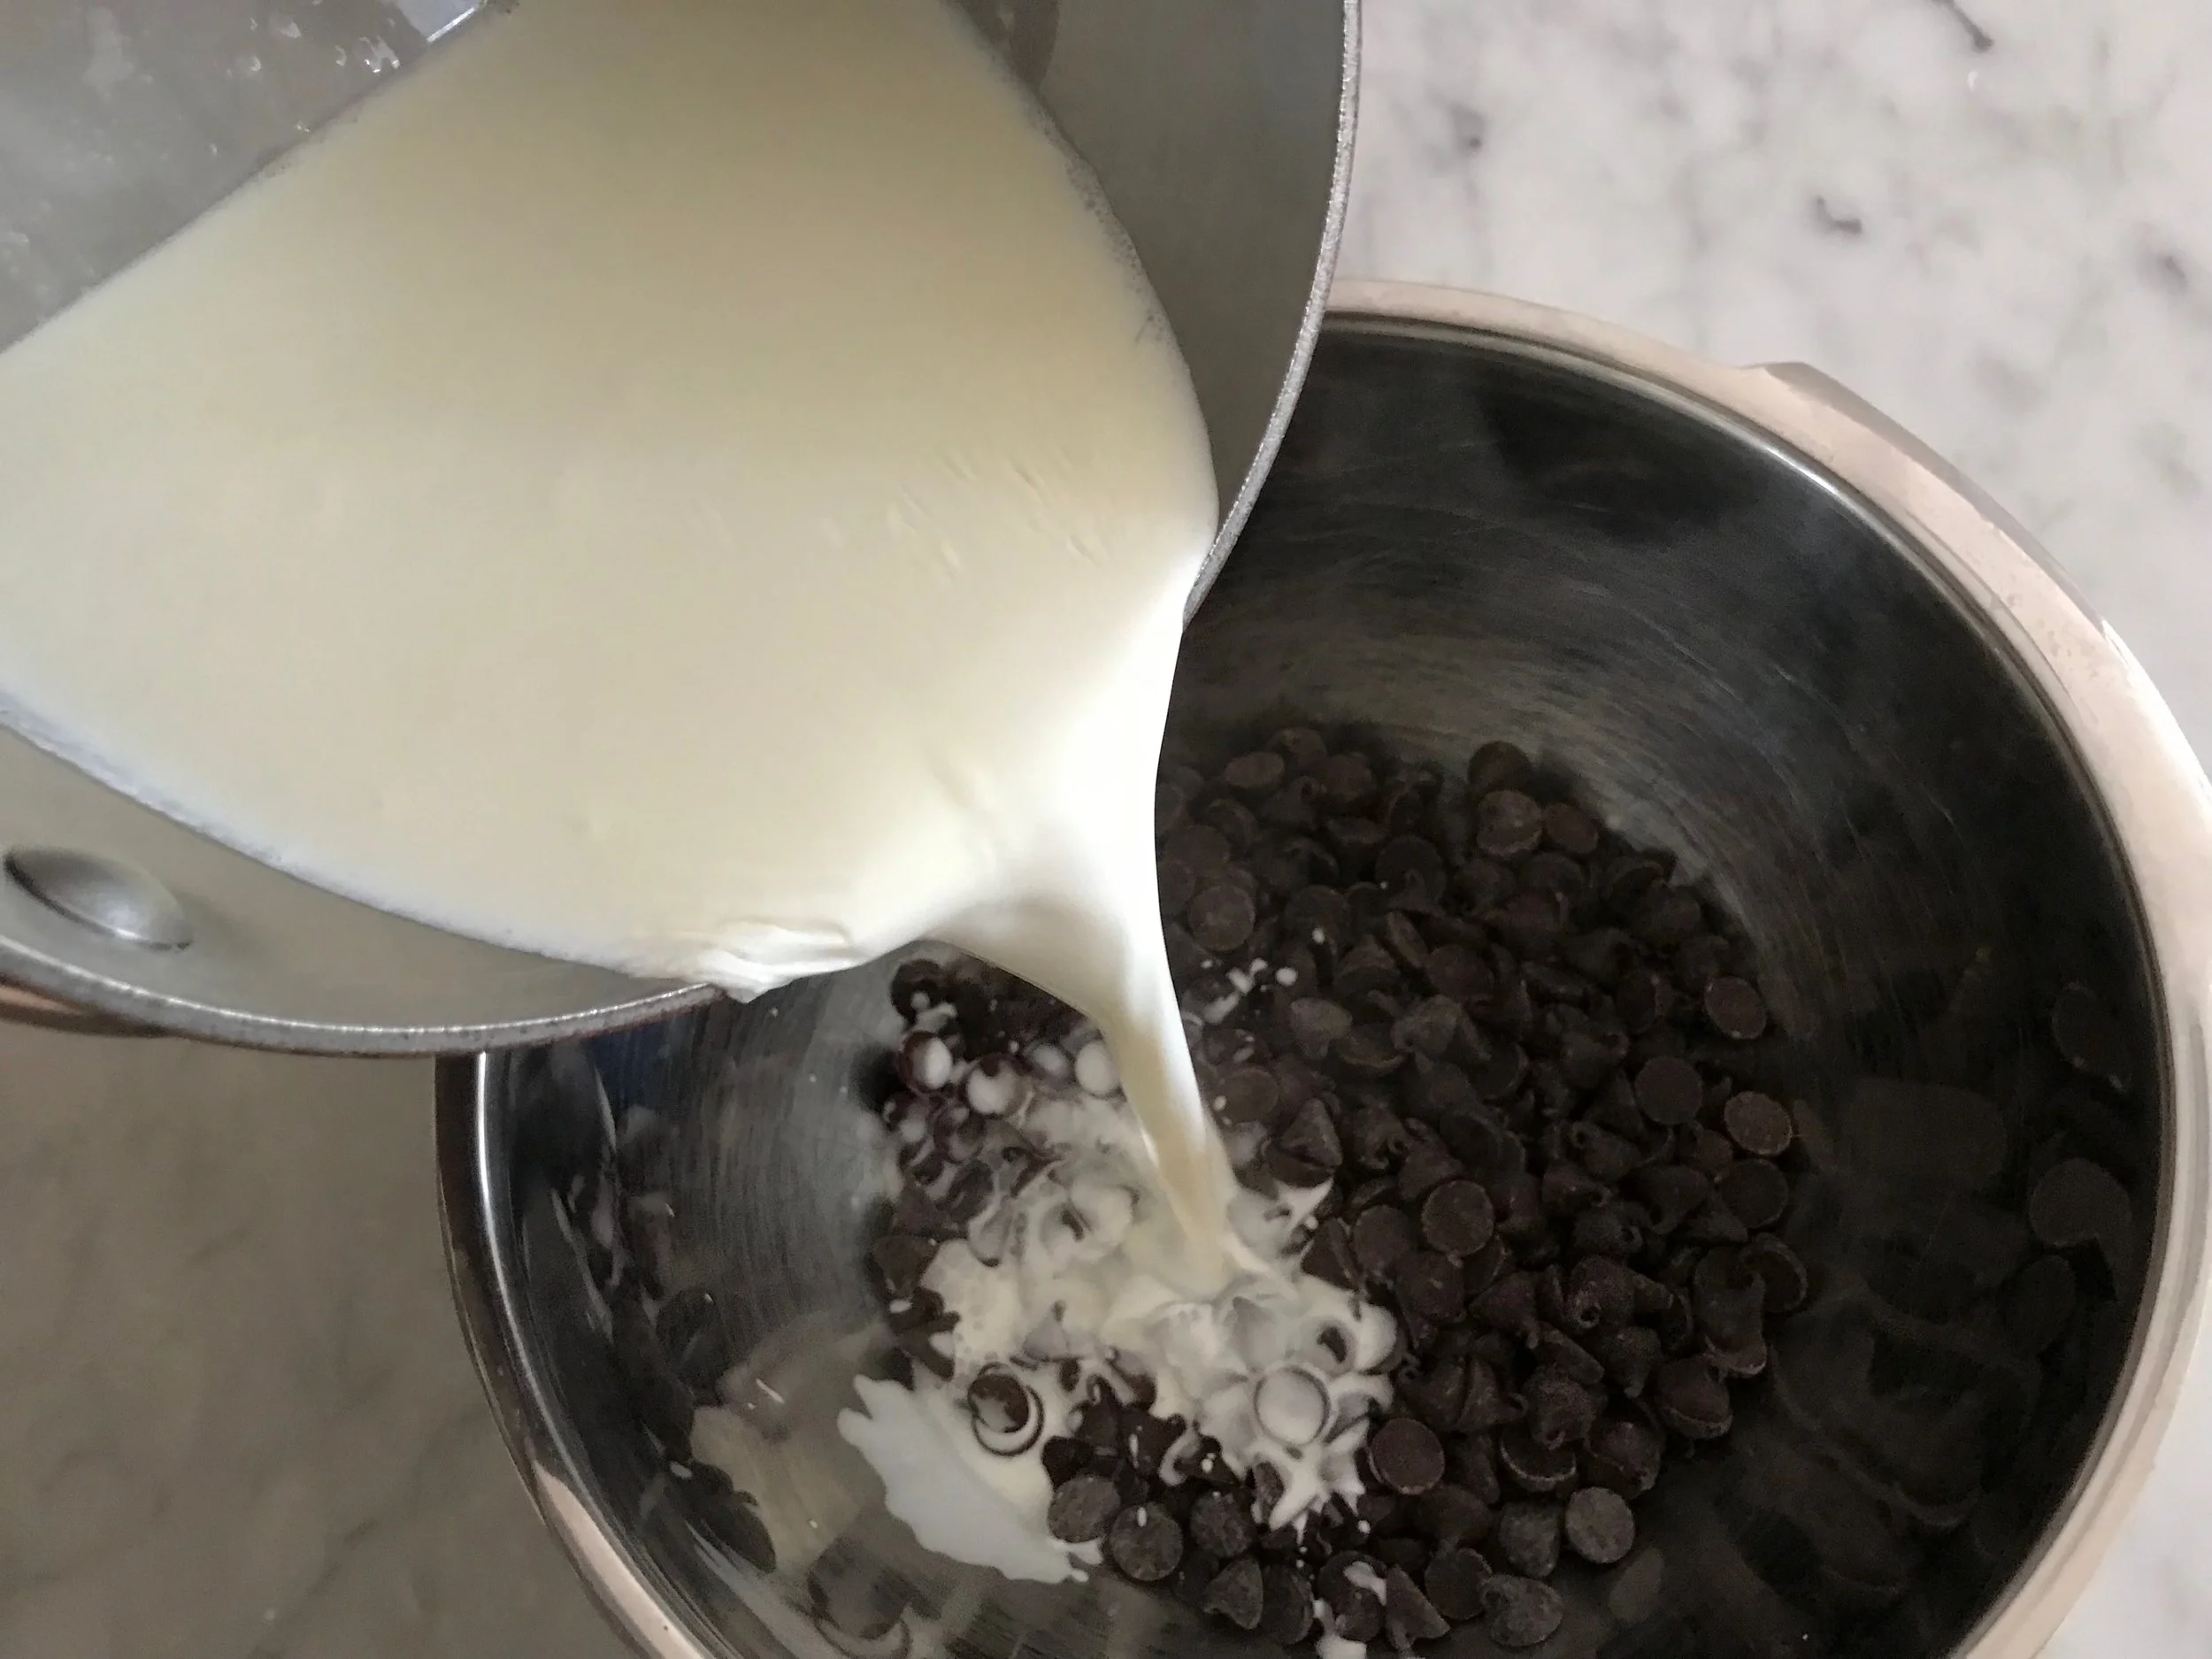
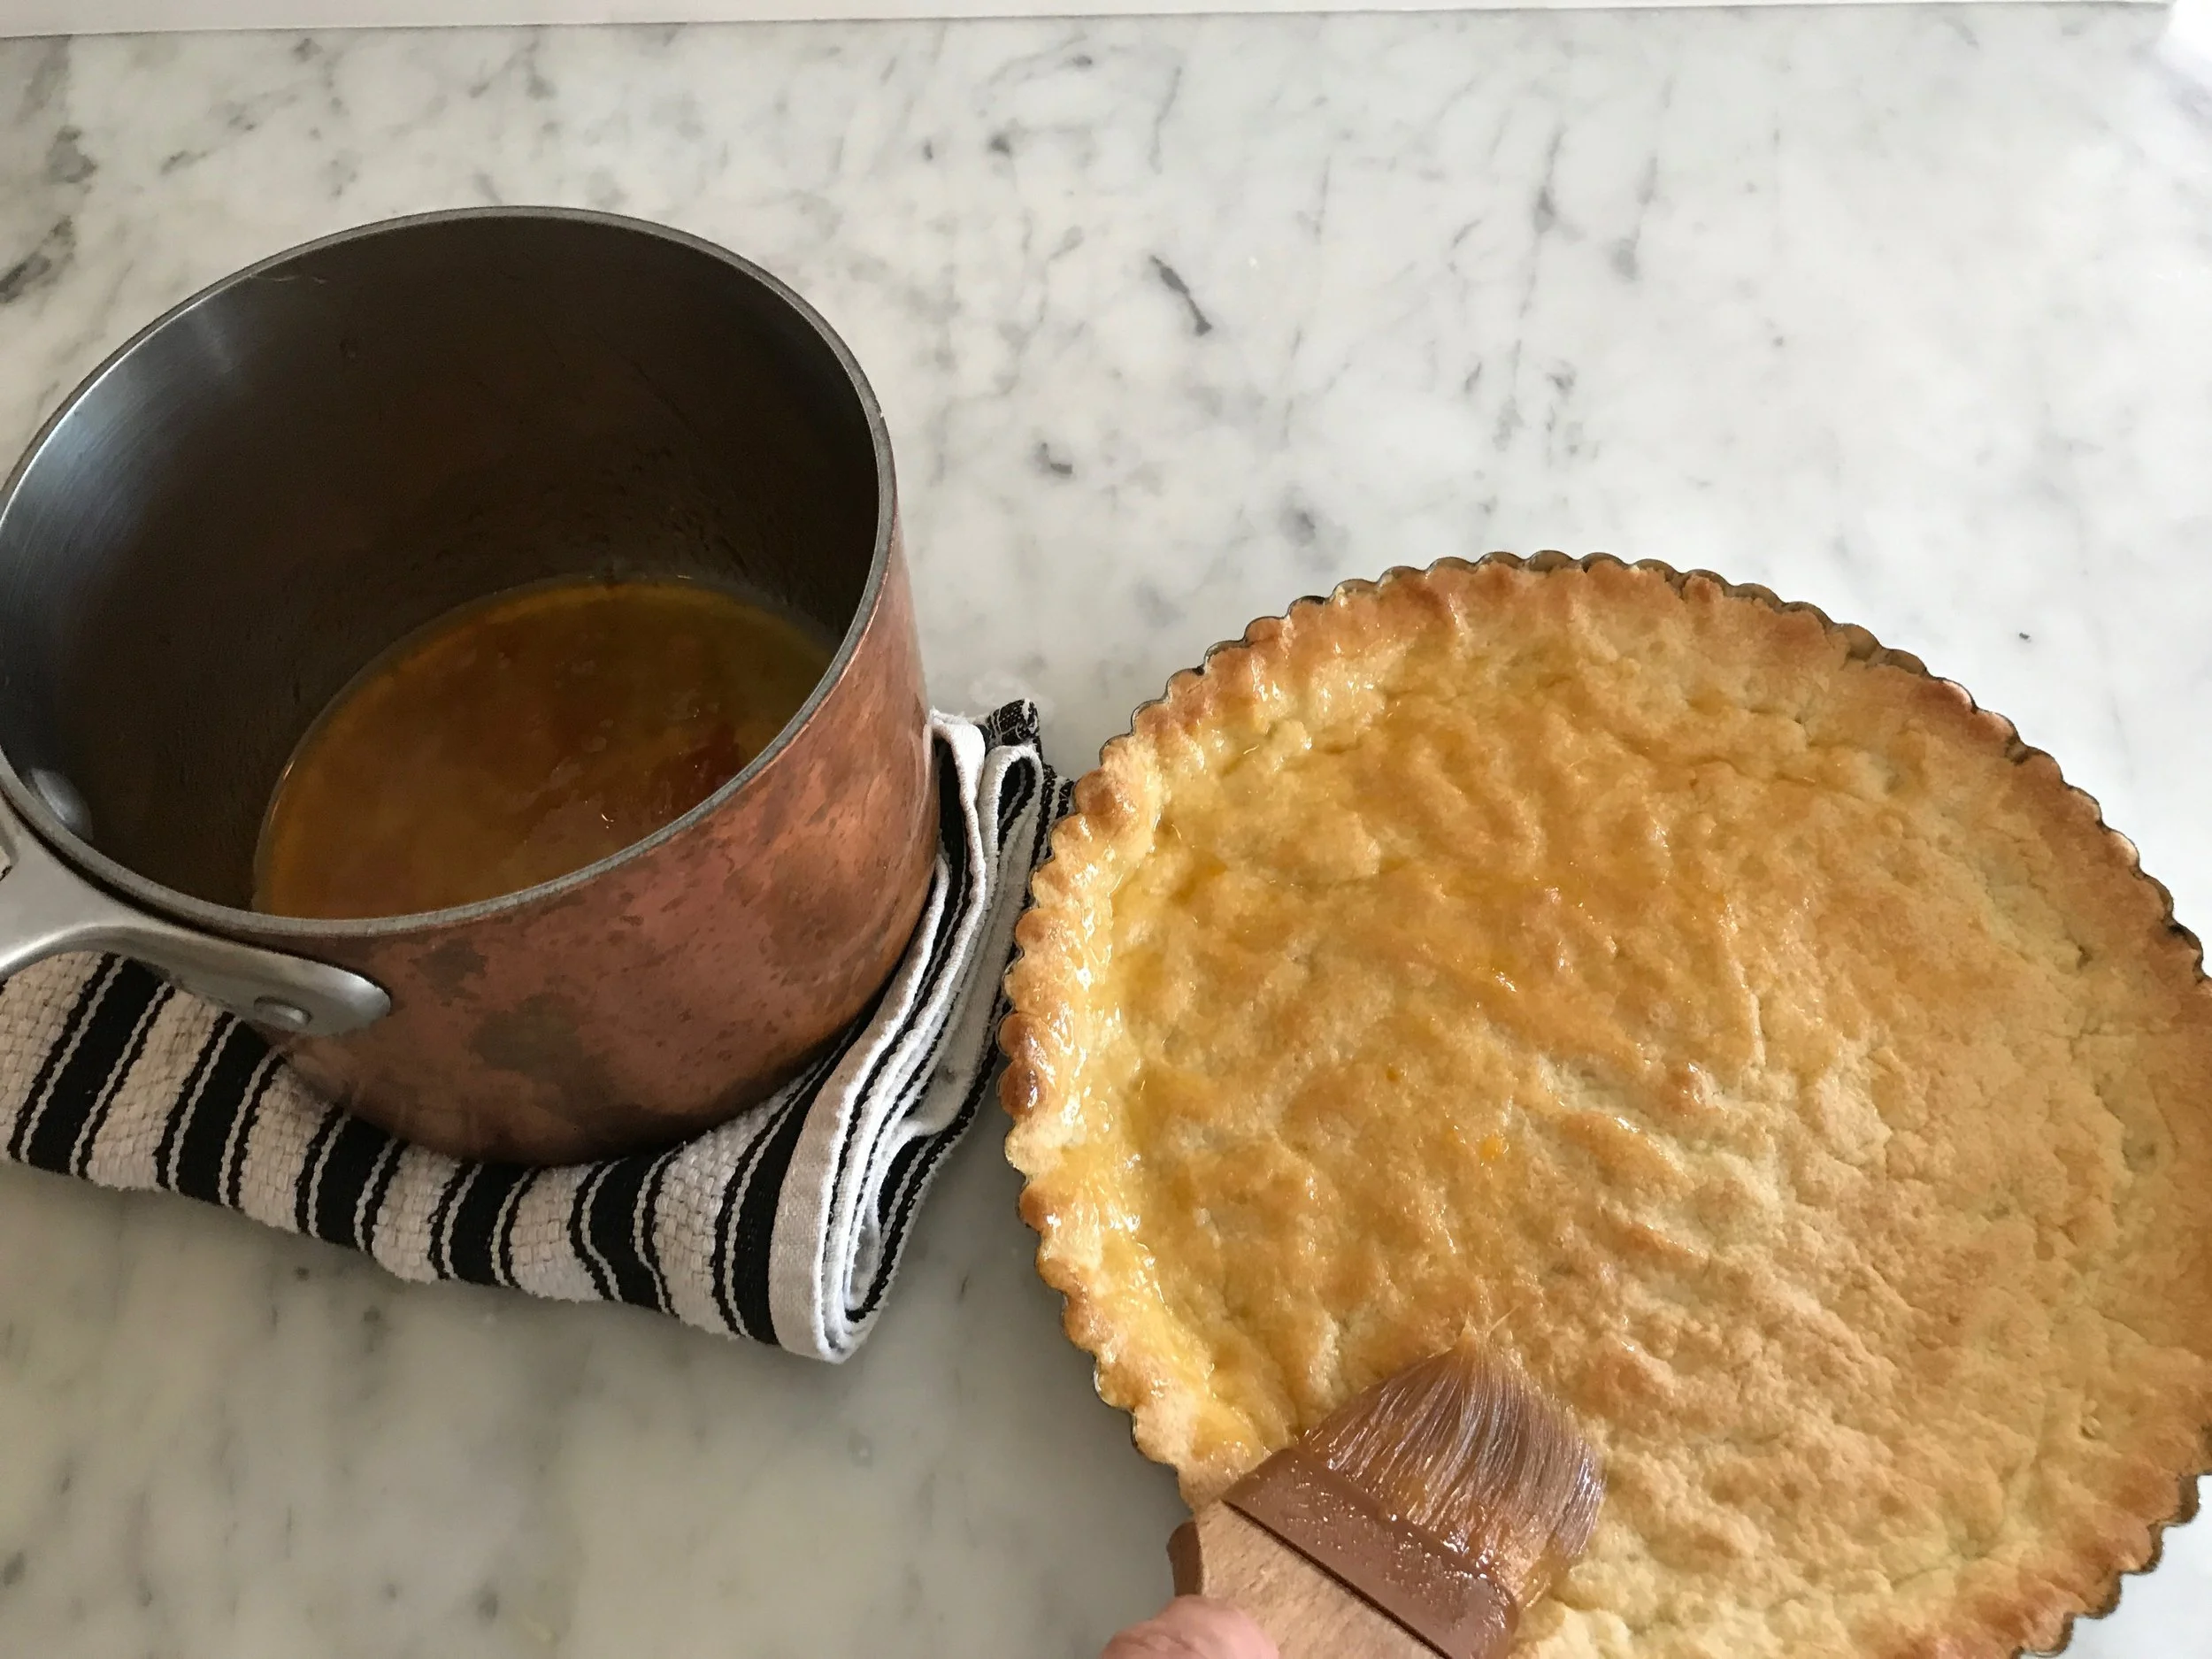
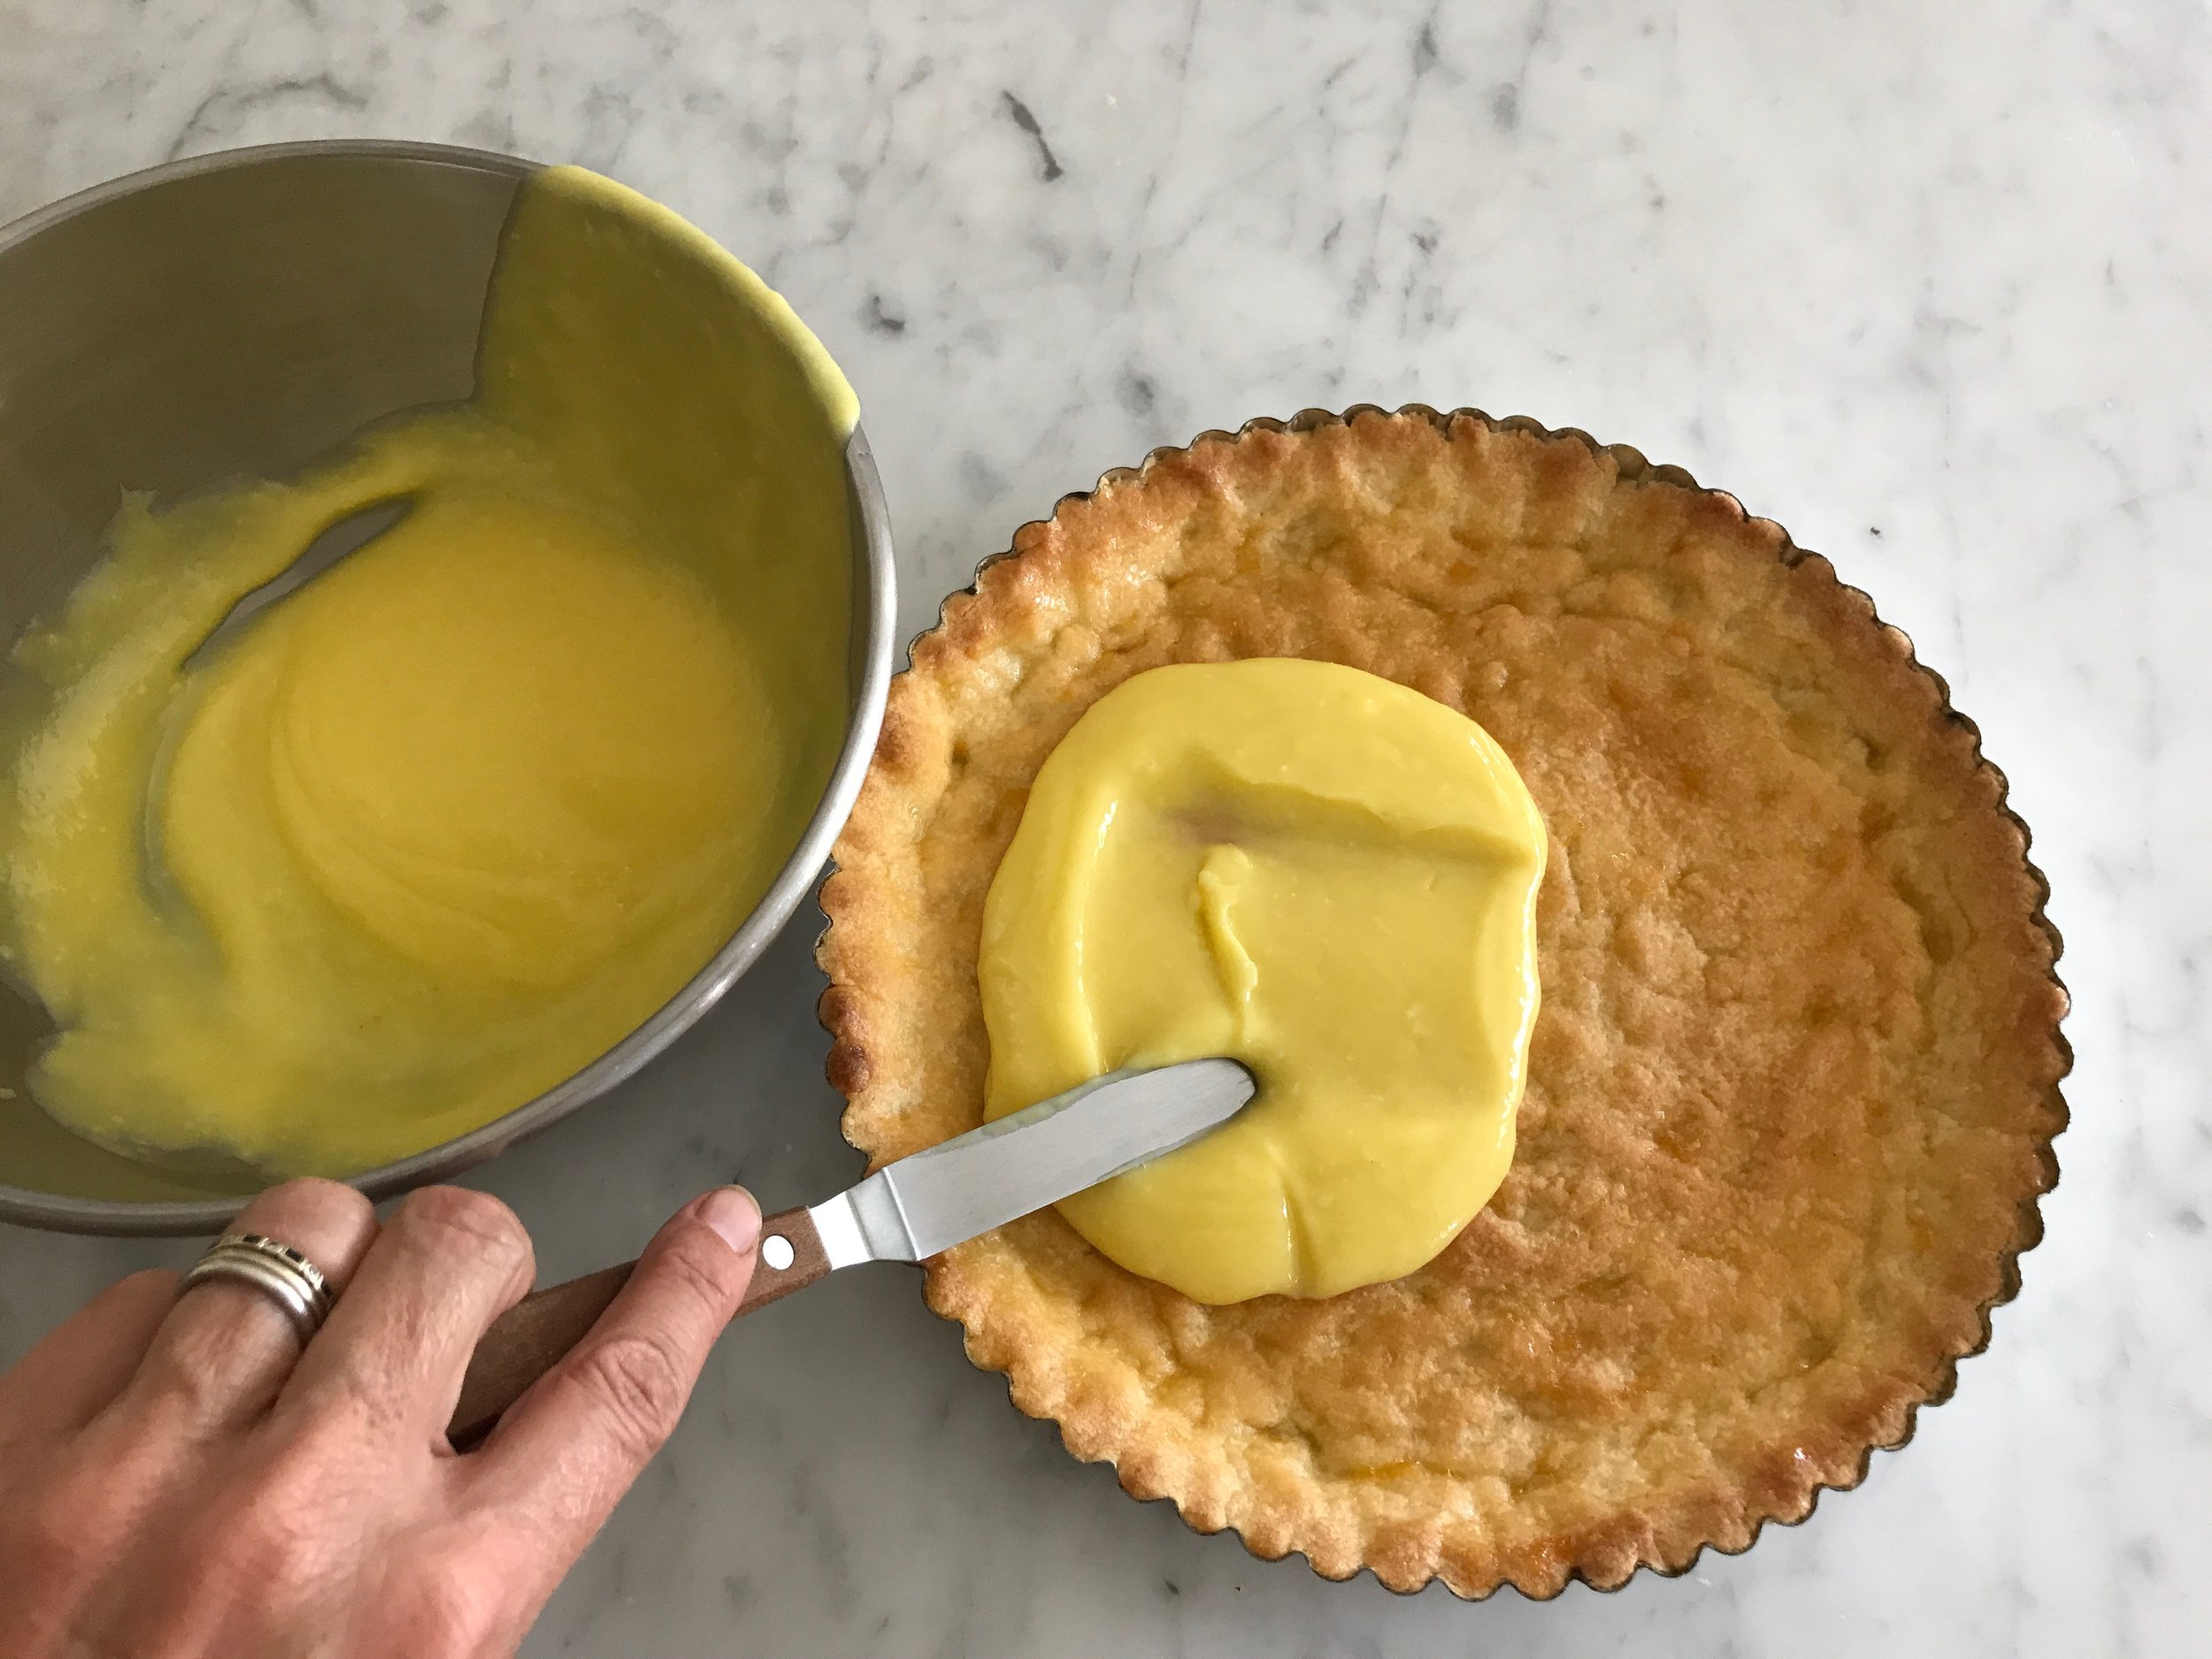
3.    Filling: Place the chocolate in a medium size bowl. Set aside. In a small saucepan, heat the heavy whipping cream until it is hot and almost boils.  Pour the hot cream over the chocolate; make sure all the chocolate is submerged. Cover with a plate or lid and let it sit for 10 minutes.


4.    Whisk vigorously until the chocolate is smooth and silky.  Add the salt and peppermint extract.

tart4.jpg

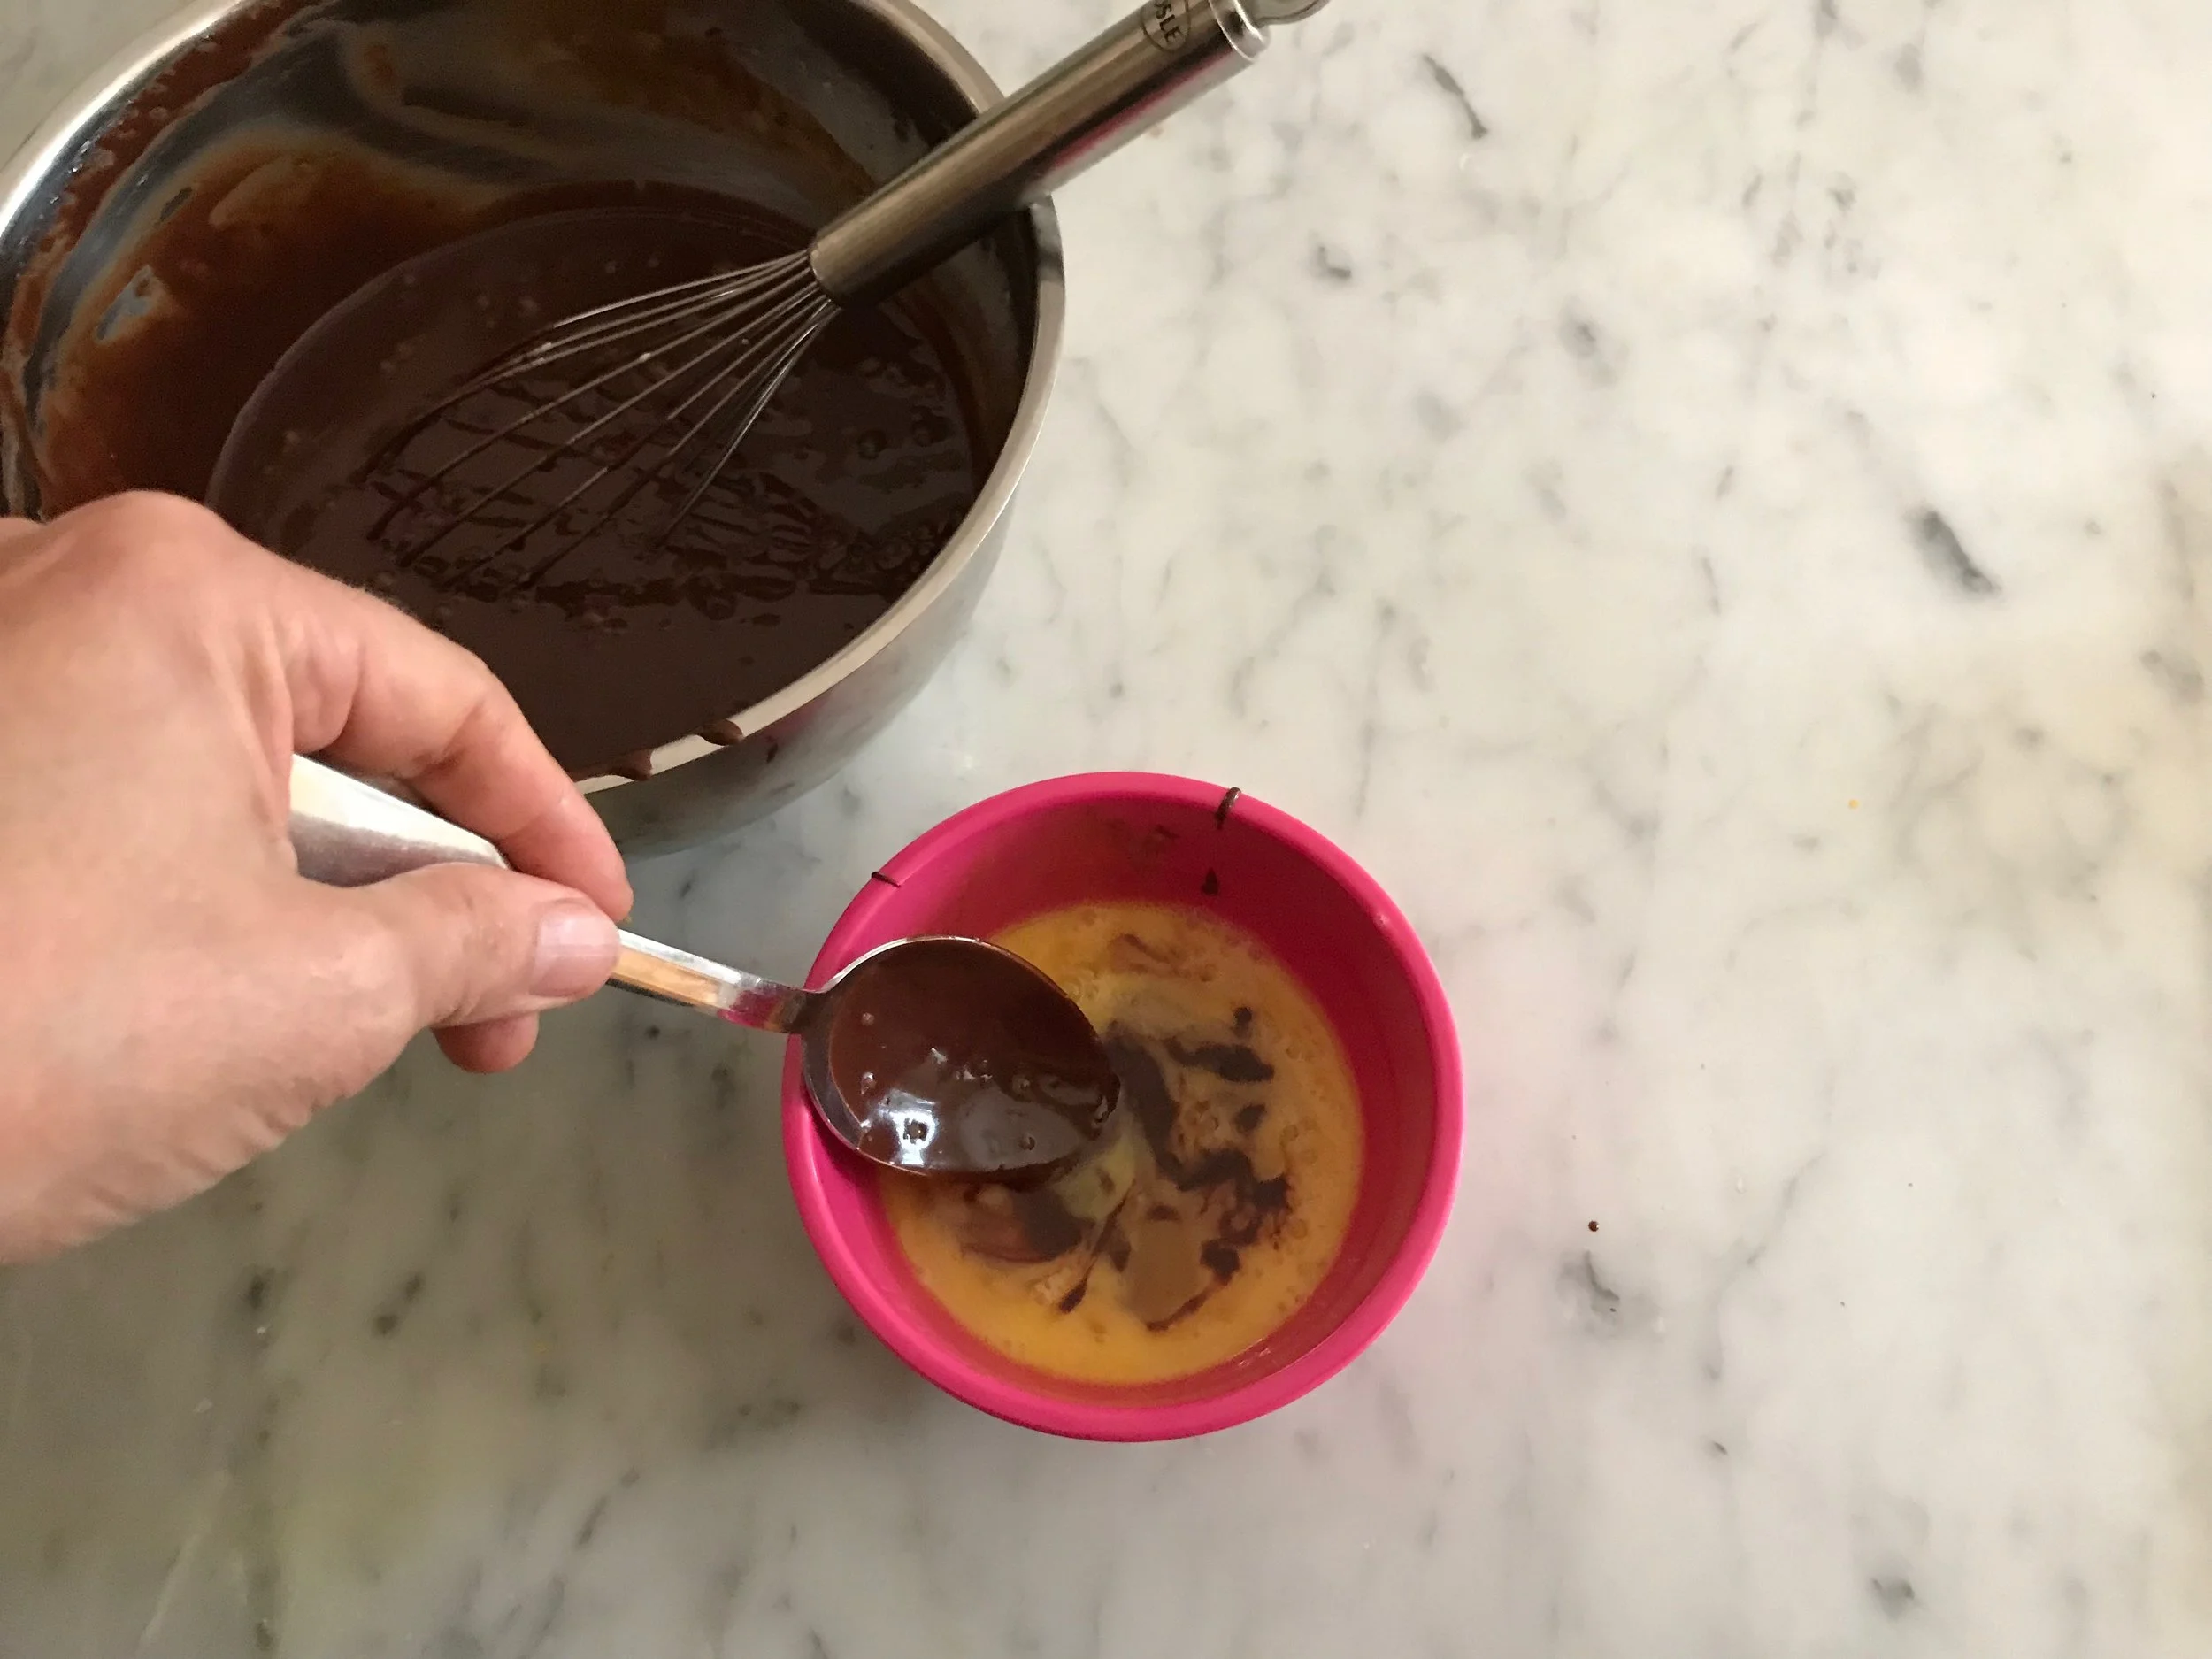
5.    In a small bowl, beat the eggs together. Add a little of the chocolate mixture to temper the eggs.


tart5.jpg

5B. Mix well, then pour the egg mixture into the chocolate mixture. Stir until combined. 

tart6.jpg

6.    Pour the mixture into the tart pan.


IMG_3841.jpg

7.    Bake for 30-35 minutes in a 250° F oven until the sides of the tart are set but the center still very jiggly.  Remove from oven and let cool completely. Place in the refrigerator and chill 3-4 hours to set. 


tart8.jpg
tart8a.jpg

8.    When ready to serve, remove tart from refrigerator 30 minutes before serving. Right before serving sprinkle the crushed candy cane on top.  Slice into slices and enjoy.

tartfinished.jpg

TIPS & TRICKS

•    **To make crumbs: place cookies in a food processor and pulse until they are the consistency of fine sand.
•    Use the bottom of a dry measuring cup to help press the cookie crumbs into the bottom of the pan. 
•    Use extract and candies made with real peppermint oil if possible for a wonderful intense peppermint flavor. If using peppermint oil start with 1 tsp. and adjust flavor as needed.
•    The center of the tart will be very jiggly when removed from oven. Do not worry it will become firm as it cools. 
•    Tart can be made 2 days. Just top with peppermint right before serving because peppermint candies will melt/dissolve. 

In December 2017 Holiday Tags Winter, Dessert, Tart, Chocolate, Peppermint
2 Comments

Cranberry, Ginger & Pear Tart

November 21, 2017 Nancy Madok
tart cover.jpg
tartingred.jpg

Ingredients

Pastry:
1½ cup all-purpose flour
1 tsp. granulated sugar
¼ tsp. salt
½ cup unsalted butter cut into ½ inch cubes and cold
8T iced, cold water

Filling:
3 large ripe pears, Anjou or Bartlett
2 cups fresh cranberries
½ cup walnuts, toasted* 
¼ cup granulated sugar
2T crystalized ginger cut into small dice
½ tsp cinnamon
pinch of salt

Topping:
3T all-purpose flour
¼ cup walnuts, toasted* cut into small dice
¼ cup brown sugar
2T crystalized ginger cut into small diced
2T butter, softened

1.    Preheat oven to 400º F.

2.    Pastry:  In a food processor, add the flour, sugar and salt; pulse a few times until combined. Add the butter and pulse until the mixture has pea size bits of butter. Add the cold water and pulse just until the mixture just starts to come together.


tart3.jpg

3.    Dump the dough onto a piece of plastic film, using the plastic to gather the dough and flatten into a circle, and chill for at least an hour.


4.    On a lightly floured surface, roll dough out into a circle slightly larger than your 10-inch tart pan, and then transfer the dough to the pan.

5.    Careful push the dough into the sides of the pan.  Trim off any excess dough. 


6.    Prick the bottom of the tart with a fork and line with parchment paper and pie weights.

7.    Bake at 400º F oven for 20 -25 minutes until till dough is set. Remove the tart from the oven, take out the pie weights and the parchment, and return the tart pan to the oven for an additional 5-10 minutes, until golden brown.

8.    Remove from oven and set aside to cool.

9.    Lower oven temperature to 350º F.

10.    Filling:  Peel the pears, core and slice into ¼ inch-thick slices and place into a medium-size bowl.


tart11.jpg

11.    In a food processor, coarsely chop the cranberries.  Add the walnuts. Pulse few times. Add mixture to the pears.


12.    Add the sugar, ginger, cinnamon, and salt to the cranberry-pear mixture.

tart12b.jpg

12b. Tossing to combine. Spoon the filling into the crust.

13.    Topping: In a small bowl, mix the flour, walnuts, brown sugar, and ginger. Add the butter, combine with your fingers or fork, and sprinkle oven the filling.

14.    Place tart into the oven and bake at 350º F until the fruit is tender and the crust is brown, about 30-40 minutes. If crust starts to get too brown before the fruit inside is done, cover with foil.

15.    When tart is done, remove from oven and place onto a cooling rack.  Serve the tart warm or cool.

*    To roast nuts: preheat oven 350º F.  Place nuts on a baking sheet and bake for 5 minutes.  Shake the pan and continue baking until nuts are toasted, about 3-5 minutes more.  Let them cool. The roasted nuts can be store in an airtight container for weeks.

TIPS & TRICKS

•    Pastry can be made ahead of time and kept frozen for up to 3 months in an air tight container or zip lock bag. Defrost in the refrigerator when needed.
•    The tart is best enjoyed the day it is made, but you can:
•    Bake the crust the day ahead. Cover with plastic wrap and store on the counter. Don’t refrigerate.
•    Topping can be made ahead.
•    Except for the pears, the filling ingredients can be prepared ahead. The day of serving, peel the pears and combine with the other filling ingredients. Then fill the crust and bake. 


In Nov 2017 Thanksgiving Tags Dessert, Winter, pears, cranberries, cinnamon, Tart
Comment

Blood Orange & Lemon Curd Tart

April 1, 2017 Nancy Madok
tart cover.jpg
tart ingred.jpg

Ingredients

Pastry:
12T room temperature butter cut into cubes
½ cup granulated sugar
2 egg yolks
2 cups all purpose flour
¼ tsp. salt

Lemon Curd:
zest of 2 lemons
½ cup lemon juice
2 egg yolks
3 eggs
1/3 cup granulated sugar
8T room temperature butter, cut into cubes

Tart:
4T apricot jelly
2T water
3-4 blood oranges or regular navel 

Dough: 

1.    In the bowl of your mixer with the paddle attachment on low speed cream the butter and sugar together until fluffy, about 1 minute. Scrape down the sides of the bowl.  

2.    Add the egg yolks and mix till combined, scrape down the sides of the bowl again then add the flour and salt; mix just until the mixture  start to come together. 


3.    Be careful not to over mix. 


4.    Use your hands to gather the dough and form into a ball.


5.    Divide the dough into half and place in a 10-inch removable bottom tart pan. Using your fingers press the dough into the bottom of the pan. . 


6.    Then press the into the sides. Add more dough as needed, making sure to keep an even thickness.  

tart7.jpg

7.    You might not use all the dough. ( the little extra can be cooked off as a small cookie) Cover the tart pan and place in refrigerator of at least 1hour.  


tart8.jpg

8.    Pre heat the oven to 375ºF. Remove the tart pan from refrigerator. Line tart pan with parchment or aluminum foil pressing it into the edges. Fill the tart pan with pie weights and place immediately into oven.


9.    Bake at 375º F for 20 minutes.  Remove the tart from the oven, take out the pie weights and the parchment and return to the oven for an additional 5-10 minutes, until golden brown.  Remove from oven and let cool.  


Lemon Curd:
 

10.    In a small saucepan over low heat, whisk the lemon zest, juice, eggs yolks, eggs, and sugar until combined. 


11.    Stir in the butter, stirring constantly until the mixture thickens, about 5-8 minutes. 

tart12.jpg

12.    It should thicken enough to hold a line when draw with finger on a wooden spoon.


13.    Remove from the heat and strain into a clean bowl.


14.    Cover with a piece of plastic wrap, pressing it directly on top of the curd and let cool completely.


Tart:

15.    In a small saucepan, mix the jelly and the water over low heat until melted to make the glaze. Brush the glaze on to the bottom of the tart shell and let set for a few minutes.  Reserve the remaining glaze.

tart16.jpg

16.    Spread the lemon curd on the tart.  


17.    Using a small knife  cut off the top and bottom of the orange. Carefully move you knife from the top to the bottom of the orange removing the membrane and the peel. Then slice the orange into slices. Repeat with remaining oranges. 


18.    Arrange the orange slices in an attractive pattern on top of the lemon curd.  

tart19.jpg

19.    Lightly brush the remaining glaze on top of the fruit.  Serve immediately.


Tips & Tricks


•    The pastry can be baked 2 days in advanced. 
•    It can also be pressed into a tart pan and frozen uncooked for 3-4 months. I placed it in a giant zip lock bag. When ready to use. Preheat oven and place frozen tart pan directly into oven.  Bake for 20mins, or until golden brown. No need for pie weights. 
•    Use can use almost any fruit to top the tart; Berries, kiwi, stone fruit
•    Completed tart is best eaten within the day so that crust doesn’t get soggy. 


print recipe
Blood Orange & Lemon Curd Tart
by Nancy Madok October-10-2017
Blood Orange & Lemon Curd Tart
Ingredients
  • Pastry
  • 12T room temperature butter cut into cubes
  • 1/2 Cup Granulated sugar
  • 2 Egg Yolks
  • 2 Cups All Purpose Flour
  • 1/4 Tsp Salt
  • Lemon Curd
  • 2 Lemons Zest of Lemons
  • 1/2 Cup Lemon Juice
  • 2 Egg Yolks
  • 3 Eggs
  • 1/3 Cup Granulated Sugar
  • 8T Room Temp Butter, Cut into cubes
  • Tart
  • 4T Apricot Jelly
  • 2T Water
  • 4 Blood Oranges or regular Navel
Instructions
Dough: In the bowl of your mixer with the paddle attachment on low speed cream the butter and sugar together until fluffy, about 1 minute. Scrape down the sides of the bowl. Add the egg yolks and mix till combined, scrape down the sides of the bowl again then add the flour and salt; mix just until the mixture start to come together. Be careful not to over mix. Use your hands to gather the dough and form into a ball.Divide the dough into half and place in a 10-inch removable bottom tart pan. Using your fingers press the dough into the bottom of the pan. Then press the into the sides. Add more dough as needed, making sure to keep an even thickness. You might not use all the dough. ( the little extra can be cooked off as a small cookie) Cover the tart pan and place in refrigerator of at least 1hour. Pre heat the oven to 375ºF. Remove the tart pan from refrigerator. Line tart pan with parchment or aluminum foil pressing it into the edges. Fill the tart pan with pie weights and place immediately into oven. Bake at 375º F for 20 minutes. Remove the tart from the oven, take out the pie weights and the parchment and return to the oven for an additional 5-10 minutes, until golden brown. Remove from oven and let cool. Lemon Curd:In a small saucepan over low heat, whisk the lemon zest, juice, eggs yolks, eggs, and sugar until combined. Stir in the butter, stirring constantly until the mixture thickens, about 5-8 minutes. It should thicken enough to hold a line when draw with finger across the wooden spoonRemove from the heat and strain into a clean bowl. Cover with a piece of plastic wrap, pressing it directly on top of the curd and let cool completely.Tart:In a small saucepan, mix the jelly and the water over low heat until melted to make the glaze. Brush the glaze on to the bottom of the tart shell and let set for a few minutes. Reserve the remaining glaze. Spread the lemon curd on the tart shell. Using a small knife cut off the top and bottom of the orange. Carefully move you knife from the top to the bottom of the orange removing the membrane and the peel. Then slice the orange into slices. Repeat with remaining oranges. Arrange the orange slices in an attractive pattern on top of the lemon curd. Lightly brush the remaining glaze on top of the fruit. Serve immediately.TIPS and TRICKSThe pastry can be baked 2 days in advanced. It can also be pressed into a tart pan and frozen uncooked for 3-4 months. I placed it in a giant zip lock bag. When ready to use. Preheat oven and place frozen tart pan directly into oven. Bake for 20mins, or until golden brown. No need for pie weights. Use can use almost any fruit to top the tart; Berries, kiwi, stone fruit Completed tart is best eaten within the day so that crust doesn’t get soggy.
Details
Prep time: Cook time: Total time: 1 hour Yield: 8-10
Featured
Risotto with Mint, Peas & Pecorino Romano Cheese
rack cover.jpg
Rack of Lamb with Mint Chimichurri Sauce
Blood Orange & Lemon Curd Tart
In April 2017 Class Tags April 2017 Class, Dessert, Blood Oranges, Tart, Lemon, Spring
Comment

PRIVACY POLICY 2020

COPYRIGHT 2020 Cucina Casa M