• UnderConstruction
  • Home
  • Seasons
  • Classes
  • Tours
  • About
  • CONTACT
  • Menus
Menu

Cucina Casa M

Street Address
City, State, Zip
Phone Number

Your Custom Text Here

Cucina Casa M

  • UnderConstruction
  • Home
  • Seasons
  • Classes
  • Tours
  • About
  • CONTACT
  • Menus

Pimento Cheese Ball with Crostini

June 28, 2019 Nancy Madok
cheese:ingred.jpg

Ingredients

½ cup mayonnaise (store bought or homemade(homemade recipe below)
1 4 oz. jar diced pimentos, drained
1 clove garlic, crushed
2T yellow onion, grated
1 tsp. Worcestershire sauce
1 tsp. cayenne pepper
¼ tsp. salt
1 pound sharp cheddar cheese, grated
½ cup chopped nuts, walnuts, pecans, or almonds
1 T chopped parsley

Crostini:
1 baguette loaf, cut on diagonal into 24 thin slices
¼ cup olive oil

1. In a medium-size bowl, combine the mayonnaise, pimentos, garlic, onion, Worcestershire sauce, cayenne pepper, and salt. Stir in the cheese. Add more salt or cayenne, if necessary.

cheese#3a.jpg

2. Line a small bowl with plastic wrap. Place the cheese mixture in the bowl, cover with plastic wrap and place in refrigerator for 3 hour.

3. When ready to serve place the nuts and parsley in a medium size bowl, stir until combined. Unwrap the cheese and place in the bowl. Press the nut/ parsley mixture into the cheese.

4. Place the cheese ball on to a platter with crostini. Cheese is best when served room temperature.

Crostini Prep:
1. Preheat the oven to 400º F.

2. Place the sliced bread onto a baking sheet. Brush each slice with a little olive oil. Bake until golden brown, about 8-10 minutes. Set aside.

Homemade Mayonnaise Prep:
3 egg yolk
1 tsp. Dijon mustard
1T vinegar
1 tsp. salt & pepper
1 ½ cup vegetable or corn oil

Preparation:
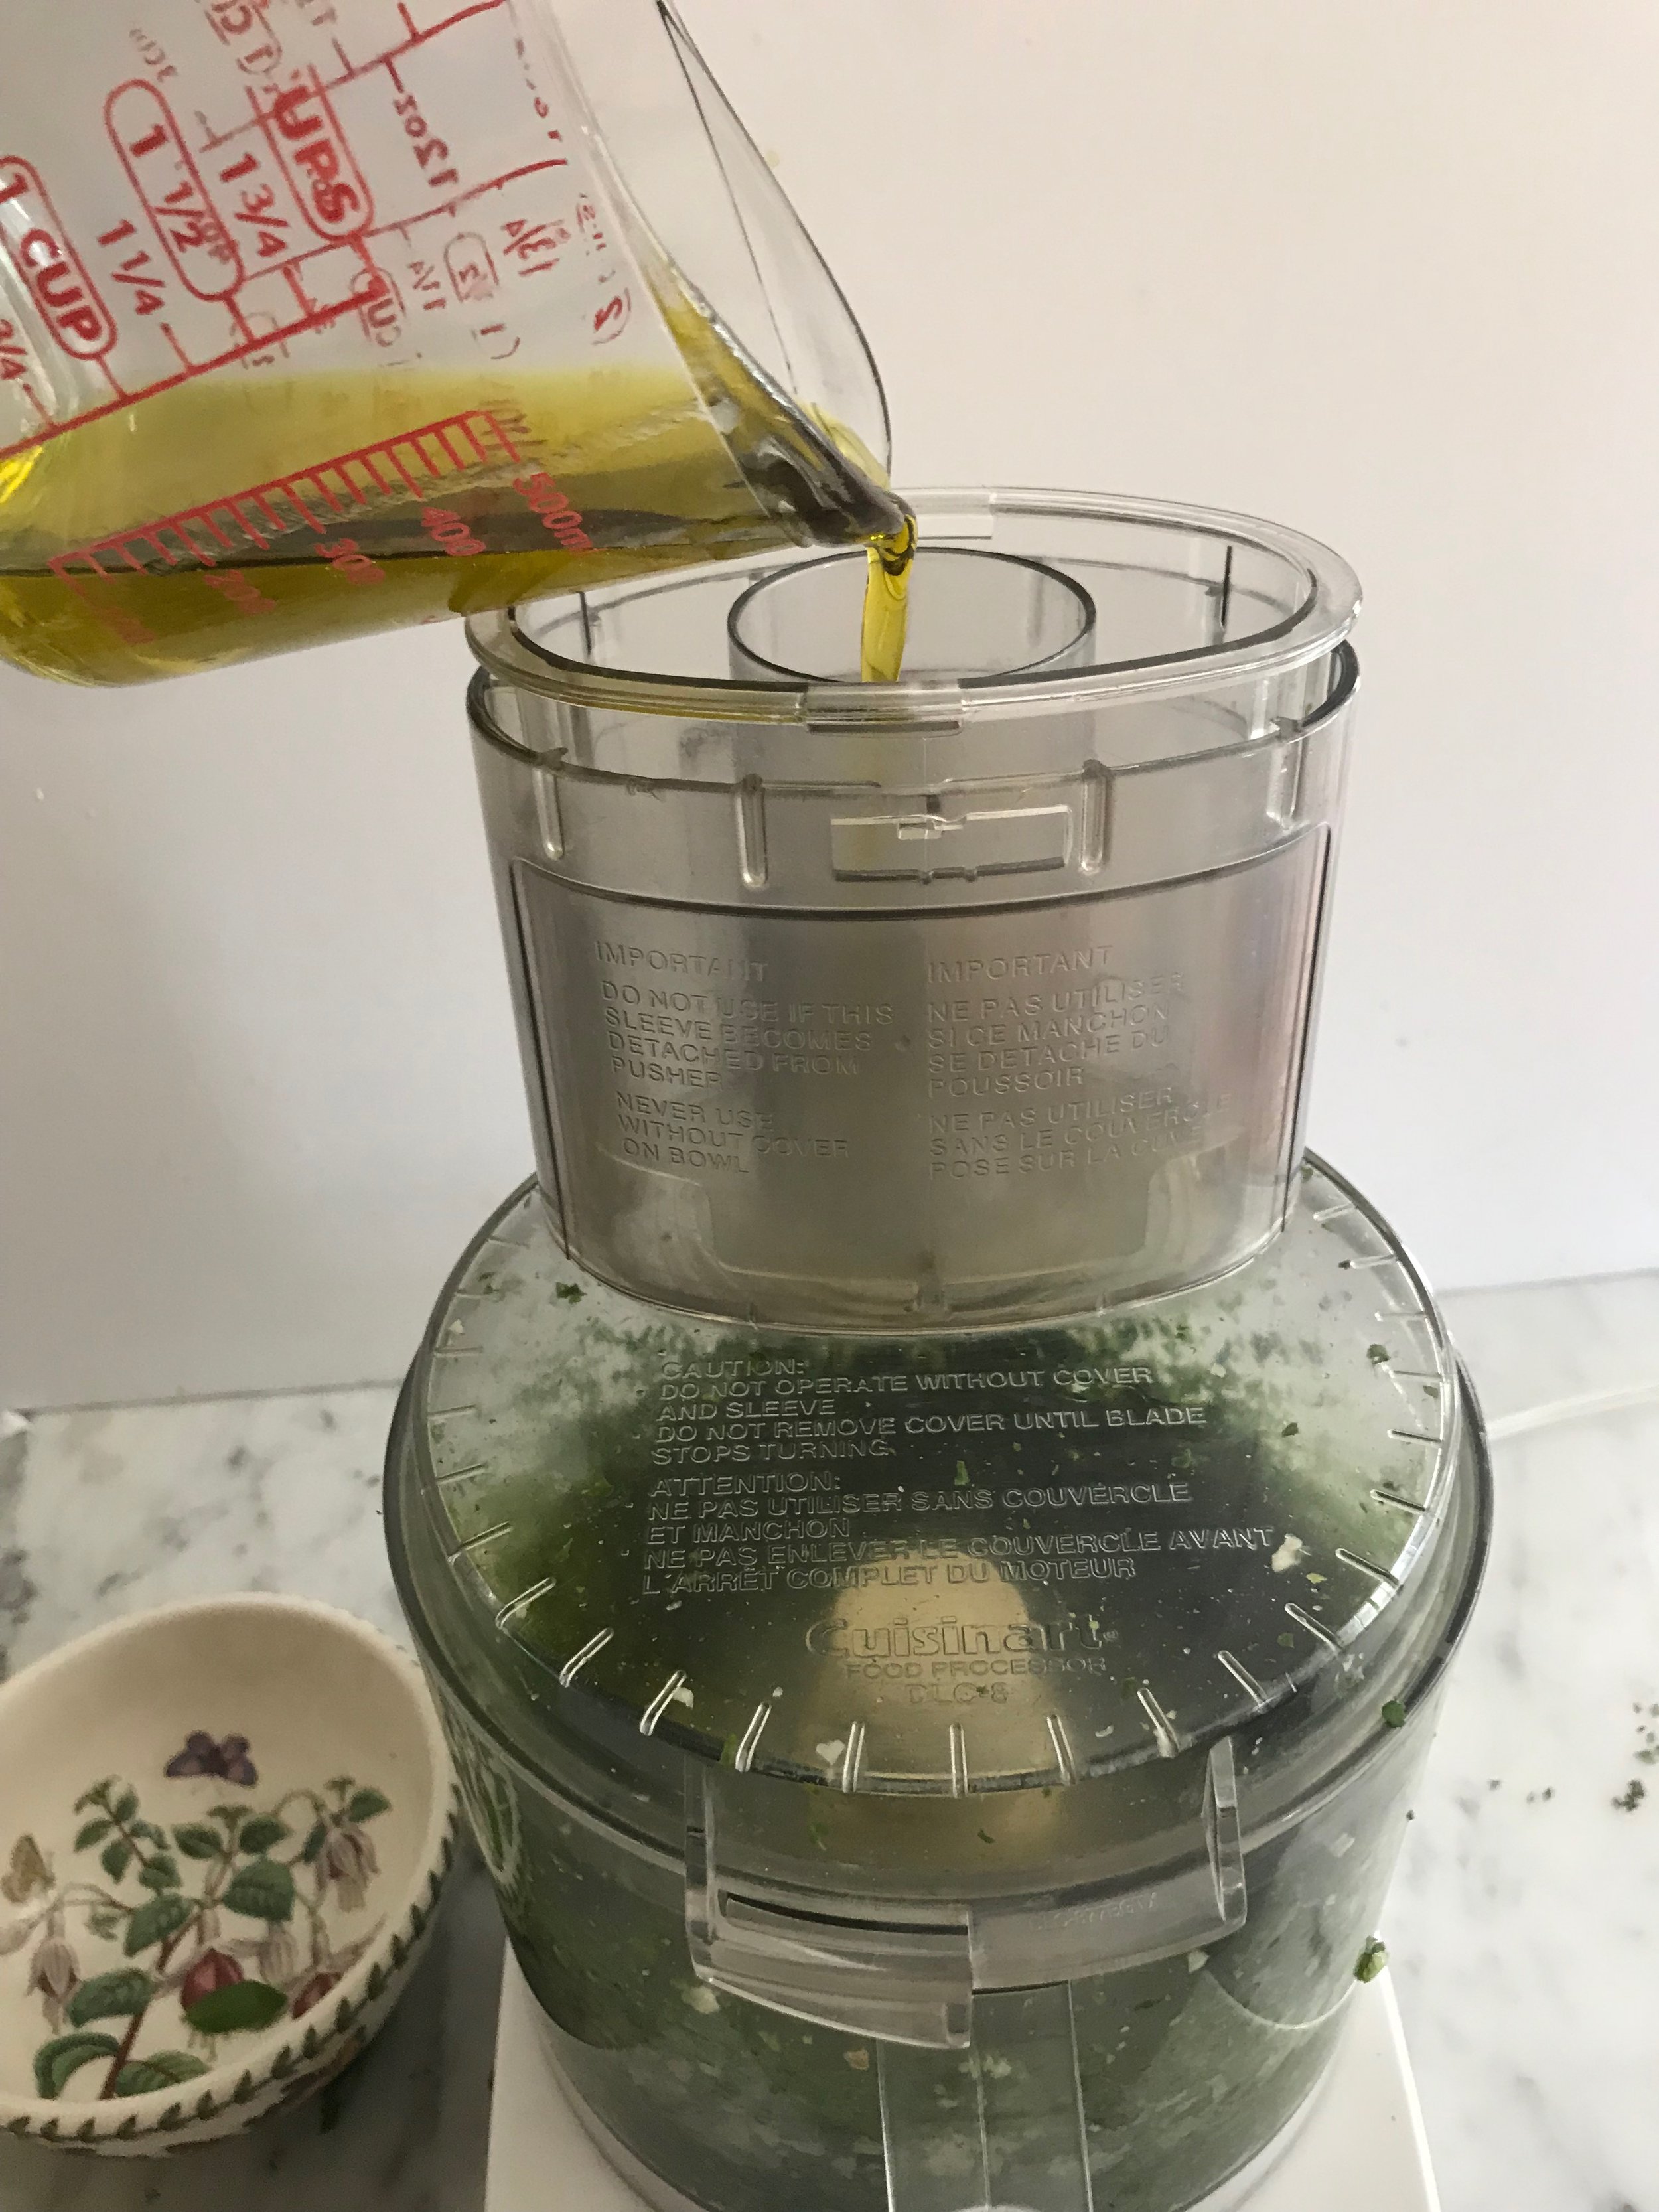
1. In your food processor, combine the egg yolk, mustard, lemon juice, salt & pepper. Pulse until combined. Slowly, in a steady stream, add the oil. Whisk until the mixture becomes emulsified. Makes 1 1/2cups

TIPS & TRICKS

• The cheese spread can be made a week in advance.

• If you wish you can make 2 smaller cheese balls. I leave my cheese ball flat on the bottom so it doesn’t roll off the platter.

• The spread can also be served in a small tureen or bowl instead of shaping into ball.

• Crostini can be cut, or complete cooked and stored in airtight container until ready to serve. Spread is also fantastic with pita chips, crackers, vegetables, or as a sandwich lie they serve at the master golf tournament!

DOWNLOAD Pimento Cheese Ball with Crostini RECIPE
In June 2019 Class Tags Summer, Start, appetizer, Cheese, Pimento, Worcestershire Sauce, Sharp Chedder, Walnuts, Pecans, Almonds, Baguette Loaf
Comment

Tri-Color Blue Cheese Coleslaw

June 28, 2019 Nancy Madok
slaw:cover.jpg
slaw:ingred.jpg

Ingredients

1 small head of green cabbage
1 small head of purple cabbage
5 large carrots, peeled
¼ cup apple cider vinegar
½ cup sour cream
½ cup Greek non-flavored yogurt or mayonnaise
1 tsp. celery seed.
1 tsp. salt
1 ½ cup Blue cheese, Roquefort, or Gorgonzola cheese, crumbled
½ cup toasted walnuts, chopped

1. Cut the cabbage in half and remove the core. Cut into wedges that will fit in the feeding tube of the food processor. Fit the food processor with a slicing blade, turn the machine on and slice the cabbage. Remove from food processor and place into a bowl, mix together, then measure out 10 cups of the cabbage and place in a large bowl. Reserve any extra cabbage for another use.

2. Change the slicing blade to a grating blade and grate the carrots, then add to the bowl with cabbage.

3. In a small bowl, stir together the vinegar, sour cream, yogurt, celery seed, salt, and cheese.

4. Toss the cabbage mixture with dressing.

5. Top with toasted walnuts and serve immediately.

TIPS & TRICKS

• You can prepare vegetables & dressing ahead. Just assemble right before serving.

• Pull the dressing out of refrigerator 1 hour before serving to allow to warm up, then toss with slaw.

• To roast nuts: preheat oven 350º F. Place the nuts on a baking sheet and bake for 5-7 minutes. Watch carefully, they burn very quickly! Once cooled, the roasted nuts can be stored in an airtight container for several weeks.

DOWNLOAD TRI COLOR BLUE CHEESE COLESLAW RECIPE
In June 2019 Class Tags Side, Summer, Coleslaw, Cabbage, Blue Cheese, Sour Cream, Walnuts, Carrot, Gorgonzola
Comment

Raspberry & Peach Short Cake

June 28, 2019 Nancy Madok
cake:ingred.jpg

Ingredients

Pastry
2½ cups all-purpose flour
1/3 cup granulated sugar
1T baking powder
¼ tsp. salt
1 tsp. zest of orange
4 oz. butter cut into pieces, chilled
1 cup heavy cream
1egg, beaten
sugar to sprinkle on top

Topping
2 cup raspberries berries, washed
2 cups peaches peeled and sliced
3T granulated sugar
½ cup Amaretto Liquor
2 cups heavy cream
¼ cups Confectioner’s sugar
1tsp vanilla

1. Preheat oven to 400° F.

2. Pastry: In a large bowl add the flour, sugar, baking powder, salt, and orange zest mix, until combined.

3. With a pastry blender, a fork or your fingers work the butter into the dry ingredients until it is small pieces

cake#4.jpg
cake#4a.jpg

4. Add the heavy cream and stir just until the mixture come together, don’t over mix.

cake#5b.jpg

5. Turn the dough onto a lightly floured surface; roll dough out ½ inch thick. Cut with a 3-inch biscuit cutter and place on a parchment lined baking sheet. Brush with the beaten egg and sprinkle with sugar.

cake#6.jpg

6. Bake at 400° F for 15 minutes, or until golden brown. Remove from oven and set aside to cool.

cake#7.jpg

7. Topping: In a small bowl, toss the berries and peaches with the sugar and Amaretto and allow to sit and hour.

8. In a mixing bowl, beat the heavy cream, confectioner’s sugar, and vanilla until soft peaks form.

9. Assemble: Spilt the short cake biscuits in half, place the bottom on plate or platter, top with boozy fruit, whipped cream and then the top with biscuit top.

10. Serve and enjoy!

TIPS & TRICKS

• Shortcake is best made the day you will eat it.

• I like to stir in the heavy cream with a spoon, but finish incorporating it with hands which seems to work better for me.

• Rolling out the dough to a ½ inch thick will yield 10 cakes, then gather the remaining dough bits and shape into 2 additional cakes. If you wish thicker short cakes, just roll out the dough not as thin.

• I topped the short cakes, with Swedish pearl sugar, which doesn’t melt in the oven. It adds a nice crunch and looks pretty. You can purchase it at: www.kingarthurflour.com You can also top the cakes with turbinado, demerara, or even plain granulated sugar. It will give you a little sweetness to the top of the cake but will melt away and not add the pretty white crystal.

• The fruit is best tossed with the liqueur and sugar 1-2 hours before serving, any longer and the fruit will macerate into small pieces, which tastes good but isn’t really attractive, any left over fruit/sauce is great on yogurt or ice cream.

• Substitute any summer fruit for this recipe. Berries and stone fruit are wonderful.

• You can also use frozen fruit. Defrost on a baking sheet, this way the fruit keeps its shape.

• You can substitute different liqueurs too. Cointreau, Cassis, or rum are delicious.

Download Raspberry & Peach Short Cake RECIPE
In June 2019 Class Tags Summer, Dessert, Raspberries, Peaches, Orange, amaretto, Shortcake, Heavy Whipping Cream, Vanilla
Comment

Chicken with Fennel, Tomatoes & Olives

August 21, 2018 Nancy Madok
chix:cover.jpg

Ingredients

2 medium onions
2 tsp each: sea salt and black pepper
2T fennel seeds
2T olive oil
1 chicken, about 4-5 pounds
1 lemon cut in half
several sprigs fresh herbs (oregano or thyme)
2-3 cups white wine
1 cup pitted black olives
1-2 tomatoes, diced
3T fresh basil, torn into bite size piece


1.    Preheat oven to 425º F.

2.    Peel and slice the onions into slices, then line the bottom of a 9x12 baking pan. Set aside. 


chix3.jpg

3.    In a small bowl combine the salt, pepper and fennel seeds together.

chix4.jpg

4.    Wash and pat dry the chicken. Place on work surface. Rub outside of bird with olive oil; use your fingers to separate the skin from the breast meat.

chix5a.jpg

5.    Rub the fennel mixture underneath the skin and all over the bird.      Place the lemon and herb sprigs inside bird.


chix6.jpg

6.    Use a piece of kitchen twine to tie the legs together.


7.    Place the chicken on top of the sliced onions. Pour 1 ½-2 cups of the wine alongside the bird.  

8.    Cover the pan on 3 sides with aluminum foil.  Place the covered chicken in a 425°F oven for 1 hour.


9.    After an hour, remove the foil, add the olives  (add the remaining wine if it has evaporated) and cook an additional 30 minutes more until golden brown and the internal temperature is 170° F.


10.    Remove from the oven carefully tip the leg end of the chicken into the pan allowing any juices that have collected to run into the pan.  Transfer to a platter and let rest for at least 15 minutes.

11.    Pour the drippings into a fat separator; leave the onions, and olives in the pan. Allow the drippings to sit until the fat has risen to the top.  Place the sauce in a small saucepan on the high heat and cook until the sauce has reduced slightly for about 3-4 minutes.

chix12.jpg

12.    Spoon the onion and olives onto a serving platter.

chix13.jpg
chix13b.jpg
chix13c.jpg

13.    Carve the chicken into pieces: The first cut remove the whole leg and thigh from the body. Then cut the leg from the thigh. Cut the wing from the breast. Cut along the breastbone to separate the meat from the bone. I like to cut each breast into 2 pieces. Place the pieces on top of onions, and olives.


chix14.jpg

14.    Spoon the sauce over the chicken.

15.    Sprinkle the diced tomato and basil on top and serve warm. 

TIPS & TRICKS

•    Try to buy olives that have their pits in them. This keeps the olive’s flesh firm and not mushy. To remove the pit, using the side of your knife, gently press down on the olive. The olive should squish and the pit should be easy to remove. I wear a plastic glove to remove the pits as to not get my fingernails black. 
•    I used black cured olives, but you could use green or kalamata
•    To test doneness, place the thermometer deep in the leg/thigh area. The internal temperature should be 170° F; as it sits it will “carry over cook” 5-10 degrees. 
•    I leave the skin on the breast meat but remove the skin from the thigh meat because it doesn’t get very crispy. 
•    The baking dish looks really messy and dirty, but it cleans up really quickly. 
•    You could substitute chicken pieces for the whole chicken. Bone-in thighs and leg should cook in about 1 hr. 20 minutes for an internal temperature of 170° F. Bone in breast meat internal temperature of 160° F, or about an hour. Check for doneness with the thermometer. Cooking meat with the bone adds so much more flavor than boneless. 
•    This dish doubles easily, you can use a bigger baking dish/roasting pan or two small ones.  It makes great leftovers and is perfect for entraining because it is delicious served warm.  


In August 2018 Tags Summer, entree, Fennel, Tomatoes, Olives, White Wine, Black Olives
Comment

Perfect Grilled Steak with Bleu Cheese Butter

July 27, 2018 Nancy Madok
steak cover.jpg

Ingredients

8 1½ inch thick New York Steaks
Salt & pepper

Butter:
8oz unsalted butter, cut into pieces, room temperature
4oz Bleu, Gorgonzola, or Roquefort Cheese, cut into pieces
2T chives, finely chopped
½ tsp. black pepper, ground
Salt

1.    Butter:  In the bowl of a food processor, add the butter, Bleu cheese. Pulse until combined.


2.    Add the chives and pepper. Pulse on and off until well combined.  Season with salt.


steak3.jpg

3.    Tear off a piece of plastic wrap, about 12x12 inches. Place the butter in the center of the wrap, fold the edge over, and shape into a log shape. Twist the ends closed. Place in the refrigerator until firm.

4.    Steak: Preheat your BBQ Grill for approximately 20 minutes.  

5.    Remove the meat from the packaging. Pat dry with a paper towel and let sit at room temperature for 30 minutes before grilling.


6.    Season well with salt and pepper immediately prior to grilling. 


7.    Place steaks on a preheated grill. Leave the grill lid open and grill for about 6-7 minutes. Turn steaks over and grill for about another 4-5 minutes. Then check the internal temperature. Remove at 110-115º F for rare.


8.    Remove steaks from grill and place on platter. Top steaks with slices of Blue cheese butter. Loosely cover with a piece of aluminum foil. Allow the meat to rest 5-10 minutes. This will allow the butter to melt and the meat will carry over cook an additional 10-15º making the finished cooking temperature 125ºF for a perfect-rare steak. 


steak9.jpg

9.    Spread the melted butter over the steaks.

10.  Serve the steak whole or slice into slices and serve on the platter. Serve immediately


TIPS & TRICKS

•    The Bleu cheese butter can be made ahead and kept in the refrigerator a week. It also freezes beautifully.
•    I use a board scraper to help shape it into a log. 
•    You can serve the butter on top of fish or chicken too! It makes a quick delicious sauce.
•    Just like you preheat your oven, you need to preheat your grill! It is important to get the steel grill grates very hot in order to sear and char your steak. To achieve the fancy crosshatch pattern that steaks have in restaurants, place the steak at a 45-degree angle to the grill grates. Cook for about 4 minutes then rotate the steak 90 degrees for an additional 3 minutes. This will produce the seared crosshatch pattern. Turn steaks over and finish grilling. Serve with the pattern side up. 
•    Note: every grill is different and you must get to know your own grill’s temperature zones and settings. Each grill has a “hot spot” where the food will cook more quickly. It is important to learn where yours is. 
•    When you remove a piece of meat from cooking, it does not stop cooking immediately. It continues to “carry over cooking.” The internal temperature can rise 10-15º degrees, so you should remove the meat before it reaches its ideal temperature and allow the “carry over” to bring it up to its perfect doneness.
•    If you prefer your meat more medium-rare, cook till 120-125º F on the grill and allow it to carry over until it reaches 130-140º F.

In July 2018 Class Tags New York Steak, Steak, Bleu Cheese, Gorgonzola, Roquefort Cheese, Chives, Main, Summer
Comment

Apricot Galette

July 27, 2018 Nancy Madok
apricotcover.jpg

Ingredients

Pastry
1½ cup all purpose flour
¼ tsp. salt
½ tsp. granulated sugar
1 stick, 8T butter, cut into cubes and cold
8T ice cold water

Filling:
1½ pounds apricots
3T ground raw almonds
5T granulated sugar
1 egg, beaten


1.    Pastry: In a food processor, add the flour, salt, and sugar. Pulse a few times until combined. Add the butter and then pulse until the mixture has bits of butter the size of peas.  


2.    Add the cold water and pulse just until the mixture starts to come together. It will look shaggy.

3.    Dump the dough onto a piece of plastic film. Use the plastic to bring the dough together.  Flatten the dough into a disk and chill for at least 1 hour.


4.    Preheat oven to 400° F. If you have a pizza stone, place it on a rack in the middle of the oven.

5.    On a lightly floured surface, roll the dough out into a circle about 14 inches diameter. Then transfer the dough to a parchment-lined baking sheet pan. Place in refrigerator for 10 minutes. 

6.    Fruit: Cut the apricots in half and remove the pit. (If they are large, cut into quarters).

7.    Remove the pastry from the refrigerator. Sprinkle the ground almonds onto the dough, leaving a 2-inch border.  


8.    Place the apricots skin-side up on top of the almonds, fitting them closely against each other. Sprinkle the 3tablespoons of sugar over the apricots.


9.    Fold the dough border over the fruit, forming pleats and making sure that there are no holes. Brush with beaten egg and sprinkle with the remaining 2 tablespoons sugar.

10.    Place the tart into the 400° F oven onto the pizza stone for 40-45 minutes, until brown and bubbling.

11.    Remove the tart from the baking sheet by pulling on the parchment paper and sliding the paper and the tart onto a cooling rack. Cool for 20-30 minutes until the fruit juices have set.  

12.    When cool, cut into slices. It’s even better served with whipped cream or ice cream.

TIPS & TRICKS

•    I make several recipes of the pastry dough, wrap them in the plastic film, and then place them in a freezer zip lock bag. They will last in your freezer for six months. When ready to use, remove one from the freezer and allow to defrost in the refrigerator. Then follow the recipe from step #4.
•    You can substitute the apricots with other stone fruit, such as peaches, nectarines, or plums. 
•    You can buy ground almonds or just take a ¼ cup of whole raw almond and “grind” them in your food processor. The nuts add a little texture to the crust and help absorb some of the fruit juice.
•    You can substitute turbinado sugar for the granulated sugar for a little extra crunch.
•    Cooking the galette on the pizza stone helps makes the crust very crisp.
•    Sliding the galette on to the cooling rack helps keep the crust from getting soggy while it cools.
•    Galette is best severed warm to room temperature. 


In July 2018 Class Tags Apricots, Galette, Dessert, Summer, Almonds, Pastry
Comment

Tian de Vegetables

June 25, 2018 Nancy Madok
tian cover.jpg
tian:ingred.jpg

Ingredients

¼ cup olive oil
2 medium onions, cut in half and sliced into thin ½ moons, about ¼” thick
1 red pepper
1 yellow pepper
2 cloves garlic, crushed

2 Italian, Japanese, or small eggplant
2 medium zucchini squash
2 medium yellow squash
4 Roma tomatoes
Salt & pepper
2T fresh thyme
2T olive oil
2T fresh basil, chiffonade

1.    Preheat the oven to 375° F.

tian2.jpg

2.    Peel and slice the onions in ½ and then slice into ½ moon slices about ¼ inch thick.

tian3.jpg

3.    Slice the peppers into ¼ thick strips. 

tian4.jpg

4.    In a large sauté pan over medium heat, add the ¼ cup of olive oil. Add the onions and peppers and cook until soft, about 10-15 minutes. Add the garlic and cook 1-2 minutes more. Season with salt and pepper. Set aside.


5.    Using a mandoline or chef’s knife, slice the eggplant, zucchini, yellow squash, and tomatoes into ¼ inch rounds. Set aside.

tian6.jpg

6.    In the bottom of a 9”x12” baking dish, spread out the onion /pepper mixture. Layer the eggplant, zucchini, yellow squash, and tomatoes on top of the onion/pepper mixture. Alternate and overlap the slices as you go, making 1 layer. You may have extra slices. Reserve them for another use.  


7.    Drizzle the 2 tablespoons of olive oil on top of the vegetables. Season with salt and pepper. Sprinkle the thyme on top.

8.    Cover the baking dish with aluminum foil. Bake for 40-45 minutes until the vegetables are soft.
9.    Remove the foil and cook an additional 35 minutes until the vegetables are cooked and slightly brown. If you have not achieved the desired brownness, place under the broiler for 3-5 minutes.

10.    Remove from oven and sprinkle the basil on top. Serve warm or room temperature.  


TIPS & TRICKS

•    You can substitute red onion for yellow. You can use red, yellow, or orange peppers too.
•    Try to find eggplants and squash that are the same diameter, so that they layer nicely. You will have the smaller end pieces left over. I chop them up, sauté in a little olive oil, and add to scrambled eggs.
•    This is a great dish for entertaining because you can prepare the dish till step #7 the day ahead. Then cook it earlier in the day. It is best serve warm. 


In June 2018 Grill Class Tags Summer, Yellow Pepper, Roma Tomatoes, Yellow Squash, Appetizer
Comment

Orzo, Pancetta, Feta & Greens w/ Basil Lemon Vinaigrette

June 25, 2018 Nancy Madok
orzo cover.jpg

Ingredients

Basil Lemon Vinaigrette:
1T Dijon mustard
1 T lemon zest
¼ cup lemon juice
½ cup extra virgin olive oil
1 T Basil chiffonade
Salt and pepper

Salad:
4T olive oil
4 oz. diced pancetta
1 medium yellow or red onion finely diced
2 cloves garlic, crushed
1 box (1 pound) Orzo
4 cups baby spinach leaves, torn into pieces
1cup toasted walnuts, broken into pieces
8 oz. Feta cheese, crumbled

1.    Vinaigrette: In a small bowl, whisk together the mustard and lemon zest and juice. Slowly add the olive oil in a steady stream, whisking constantly until emulsified. Season with salt and pepper. Stir in basil. Set aside.


2.    In a medium sauté pan over medium heat, heat 2 tablespoons of olive oil. Add the pancetta and cook until brown and crispy. Using a slotted spoon, remove the cooked pancetta from the pan and place on a paper towel lined plate. Allow the pancetta to drain and then place in a large bowl. Set aside. 


3.    Remove any remaining fat from the pan. Place the pan back on the heat and add 2 tablespoons of the pancetta fat or more olive oil if necessary.


4.    Sauté the onions until soft, about 4-6 minutes. Add the garlic and cook an additional 1-2 minutes. Add to bowl with the pancetta and set aside.

5.    Bring a large pot of water to a boil. Add 1 tablespoon salt. Add the orzo and cook as per package directions.


6.    Drain the orzo and place in the bowl with the pancetta and onion mixture. Add the spinach. Toss with the hot pasta. 


7.    Add the vinaigrette and continue tossing until the spinach has wilted. Add the feta cheese and nuts, and toss till combined. Season with salt and pepper. 


8.    Place salad on platter and serve warm or at room temperature.

TIPS & TRICKS

•    Vinaigrette can be made ahead. Just add the basil at the last moment.
•    You can substitute bacon for pancetta.
•    Almonds or pecans can be substituted for walnuts.
•    Goat cheese and blue cheese are fantastic and can really change up the taste of this salad.
•    This salad is wonderful the next day.

In June 2018 Grill Class Tags Summer, Orzo, Pancetta, Feta, Lemon, Basil, Walnuts, Salad
Comment

Grilled Rosemary Lemon Chicken Brochettes

June 25, 2018 Nancy Madok
chix cover.jpg

Ingredients

3 lbs. boneless, skinless chicken thighs
2 tsp. fresh rosemary, finely chopped
2 cloves garlic, crushed
1T lemon zest
¼ cup lemon juice
¼ cup olive oil
Salt & pepper

1.    Cut the chicken thighs into 1½-inch pieces. Place them into a medium-size bowl and set aside.

chix2.jpg

2.    In a large bowl, add the rosemary, garlic, lemon zest, juice, and olive oil. Mix until combined. Add the chicken and toss until well coated.  Refrigerate for 1-2 hours (no more than 2 hours).

3.    Preheat your BBQ Grill to medium/medium-high.

4.    Remove the chicken from refrigerator. Pour off any remaining marinade. Thread the chicken onto the skewers, making sure not to overcrowd the chicken pieces. Using a paper towel, pat the chicken dry.  Season with salt and pepper.


5.    Place the chicken on the hot grill. Close the lid. Grill the chicken to 5-8 minutes on one side to get a nice brown color. Open the lid, turn the skewers, and close the lid for about 5 minutes. Repeat until chicken is golden brown and cooked*. Total cooking time is about 12-15 minutes on “medium” heat.                                    

* Note you may need to remove the pieces of meat at the tip first, as they may cook faster than the pieces near the handle. Slide the pieces near the handle toward the tip as the tip pieces are removed.


6.    Remove the meat from skewers and place on a platter. Serve warm. 


TIPS & TRICKS

•    I remove any large pieces of fat from the thighs, but don’t remove all of it. It adds flavor and will be rendered off in the cooking process.
•    Don’t marinade the cubes thigh meat more than 2 hours because the lemon juice will start to “cook” the chicken, making the flesh mushy.
•    If you wish you can keep the thighs whole. Just marinade and grill them.
•    A little fresh rosemary goes a long way. 
•    This chicken is fantastic cold. You can add it to a green salad, pasta, or even to the orzo salad recipe from this class.


In June 2018 Grill Class Tags Summer, grill, Rosemary, Chicken, Brochettes, Lemon
Comment

Triple Berry Nut Crumble

June 25, 2018 Nancy Madok
berry:cover.jpg

Ingredients

6 cups berries: blackberries, blueberries, raspberries, or strawberries, washed and cut into pieces
½ cup granulated sugar

Crumble:
1¼ cup all purpose flour
2/3 cup golden brown sugar
Pinch of salt
10 tablespoons cold butter, cut into pieces.
1½ cups coarsely chopped toasted nuts: walnuts, pecans, or almonds
1 pint vanilla ice cream 

1.    Preheat oven to 350º F.

2.    In a medium-size bowl, toss the berries with the granulated sugar until well combined. Pour into a 10”x12” baking dish.


3.    In a small bowl, combine the flour, brown sugar, salt, and butter. Using your fingers, mix until it resembles cornmeal. Toss in the nuts.


4.    Sprinkle the crumble on top of the berries and bake in a 350° F oven for about 50-60 minutes, or until brown and bubbling.


5.    Remove from oven and cool for at least 15 minutes before serving into individual bowls. 

6.    Can be served with ice cream, or a drizzle of heavy cream.


Roasted Nuts:

1.    Preheat oven 350º F. Place nuts on a baking sheet and bake for 5 minutes. Shake the pan and continue baking until nuts are toasted, about 3-5 more minutes.  Set aside.

TIPS & TRICKS


•    The crumble topping can be made ahead and just placed on top of berries before baking. 
•    This dish is best served warm.
•    I make several crumble topping’s ahead and place in Ziploc bags in my freezer. Then I just have to shop & prepare the berries. This makes this desert even easier!!
•    You can substitute other summer fruits. Peaches, nectarines, apricots work wonderfully in this recipe.
•    I pre-scoop my ice cream. Take a baking sheet lined with parchment paper. Scoop soften ice cream onto the baking sheet. Placed the sheet pan into freezer. Remove the pre-scooped ice cream balls a few minutes before serving dessert. (Once the ice cream balls have frozen solid you can transfer them to a Ziploc bag if you’re short on freezer space.)

In June 2018 Grill Class Tags Summer, Dessert, Blackberries, Blueberries, Raspberries, Strawberries
Comment

Panzanella Salad

May 20, 2018 Nancy Madok
panzzzcover.jpg

Ingredients

1 large loaf of ciabatta bread, torn into bite-size pieces (about 10 cups)
Olive oil
1 medium red onion
2 pounds tomatoes
1 English cucumber
1-cup fresh basil leaves
½ cup red wine vinegar
¾ cup extra virgin olive oil
Salt and pepper


panz1.jpg

1.    Preheat the oven to 350° F. In a medium bowl, toss the torn ciabatta with 2 tablespoon of olive oil.

2.    Place on a baking sheet and bake for 10-15 minutes, or until dried out and slightly toasted. Set aside. (The bread cubes can be made in advance and stored in an airtight container).

panz3.jpg

3.    Peel and chop the red onion into medium dice. Place in a small bowl, cover with ice water, and let sit for 10-15 minutes. Drain and set aside.


4.    Cut the tomatoes and cucumber into bite-size pieces. Place in a large bowl.

panz5.jpg

5.    Tear the basil into bite-size pieces, and add it to the bowl.  


6.    In a small bowl or jar, stir the olive oil and vinegar together. Season with salt and pepper.

7.    Add the red onion and toasted ciabatta to the tomatoes, cucumbers, and basil. Toss with the dressing and let sit on your counter for at least 30 minutes, or up to 2 hours, to allow the flavors to blend.

8.    Before serving, toss one final time, adjust the seasoning, and place on platter or serving dish. 

TIPS & TRICKS

•    Ciabatta bread is the key of success in the salad. It has a nice dense, crumb and chewy crust that when slightly toasted, it dries out enough to absorb the dressing, but not get soggy.
•    Use a combination of red or yellow tomatoes, or any varieties that look the best. Home grown or from a farmers market, tomatoes that are picked when ripe will have the best flavor. A few examples are cheery, early girl, grape, and heirloom to name a few. 
•    Use can substitute a Persian cucumber for the English cucumber. Both work well and just need to be cut into pieces. However, Persian cucumbers need to be peeled before slicing. 
•    The list of additional goodies you can add to this salad are endless. Here are a few suggestions: chopped pepper, olives, artichoke hearts, mini Mozzarella balls, and crumbled feta.
•    Soaking the red onions in ice water Removes the better assertiveness of the onion and really crisp them up which adds a nice contrast to the salad.
•    You can prepare all the ingredients a day or two ahead, but the salad is best combined and eaten the same day.


In May 2018 Class Tags Summer, Salad, Panzanellla, ciabatta, basil, cucumber, red wine vinegar
Comment

Eggplant Gratin

May 20, 2018 Nancy Madok
eggplantcover.jpg

Ingredients

2 large eggplants (about 2 pounds) 
Olive oil
1 medium yellow onion, finely diced
2 cloves garlic, crushed
1½ pounds of tomatoes, cut into medium dice (or one 28 oz. can whole     tomatoes cut in to chunks with juice)
½ cup fresh basil leaves, chiffonade
Sea or coarse salt & pepper
1 egg
½ cup ricotta
1½ cup unflavored Greek yogurt
¾ cup grated Parmigiano-Reggiano cheese


1.     Preheat oven to 350° F.

2.    Cut the eggplant into ½ inch round slices, and place them on a baking sheet in a single layer. Sprinkle the slices with the coarse salt and let the eggplant sit for 30 minutes.


3.    Wipe the slices with paper towels to remove the salt and moisture.


4.    Brush one side of the slice lightly with olive oil.


5.    Bake in a 350° F oven until soft, about 25- 30 minutes. Remove from oven and set aside. Increase the oven temperature to 450º F.

6.    In a medium sauté pan over medium heat, heat 2T of olive oil and sauté the onion until slightly soft, about 4-6 minutes. Add the garlic and sauté for 2 more minutes.


7.    Add the tomatoes. Turn the heat up to “medium-high,” and cook until the tomatoes are soft and the liquid has reduced and thickened, about 6-8 minutes. Season with salt and pepper. Set aside.


eggplant8.jpg

8.    In a small bowl, combine the egg, ricotta, yogurt and ½ cup of the Parmigiano-Reggiano cheese. Set aside.


9.    Line a 9x11-inch baking dish with a single layer of the eggplant slices. Sprinkle with a little salt and 4-5 grinds of pepper. Sprinkle on half of the basil.

10.    Spread the tomato mixture over the eggplant and sprinkle the remaining basil on top.


11.    Cover the tomato mixture with the rest of the eggplant slices.


12.    Spread the egg-cheese mixture evenly on top of the eggplant slices.


13.    Sprinkle the remaining Parmigiano-Reggiano cheese on top.


14.    Bake for 10 minutes at 450º F. Reduce the oven temperature to 350º F and bake for an additional 20-25 minutes, until hot and golden brown. If not brown enough, place under the broiler for 2-3 minutes.

15.    Cool 20 minutes before serving.

TIPS & TRICKS

•    Globe or Italian eggplants work best for this dish. They have a delicious and meaty texture to them. Look for eggplants that have smooth skin, are free from blemishes, and on the heavy side. 
•    I use Roma tomatoes. They have a thick, dense flesh and not too much liquid in them. You can substitute any tomatoes that look good and are in season. The cooking time might need to be increased to allow all of the liquid to reduce. 
•    Whole milk ricotta and whole milk unflavored Greek yogurt are so intensely rich and creamy, then the low fat varieties. They are life changing! Also, try to find ricotta and yogurt that have no additives added to them.
•    I like to buy a wedge of Parmigiano-Reggiano cheese and grate it in my food processor. Let the cheese sit on you counter for 30 minutes. Cut it into 1-inch cubes, and then process it until finely ground. Store the grated cheese in a container in your fridge. 
•    The gratin can be assembled until step #7 the day ahead. Top with the cheese mixture and bake the day of. It is best served warmed. It makes a great light lunch with a salad. I just adore it cold or warmed up with a fried egg on top anytime! 


In May 2018 Class Tags Summer, appetizer, Eggplant, Gratin, Greek Yogurt, Parmigiano-Reggiano cheese
Comment

Marinated Grilled Leg of Lamb

May 20, 2018 Nancy Madok
lamb cover.jpg

Ingredients

1 4- pound boneless leg of lamb, butterflied*
Rub:
3 cloves garlic, peeled
1 cup loosely packed parsley leaves
4T fresh thyme leaves or rosemary
3T olive oil
salt & pepper

Pistou:
3 cloves garlic, peeled
1 cup loosely packed parsley leaves
3 cups basil leaves
½ cup olive oil
salt & pepper

lamb1.jpg
lamb1a.jpg
lamb1b.jpg

1.    *You can ask your butcher to butterfly the boneless leg of lamb for you or you can do it yourself by placing the leg of lamb on a cutting board, using a boning knife to “butterfly” the thickest part of the leg areas so that the overall thickness of the meat is 1 – 1½” thick. If necessary, trim any large pieces of fat off the meat. I then cut the leg into 2 pieces so that it is easier to handle. Set aside.

lamb2a.jpg

2.    In a bowl of your food processor, while running, add the garlic and process until chopped.  Add the parley and herbs; pulse until chopped. Add the olive oil and pulse until combined.


3.    Spread the rub all over the lamb. Place in a ziplock bag or sealed container. Refrigerate overnight.

4.    Approximately 1 ½ hour before want to serve the lamb, Remove the meat from the bag or container, place on a platter and let sit on your counter for 30 minutes. Preheat your BBQ grill. 

5.    Right before grilling, pat the meat dry using paper towels dry. Season with salt and pepper.

6.    Place the meat fat side up on the grill over “medium-high” heat. Let the meat achieve a nice sear before flipping it over, about 6 minutes.


7.    Flip to the other side. You may need to occasionally flip or turn the meat over if the fat should catch on fire and flare up.

9.    Remove from grill and place on platter. Cover loosely with aluminum foil. Let it rest for 15-20 minutes.

8.    Continue cooking until the thermometer reads 125º-130º F for medium rare, about and additional 10-15 minutes, depending on the thickness of the meat and the temperature of your grill.

lamb10a.jpg

10.    Slice the lamb against the grain i.e. with the knife slicing perpendicular to the direction of the grain in the meat.

lamb11.jpg

11.    Place the sliced meat on a platter, and serve with pistou sauce. 


lamb12.jpg

12.    Pistou: In a bowl of your food processor, while running, add the garlic. Process until chopped, add the parsley and basil, and pulse until finely chopped.

lamb13.jpg

13.    Add the olive oil, pulse until smooth, season with salt and pepper. This sauce can be made 4 days ahead, but remove from refrigerator a hour before serving. 


TIPS & TRICKS

•    If you have the lamb butterflied by the butcher, make sure to ask to have it cut so that the overall thickness of the meat is 1- 1½ inches, this will make the cooking process much easier and insure that the meat is cooked evenly.
•    You can make the pistou directly after you make the rub, so that you don’t have to wash the food processor twice.
•    Left over grilled lamb makes the most fantastic sandwiches or tacos!

In May 2018 Class Tags Summer, Lamb, entree, main, rosemary
Comment

Stuffed Summer Vegetables

May 3, 2017 Nancy Madok
stuff vegcover.jpg
stuff veg1.jpg

Ingredients

3T olive oil
1 medium yellow onion, finely diced
2 cloves garlic, crushed
1 cup white rice    
1 cup diced tomatoes and juice
1 cup water
1T double concentrated tomato paste
½ cup grated Pecorino Romano cheese
¼ cup toasted pine nuts*
3T fresh basil, chiffonade
2T chopped flat parsley
salt & pepper
4 peppers
4 medium zucchinis or yellow squash 

stuff veg2.jpg

1.   In a sauté pan, with a lid over medium heat, add the olive oil; when warm, add the onion and sauté 4 minutes, until they start to soften.  Add the garlic and sauté gently for 1 minute more. 


stuff veg3.jpg

1b.  Add the rice and cook stirring until opaque; about 2 minutes.

stuff veg4.jpg

2.    Add the tomatoes and the water cover; with the lid, lower the heat to “low” and simmer, stirring occasionally until the rice is tender, about 15 minutes.


stuff veg7.jpg

3.    Remove from the heat and add the cheese, basil, pine nuts and parsley.  Season with salt and pepper.

4.    Pre heat the oven to 350º F.

stuff veg5.jpg

5. Cut the peppers in half and remove the seeds.

stuff veg6.jpg

5b. Cut the zucchinis in half.  Using a melon baller or small knife, scoop out the interior flesh creating a little boat.  

stuff veg9.jpg

5c. Fill the peppers and zucchini with the rice mixture (you may have extra rice filling). 

6. Place the stuffed vegetables on a rimed baking sheet.  Cover with aluminum foil and place in the 350º F oven.  Bake until the vegetables are slightly soft; about 50 minutes.  Remove from the oven.  Remove the foil and let cool.  Serve warm or room temperature. 

stuffed veg10.jpg

Tips & Tricks

  • To toast pine nuts: place on a rimmed baking sheet in a 350º F oven for 3-4 minutes or until golden brown. Watch carefully: they burn quickly!
  • Rice is delicious as a simple side dish. You can also stuff eggplant or tomatoes.
print recipe
Stuffed Summer Vegetables
by Nancy Madok October-10-2017
Ingredients
  • 3T Olive Oil
  • 1 Medium Yellow Onion Finely Diced
  • 2 Cloves Garlic, Crushed
  • 1 Cup White Rice
  • 1 Cup Diced Tomatoes and Juice
  • 1 Cup Water
  • 1T Double Concentrated Tomato Paste
  • 1/2 Cup Grated Pecorino Romano Cheese
  • 1/4 Cup Toasted Pine Nuts*
  • 3T Fresh Basil, chiffonade
  • 2T Chopped Flat Parsley
  • Salt and Pepper
  • 4 Peppers
  • 4 Medium Zucchinis or Yellow Squash
Instructions
In a sauté pan, with a lid over medium heat, add the olive oil; when warm, add the onion and sauté 4 minutes, until they start to soften. Add the garlic and sauté gently for 1 minute more. Add the rice and cook stirring until opaque; about 2 minutes. Add the tomatoes and the water cover; with the lid, lower the heat to “low” and simmer, stirring occasionally until the rice is tender, about 15 minutes.Remove from the heat and add the cheese, basil and parsley. Season with salt and pepper. Pre heat the oven to 350º F.Cut the peppers in half and remove the seeds. Cut the zucchinis in half. Using a melon baller or small knife, scoop out the interior flesh creating a little boat. Fill the peppers and zucchini with the rice mixture (you may have extra rice filling). Place the stuffed vegetables on a rimed baking sheet. Cover with aluminum foil and place in the 350º F oven. Bake until the vegetables are slightly soft; about 50 minutes. Remove from the oven. Remove the foil and let cool. Serve warm or room temperature. Tips & Tricks ** To toast pine nuts: place on a rimmed baking sheet in a 350º F oven for 3-4 minutes or until golden brown. Watch carefully: they burn quickly! Rice is delicious as a simple side dish. You can also stuff eggplant or tomatoes.
Details
Prep time: 30 mins Cook time: 20 mins Total time: 1 hour Yield: 8
Featured
Stuffed Summer Vegetables
Garlic & Herb Marinated Steak with Tomato Relish
Chocolate Chip Pavlova
In May 17th Grill Class Tags appetizer, quick, easy, bell peppers, May 17th Grill Class, Summer
Comment

Garlic & Herb Marinated Steak with Tomato Relish

May 2, 2017 Nancy Madok
steakcoverjpg.jpg
Garlic___Herb_Marinated_Steak_with_Tomato_Relish_—_Cucina_Casa_M.jpg

Ingredients

Ingredients Steak:
3 cloves garlic, crushed
2T Herbs d’ Provence
1T salt
1T ground pepper
2T olive oil
3 pounds flap meat 

Ingredients Tomato Relish:
1½ pound (2cups) cherry tomatoes, cut into bite-sized pieces
2 shallots sliced thinly
6T oil-packed sun dried tomatoes drained, chopped (reserved 3T of the oil)
2T capers
4T fresh basil leaves, julienne
3T red wine vinegar
salt & pepper

steak3.jpg

In a small bowl, mix the garlic, herbs, salt, pepper and oil. 

steak4.jpg

Rub this spice mixture all over steak and allow the meat to sit at least 30 minutes at room temperature.  The rub can be placed on the meat and refrigerated ahead, but no more than 4 hours.

steak7.jpg

About 20 minutes before you are ready to grill, turn on the grill to heat to your grilling temperature, usually “medium-high” or the setting that gives you a good sear when the meat hits the steel grating.

steak8.jpg

Grill the meat until medium rare, 3-5 minutes a side, or until internal temperature is 130 - 135°F.  Transfer steak to a platter and let rest for 5-10 minutes.

steak9.jpg

Slice the steak against the grain and serve with relish.

steak5.jpg

In a medium bowl, toss all the ingredients together.

steak6jpg.jpg

Season well with salt and pepper and let sit at room temperature for a least 30 minutes.  Serve with grilled meat. Will keep in refrigerator for 3 days. 


Tip & Tricks

•    Flap meat is a terrible name for a delicious cut of meat. It comes from the sirloin section of the animal. The French call this cut bavette which means “bib” because of the shape of the meat which is long and skinny like a bib. When preparing your meat cut it into manageable size pieces that will be easy to grill.The texture and taste are very similar to a skirt steak but usually cost less. 
•    Marinated meat can be placed in a zip lock bag and refrigerated up to 4 hrs. before cooking, no longer or meat fibers will start to break down and get soggy. Before grilling remove the meat from the bag using paper towels blot the meat to remove any moisture that has accumulated. This will insure you get a nice sear on the meat. 

print recipe
Garlic & Herb Marinated Steak with Tomato Relish
by Nancy Madok June-28-2017
Garlic and Herb Marinated Steak cook on the Grill to sweet perfection. Topped with a Tomato Relish
Ingredients
  • 3 Garlic Cloves Crushed
  • 2 Tbsp Herbs d' Provence
  • 1 Tbsp Salt
  • 1 Tbsp Ground Pepper
  • 2 Tbsp Olive Oil
  • 3 Pounds Flap Meat
  • Tomato Relish
  • 2 Cups Cherry Tomatoes, cut into bite sized pieces
  • 2 Shallots - cut thinly
  • 6 Tbsp Oil Packed Sun dried tomatoes drained, chopped (reserved 3T of the oil)
  • 2 Tbsp Capers
  • 4 Tbsp Fresh Basil Leaves, julienne
  • 3 Tbsp Red wine vinegar
  • Salt and Pepper
Instructions
1. In a small bowl, mix the garlic, herbs, salt, pepper and oil. Rub this spice mixture all over steak and allow the meat to sit at least 30 minutes at room temperature. The rub can be placed on the meat and refrigerated ahead, but no more than 4 hours. 2. About 20 minutes before you are ready to grill, turn on the grill to heat to your grilling temperature, usually “medium-high” or the setting that gives you a good sear when the meat hits the steel grating. 3. Grill the meat until medium rare, 3-5 minutes a side, or until internal temperature is 130 - 135°F. Transfer steak to a platter and let rest for 5-10 minutes. 4. Slice the steak against the grain and serve with relish. Tip & Tricks • Flap meat is a terrible name for a delicious cut of meat. It comes from the sirloin section of the animal. The French call this cut bavette which means “bib” because of the shape of the meat which is long and skinny like a bib. When preparing your meat cut it into manageable size pieces that will be easy to grill.The texture and taste are very similar to a skirt steak but usually cost less. Marinated meat can be placed in a zip lock bag and refrigerated up to 4 hrs. before cooking, no longer or meat fibers will start to break down and get soggy. Before grilling remove the meat from the bag using paper towels blot the meat to remove any moisture that has accumulated. This will insure you get a nice sear on the meat. Prep for Tomato Relish:1. In a medium bowl, toss all the ingredients together. 2. Season well with salt and pepper and let sit at room temperature for a least 30 minutes. Serve with grilled meat. Will keep in refrigerator for 3 days.
Details
Prep time: 30 mins Cook time: 10 mins Total time: 40 mins Yield: 8 Servings
Featured
Stuffed Summer Vegetables
Garlic & Herb Marinated Steak with Tomato Relish
Chocolate Chip Pavlova
In May 17th Grill Class Tags entree, steak, tomato, bbq, grill, main, May 17th Grill Class, Summer, sun-dried tomatoes, tomato relish
Comment

Chocolate Chip Pavlova

May 1, 2017 Nancy Madok
pavcovershot.jpg
pav1.jpg

Ingredients:

2 cups superfine sugar
1T cornstarch
1 tsp. vanilla extract
2 tsp. white vinegar
6 egg whites at room temperature for 30 minutes
1 cup dark chocolate chips/chunks(at least 60% cacao)
1½ lbs. strawberries
½ lb. raspberries
2T granulated sugar
3T Cointreau liqueur
3 cups heavy whipping cream
2T confectioner’s sugar 

1.        Preheat oven to 275° F with the rack in the middle.

pav7.jpg

2.        Line the bottom of two baking sheet pans with parchment paper. Using a pencil, draw six 3½ inch circles on each piece of paper, then flip it over so the pencil lines are on the bottom of the paper.

3.       In a small bowl, combine the superfine sugar and cornstarch; mix until combined. 

4.       In a small bowl, stir the vanilla and vinegar together.

pav2.jpg

5.        In the bowl of an electric mixer, beat the eggs whites with a pinch of salt at medium speed until they hold soft peaks, about 3 minutes.


pav3.jpg

Increase the speed to “medium-high” and add the sugar mixture 1T at a time.  After all the sugar has been added, beat 1 minute more. 


pav4.jpg

Add the vinegar mixture and continue beating at high speed

pav5.jpg

Do this until meringue is glossy and holds stiff peaks, about 5 minutes.


pav6.jpg

Fold in the chocolate chips.

pav9.jpg
pav10.jpg

6.   Spoon the meringue into the pencil drawn circles (about a ½ cup of batter per circle).  Using an offset spatula or the back of the spoon, make a little well in the center of each meringue.

7.        Bake the meringues at 275° F for about 1 hour or until they have a crisp crust and feel dry to the touch; the inside will still be marshmallow-like.

8.        Turn the oven off and prop the door open using a wooden spoon.  Allow the meringues to cool in oven 1 hour, then remove from the oven and let meringues cool completely. 

pav11.jpg
pav12.jpg

9.        While the meringues are cooling, wash and slice the strawberries. Toss them and the raspberries with the 2 tablespoons of granulated sugar and liqueur and let sit 1 hour at room temperature.


10.        In a bowl of an electric mixer, beat the heavy cream and confectioner’s sugar until it forms soft peaks.

pav13.jpg

11.        Place each meringue on a plate. Top each with a dollop of the whipped cream and then a spoonful of the fruit (with juice) over the top.  Repeat with the remaining meringue, cream and fruit.  Serve immediately. 

TIPS AND TRICKS

  • You can make “Superfine” sugar by placing regular granulated sugar in a food processor and pulse a few times until the mixture looks and feels like sand.

  • Meringues can be made ahead and stored in zip lock bags or airtight containers in your pantry for a week.

  • An egg slicer is a great way to slice the strawberries into nice uniform slices.

print recipe
Chocolate Chip Pavlova
by Nancy Madok May-14-2017
A wonderful mix of creaminess and strawberries with a touch of chocolate goodness
Ingredients
  • 2 cups Superfine Sugar
  • 1 Tbsp Cornstarch
  • 1 Tsp Vanilla Extract
  • 2 Tsp White Vinegar
  • 6 Egg Whites (room temp for 30 mins)
  • 1 Cup Dark Chocolate Chip/Chunks (60% Cacao)
  • 1 1/2 Pounds Strawberries
  • 1/2 Pound Rasberries
  • 2 Tbsp Granulated Sugar
  • 3 Tbsp Cointreau Liqueur
  • 3 Cups Heavy Whipping Cream
  • 2 Tbsp Confectioners Sugar
Instructions
Meringues: 1. Preheat oven to 275° F with the rack in the middle. 2. Line the bottom of two baking sheet pans with parchment paper. Using a pencil, draw six 3½ inch circles on each piece of paper, then flip it over so the pencil lines are on the bottom of the paper. 3. In a small bowl, combine the superfine sugar and cornstarch; mix until combined. 4. In a small bowl, stir the vanilla and vinegar together. 5. In the bowl of an electric mixer, beat the eggs whites with a pinch of salt at medium speed until they hold soft peaks, about 3 minutes. Increase the speed to “medium-high” and add the sugar mixture 1T at a time. After all the sugar has been added, beat 1 minute more. Add the vinegar mixture and continue beating at high speed until meringue is glossy and holds stiff peaks, about 5 minutes. Fold in the chocolate chips. 6. Spoon the meringue into the pencil drawn circles (about a ½ cup of batter per circle). Using an offset spatula or the back of the spoon, make a little well in the center of each meringue. 7. Bake the meringues at 275° F for about 1 hour or until they have a crisp crust and feel dry to the touch; the inside will still be marshmallow-like. 8. Turn the oven off and prop the door open using a wooden spoon. Allow the meringues to cool in oven 1 hour, then remove from the oven and let meringues cool completely. 9. While the meringues are cooling, wash and slice the strawberries. Toss them and the raspberries with the 2 tablespoons of granulated sugar and liqueur and let sit 1 hour at room temperature. 10. In a bowl of an electric mixer, beat the heavy cream and confectioner’s sugar until it forms soft peaks. 11. Place each meringue on a plate. Top each with a dollop of the whipped cream and then a spoonful of the fruit (with juice) over the top. Repeat with the remaining meringue, cream and fruit. Serve immediately. TIPS AND TRICKS • You can make “Superfine” sugar by placing regular granulated sugar in a food processor and pulse a few times until the mixture looks and feels like sand. • Meringues can be made ahead and stored in zip lock bags or airtight containers in your pantry for a week. • An egg slicer is a great way to slice the strawberries into nice uniform slices.
Details
Prep time: 20 mins Cook time: 1 hour Total time: 1 hour 20 mins Yield: 12 servings
Featured
Stuffed Summer Vegetables
Garlic & Herb Marinated Steak with Tomato Relish
Chocolate Chip Pavlova
In May 17th Grill Class Tags Dessert, Strawberries, Cream, May 17th Grill Class, Summer, pavlova, chocolate chips, whip cream
Comment

PRIVACY POLICY 2020

COPYRIGHT 2020 Cucina Casa M