• UnderConstruction
  • Home
  • Seasons
  • Classes
  • Tours
  • About
  • CONTACT
  • Menus
Menu

Cucina Casa M

Street Address
City, State, Zip
Phone Number

Your Custom Text Here

Cucina Casa M

  • UnderConstruction
  • Home
  • Seasons
  • Classes
  • Tours
  • About
  • CONTACT
  • Menus

Lasagne Bolognese

January 29, 2020 Nancy Madok

Ingredients

Ragu:
1 large carrot
2 stalks celery
1 medium onion
4 oz. pancetta
2T olive oil
1 pound ground beef
1 cup red wine
2T double-concentrated tomato paste dissolved in 1cup warm water
1½ cups beef stock
salt & pepper

Besicamella:
8T butter
8T flour
4 cups milk, room temperature
1 tsp. salt
4-5 grinds fresh pepper
½ tsp. nutmeg
¼ cup Parmigiano-Reggiano cheese

Pasta:
1 pound fresh spinach pasta sheets
½ cup Parmigiano- Reggiano cheese

las#1.jpg

1. Ragu: In a food processor, finely chop the onion, carrots and celery. Set aside.

2. Now in the food processer (no need to wash from Step 1), finely chop the pancetta until it resembles ground pork.

3. In a medium sauce pot or Dutch oven over medium heat, add the olive oil; when warm, add the pancetta and cook about 4 minutes until some of the fat starts to render out. Add the vegetables and cook an additional 4-6 minutes until vegetables are soft.

4. Increase the heat to medium-high and add the ground beef; using a spoon, break the meat up into small pieces. Continue stirring and breaking the meat into very small pieces until the meat has cooked evenly, about 5 minutes.

las#5a.jpg

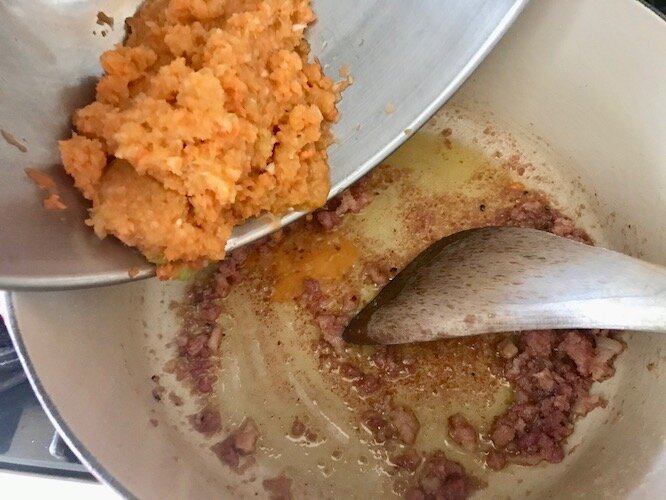
5. Stir in the red wine and cook about 2 minutes; add the diluted tomato paste and reduce the heat to a simmer. Every few minutes, give the sauce a stir and add a little of the beef stock so that the sauce stays moist. Cook the sauce for 1-1½ hours until most of the liquid has evaporated. Season with salt and pepper. Set aside until ready to use.

6. Besicamella Sauce: In a medium saucepan over low heat, melt the butter; add the flour and stir constantly. Cook until light brown and smells like toast, approximately 2-3 minutes.

las#7.jpg

7. Add the milk while stirring. Turn the heat to medium-high and cook until slightly thick, ( it should just coat a wooden spoon) approximately another 4-6 minutes.

8. Season with nutmeg, cheese, salt and pepper.

9. Pasta: Bring a large pot of water to a boil. Season with 1 tablespoon of salt. Working in batches, blanch a few noodles at a time for 1-2 minutes. Place the cooked noodles into a bowl of ice water to stop the cooking. Remove the noodles from ice bath and place on a single layer on a kitchen towel.

10. Assembly: In an 8x10-inch baking dish, cover the bottom of the pan with thin layer of the besicamella then top with a layer of pasta sheets. Spread 2-3 spoons of the Besicamella on top of the pasta, then add 2-3 spoons of the ragú into a thin layer all over the pasta. Top with a handful of cheese.

11. Continue layering the pasta, besicamella, ragú, and cheese ending with pasta sheet on top. Spread with a little béchamel and sprinkle of cheese.

12. When ready to serve, preheat an oven to 350° F. Cover the lasagna with foil and bake for 20 minutes, remove the foil and bake another 20 minutes until hot and slightly golden brown.

13. Allow to sit 5-10 minutes before cutting into squares and serving.

TIPS & TRICKS

• I like using a 8 X10 lasagne pan because you end up with 6 or 7 layers of pasta and sauce. But if you can use any size baking dish. You will just need to cut the pasta noodles to fit the size pan and may end up with less layers
• Ragú can be doubled and frozen. It can be also served with tagliatelle pasta noodles.
• Sauces can be made a day or 2 ahead and reheated over low heat before assembling. If the sauces get to thick, thin the besicamella out with a little milk and the ragú with little stock, then blanch the pasta noodles & assemble the lasagne.
• Traditionally this dish is made with green/ spinach pasta noodles but you can use just plain egg pasta.
• Uncooked lasagna can be made 2 days ahead and refrigerated. Before serving remove from the fridge at least an hour to get up to room temperature.
• You can also freeze the uncooked lasagna. Remove from the freezer and allow to defrost in the fridge over night.

DOWNLOAD LASAGNE BOLOGNESE RECIPE
In January 2020 Class Tags main, entree, winter, carrot, celery, Pancetta, ground beef, Red Wine, beef stock, nutmeg, Parmigiano-Reggiano cheese, Spinach Pasta
Comment

Pork Tenderloin stuffed with Spinach, Ham, & Cheese

December 19, 2019 Nancy Madok
pork:cover.jpg
pork:ingred.jpg

Ingredients

2T Butter
1 shallot, finely chopped
1 pound baby spinach, washed, drained and slightly damp
3T olive oil
2 pork tenderloin, approx 1 ½ lb each
10 slices prosciutto d’ Parma
1 cup Parmigano-Reggiano cheese, sliced with a potato peeler into curls
salt & pepper
butcher twine
1 cup chicken stock

pork#1.jpg
pork#1a.jpg

1. Spinach: In a large pan with a lid over medium heat, add the butter; when warm, add the shallots and sauté for about 2-3 minutes, or until they just begin to soften. Add the spinach, toss, then cover with the lid and cook for 2-3 minutes.

pork#2.jpg
pork#2a.jpg

2. Remove the lid and turn the heat to medium-high. Toss the spinach for another 1-2 minutes until the greens are wilted. Season with salt and 4-5 twists of pepper.

3. Remove the spinach from pan and place in a colander lined with a clean kitchen towel. Allow the spinach to cool slightly, Twist the spinach in the towel and using your hands squeeze out any excess water. Then chop then spinach finely and set aside.

4. Pre heat the oven to 400º F.

5. Pork: Place one of the pork tenderloins onto a cutting board. Slip your boning knife under the shiny silver skin and remove it from the meat. There is no need to remove the little bits of fat.

6. Holding the knife parallel to the tenderloin, make a cut though the center, but not going all the way though to the other side. The pork will fold open like a book. Flip the meat over and place a piece of plastic wrap on top and gently pound the tenderloin out until you reach an over all thickness of ¼ inch. Set aside and repeat to the other tenderloin.

pork#7.jpg

7. Lay the pounded tenderloin back on the cutting board. Place 5 of the prosciutto slices on top of the pork, over lapping slightly as you go.

pork#8.jpg

8. Place one half of the spinach mixture evenly down the center of the loin; top with one half of the cheese.

pork#9.jpg
pork#6d.jpg

9. Carefully roll the tenderloin up. Use butcher twine to secure it closed. Repeat with other tenderloin. Season the outside with salt & pepper.

10. Place a large ovenproof skillet on the stove on medium-high heat. Add the 3 tablespoons of olive oil. Once the oil is very hot, add the tenderloins. Sear each side of tenderloin until golden brown; about 2-3 minutes a side.

11. Carefully place the skillet into the 400º F oven and roast until the internal temperature reaches135-140º F inside, about 15-20 minutes, depending on the thickness of the tenderloin.

12. Transfer the meat to a carving board; loosely tent with aluminum foil and let rest for 10-15 minutes.

13. While the meat is rest place the pan on the stove over medium -high heat. CAREFUL THE HANDLE IS HOT!! Add the chicken stock and deglaze the pan scraping the bottom to get all the brown bits. Set aside.

14. Remove the string and slicing the tenderloin, place on a plate or platter. Spoon the pan sauce on top of the meat. Serve with the dauphinious potatoes.

TIPS & TRICKS

• Spinach can be sautéed a day or 2 in advance.
• The pork can be pounded the day ahead then assembled early in the morning of your party. Wrap the stuffed tenderloin in plastic or parchment. Pat dry with paper towels before searing to insure you get a beautiful brown sear.
• Left over pork makes a great lunch or sandwich.

DOWNLOAD STUFFED PORK TENDERLOIN RECIPE
In December 2019 Holiday Tags Winter, Fall, Main, meat, Pork, Tenderloin, Spinach, Ham, Parmigiano-Reggiano cheese, prosciutto
Comment

Yukon Gold Potato Gratin

April 15, 2019 Nancy Madok
potato:cover.jpg.jpg

Ingredients

1 ½ cup milk
1 cup heavy cream
2 cloves garlic, crushed
4 sprigs fresh thyme
1 cup dried breadcrumb, or panko
½ cup grated Parmigiano - Reggiano cheese
salt & pepper
2 pounds Yukon Gold potatoes

1. Preheat oven to 425° F.

2. In a saucepan with a lid over medium-high heat, heat the milk, cream, garlic, and thyme until it comes to a boil. Turn off the heat. Cover and steep for 15 minutes. Strain and season with salt and pepper. Set aside.

3. In a small bowl, combine the breadcrumbs and cheese. Set aside.

4. Wash and slice the potatoes into 1/8 –inch slices Place in a large bowl, toss the potatoes with salt and pepper. Place them in an 8-x10 oven proof-baking dish, layering and over-lapping the slices as you go.

potato#5a.jpg

5. Pour the milk mixture on top, then sprinkle the breadcrumb topping on top.

6. Bake in a 425° F oven for 45-55 minutes, until bubbly and brown.

potato7.jpg

7. Remove from oven and allow to cool 10-15 minutes before serving.

Tips & Tricks

• This dish is best cooked then served, but you can prepare all the steps ahead then assemble it at the last moment. You can steep and strain the milk/cream mixture (just rewarm in before adding to potatoes). Prepare the breadcrumb topping ahead and slice the potatoes ahead, just cover them in water to keep them from turning brown, drain and pat very well before assembling dish.

• I love using Yukon gold potatoes because the texture is so creamy and buttery. T. hey also hold their shape very well after being cooked. But you could substitute and use Idaho potatoes. Their texture is fluffier.

• Potatoes need to sit 10-15 minutes after cooking so that the cream mixture will set. They keep warm for up to 30 minutes after cooking, but if you need to reheat cover with foil and pop in oven for just a few minutes, otherwise they will dry out

Download Yukon gold potato gratin
In April 2019 Tags side, main, Spring, garlic, Gold Potatoes, Heavy Whipping Cream, thyme, Panko Crumbs, Parmigiano-Reggiano cheese
Comment

Creamy Polenta

March 31, 2019 Nancy Madok
polenta:cover.jpg
polenta:ingred.jpg

Ingredients

2T butter
8 cups water
2 tsp. salt
2 cups medium-ground corn meal
½ cup grated Parmigiano-Reggiano cheese

1.        Preheat oven to 350º F.

2.        Prepare a large (10x12 inch) baking dish by coating the pan with butter.

polenta3.jpg

3.       In a saucepan, bring the water to a boil, add the salt, and slowly add the corn meal, whisking until smooth and combined.

polenta4.jpg

4.        Reduce the heat to a simmer and continue stirring until the mixture becomes thick, about 10 minutes.

5.        Remove the pan from the heat and stir in the cheese, mixing well. Pour the polenta into the buttered pan.

polenta6.jpg

6.        Place into the oven, and bake for 25-30 minutes, stirring every 10-15 minutes until the polenta is soft.

7.        Remove from oven. Season with salt and pepper if needed, and then cover with foil to keep warm until ready to serve.

8.        To serve, spread the polenta on a platter or dinner plate and top with chicken and sauce.

TIPS & TRICKS

•     You can use any medium coarse ground corn meal for this recipe.

•     To grate the Parmigiano -Reggiano by hand is best. However, you can, and I do, use a food processor. Allow the cheese to sit on your counter for an hour to become slightly soft. Cut it into 2 inch pieces. With the motor running, add some of the cheese pieces. Work in small batches so the cheese can be ground before the motor has a chance to heat the cheese and change the consistency. Store extra cheese in a glass or plastic container in your fridge.

CLICK HERE FOR CHICKEN RECIPE
DOWNLOAD CREAMY POLENTA RECIPE
In March 2019 Class Tags Main, Polenta, Spring, Parmigiano-Reggiano cheese
Comment

Herbed Breadsticks

June 26, 2018 Nancy Madok
stick:cover.jpg

Ingredients

Dough:
1 package active yeast
1½ cup very warm water (110° F) 
4 cups all-purpose flour
1½ tsp salt
2T olive oil

1T fresh rosemary, finely chopped
1T fresh thyme, finely chopped
½ cup Parmigiano-Reggiano cheese
½ cup olive oil
Salt

1.    Preheat oven to 400° F. 
2.    Place the flour and salt in the bowl of a food processor and pulse a few times to mix together.

3.    Dissolve the yeast in the warm (110° F) water 

stick4.jpg

4.    With the food processor running, add the water-yeast mixture in a steady stream. 


5.    Turn off the machine and add the oil. Pulse a few times to mix in the oil.

stick6c.jpg

6.    Scrape the dough out of the bowl onto a floured board or counter.  Gather any bits of dough and flour and quickly knead into a large ball.  Cut the dough into 4 equally sized pieces and roll each piece into a tight, smooth ball. Cover with a clean dishtowel and allow to rise until dough doubles in size, about 45 minutes. 


7.    In a small bowl, combine the rosemary, thyme and cheese. Set aside.


8.    Place a ball of dough on a lightly floured board and, using a rolling pin, roll the dough into a rectangle, approximately 10”x15”.  Sprinkle one half of the dough with the herb-cheese mixture.

9.    Fold the dough over the herb-cheese mixture like a book.  


10.    Cut the dough lengthwise into 1-inch strips. Then cut the dough strips in half perpendicular to the length of the strip.  


stick11 .jpg

11.     Using your hand, roll and twist the dough into thin breadsticks. Place on baking sheet. Repeat with the remaining dough. 


12.     Bake in 400°F oven for 15-20 minutes, or until golden brown. 

13.     Remove from the oven. Brush with olive oil and sprinkle with the remaining herb-cheese mixture and salt.  

14.     Serve hot or room temperature.

TIPS & TRICKS

•    You will need 1 baking sheet for each ball of dough, or bake it in batches.
•    You can make the breadsticks sweet by substituting the herb/cheese mixture with ½ cup granulated sugar and 1 tsp. of cinnamon. 
•    You can make these 2-3 days ahead through step #8. Store in an airtight container or giant zip lock bag. Before serving, reheat in a 400°F oven for 5 minutes. Then brush with oil and sprinkle with herb-cheese mixture and salt.
•    This dough is great for making pizzas too!!


In June 2018 Grill Class Tags summer, bread, appetizer, Parmigiano-Reggiano cheese, thyme, rosemary
Comment

Eggplant Gratin

May 20, 2018 Nancy Madok
eggplantcover.jpg

Ingredients

2 large eggplants (about 2 pounds) 
Olive oil
1 medium yellow onion, finely diced
2 cloves garlic, crushed
1½ pounds of tomatoes, cut into medium dice (or one 28 oz. can whole     tomatoes cut in to chunks with juice)
½ cup fresh basil leaves, chiffonade
Sea or coarse salt & pepper
1 egg
½ cup ricotta
1½ cup unflavored Greek yogurt
¾ cup grated Parmigiano-Reggiano cheese


1.     Preheat oven to 350° F.

2.    Cut the eggplant into ½ inch round slices, and place them on a baking sheet in a single layer. Sprinkle the slices with the coarse salt and let the eggplant sit for 30 minutes.


3.    Wipe the slices with paper towels to remove the salt and moisture.


4.    Brush one side of the slice lightly with olive oil.


5.    Bake in a 350° F oven until soft, about 25- 30 minutes. Remove from oven and set aside. Increase the oven temperature to 450º F.

6.    In a medium sauté pan over medium heat, heat 2T of olive oil and sauté the onion until slightly soft, about 4-6 minutes. Add the garlic and sauté for 2 more minutes.


7.    Add the tomatoes. Turn the heat up to “medium-high,” and cook until the tomatoes are soft and the liquid has reduced and thickened, about 6-8 minutes. Season with salt and pepper. Set aside.


eggplant8.jpg

8.    In a small bowl, combine the egg, ricotta, yogurt and ½ cup of the Parmigiano-Reggiano cheese. Set aside.


9.    Line a 9x11-inch baking dish with a single layer of the eggplant slices. Sprinkle with a little salt and 4-5 grinds of pepper. Sprinkle on half of the basil.

10.    Spread the tomato mixture over the eggplant and sprinkle the remaining basil on top.


11.    Cover the tomato mixture with the rest of the eggplant slices.


12.    Spread the egg-cheese mixture evenly on top of the eggplant slices.


13.    Sprinkle the remaining Parmigiano-Reggiano cheese on top.


14.    Bake for 10 minutes at 450º F. Reduce the oven temperature to 350º F and bake for an additional 20-25 minutes, until hot and golden brown. If not brown enough, place under the broiler for 2-3 minutes.

15.    Cool 20 minutes before serving.

TIPS & TRICKS

•    Globe or Italian eggplants work best for this dish. They have a delicious and meaty texture to them. Look for eggplants that have smooth skin, are free from blemishes, and on the heavy side. 
•    I use Roma tomatoes. They have a thick, dense flesh and not too much liquid in them. You can substitute any tomatoes that look good and are in season. The cooking time might need to be increased to allow all of the liquid to reduce. 
•    Whole milk ricotta and whole milk unflavored Greek yogurt are so intensely rich and creamy, then the low fat varieties. They are life changing! Also, try to find ricotta and yogurt that have no additives added to them.
•    I like to buy a wedge of Parmigiano-Reggiano cheese and grate it in my food processor. Let the cheese sit on you counter for 30 minutes. Cut it into 1-inch cubes, and then process it until finely ground. Store the grated cheese in a container in your fridge. 
•    The gratin can be assembled until step #7 the day ahead. Top with the cheese mixture and bake the day of. It is best served warmed. It makes a great light lunch with a salad. I just adore it cold or warmed up with a fried egg on top anytime! 


In May 2018 Class Tags Summer, appetizer, Eggplant, Gratin, Greek Yogurt, Parmigiano-Reggiano cheese
Comment

Pasta with Caramelized Tomatoes, Basil & Cheese

April 15, 2018 Nancy Madok
pasta:cover.jpg
pasta:ingred.jpg

Ingredients

2 pounds cherry or grape tomatoes

3T olive oil
1 medium onion, finely chopped
3 cloves garlic, crushed
½ cup fresh basil leaves, chiffonade
salt & pepper
1 cup grated Parmigiano-Reggiano cheese

1lb fresh or dried pasta
extra Parmigiano-Reggiano cheese for serving 

1.    Preheat the oven to 300º F.

2.    Line a baking sheet pan with a piece of parchment paper. Cut the tomatoes in half lengthwise and place cut side up on the sheet pan. Place in the oven and roast for about 1½ -2 hours, or until they are slightly dry, caramelized and shriveled. Set aside.

3.    In a large pot of boiling water, add 1T of salt, return the water to a boil, then add the pasta and cook as directed; until al dente.

4.    In a medium sauté pan over medium-high heat, heat the olive oil, and then add the onion and sauté 3-4 minutes, until slightly soft. Add the garlic and cook 2-3 minutes.

pasta5.jpg

5.    Add the tomatoes, and cook until they are warmed. Season with salt, pepper. Set aside.


pasta6.jpg

6.    Drain the cooked pasta. Reserve 1½ cups of the cooking water. Toss the pasta with 1 cup of the cooking water

7.    Add the tomatoes, basil, and cheese and toss until well coated.  If the paste seems a little dry add the remaining cooking pasta liquid. 

8.     Serve immediately with extra cheese.

TIPS & TRICKS

•    The tomatoes can be made days ahead and stored in an airtight container.  I like to make a double batch so that I can use 1 for the recipe and one for bruschetta. I take toasted sliced bread top it with a little ricotta, the caramelized tomatoes, a drizzle of olive oil and a sprinkle of fresh basil. Now you have a fantastic appetizer!
•    Chiffonade is a French word that means to cut into rags. To do this stack the basil leaves on top of each other, and then roll into a cigar shape tube. Use a knife slice crosswise across the basil into thin strips that look like ribbons, rags, or thin strips.
•    Buy a wedge of Parmigiano- Reggiano and grate it at home! The flavor is so superior then any pre-grated cheese.  Cut the cheese into 1- 2 inch squares. Place them in your food processor or blender. Blend until ground. Store in an airtight container. Save the rind of the cheese and add it to your vegetable soups, tomato sauces, cooked bean or lentil dishes. It adds an excellent flavor and a complexity to the dish. Just remove it before serving. They freeze wonderfully. 


DOWNLOAD RECIPE PDF HERE

In April 2018 Class Tags appetizer, starter, tomatoes, basil, Parmigiano-Reggiano cheese, spring
Comment

PRIVACY POLICY 2020

COPYRIGHT 2020 Cucina Casa M