• UnderConstruction
  • Home
  • Seasons
  • Classes
  • Tours
  • About
  • CONTACT
  • Menus
Menu

Cucina Casa M

Street Address
City, State, Zip
Phone Number

Your Custom Text Here

Cucina Casa M

  • UnderConstruction
  • Home
  • Seasons
  • Classes
  • Tours
  • About
  • CONTACT
  • Menus

Pasta with summer beans

August 21, 2018 Nancy Madok
pasta cover.jpg

Ingredients

2T olive oil
1 medium or 2 small onion, finely chopped
2 cloves garlic, crushed
2 cups cherry tomatoes
1 pound dried pasta
1 pound green, yellow or purple beans
½ cup grated Pecorino Romano Cheese, plus more for serving
1 cup basil leaves, torn into bite size pieces
salt & pepper


pasta1.jpg

1.    Trim the ends, and cut the beans into bite size pieces. Set aside. Cut the tomatoes in ½ and set aside.


2.    In a medium sauté pan over medium heat, heat the 2 tablespoons of olive oil and sauté the onions until soft, about 3-4 minutes.


3.    Add the garlic and sauté 2-3 minutes more.


pasta4.jpg

4.    Add the tomatoes and toss until warm, about 2 minutes. Season with salt and pepper. Set aside.

pasta5.jpg

5.    Bring a large pot of water to a boil.  Add 1 tablespoon of salt.  Add the pasta and cook for half the cooking time instructed on the package, then add the beans and finish cooking the pasta as directed, until al dente.

6.    Drain the pasta and reserve 1 cup of the cooking liquid.

IMG_0162.jpg

7.    Toss the pasta with ½ cup of the cooking liquid, the onion mixture, basil, and the cheese toss until pasta is coated with sauce. If the mixtures seem a little dry, add a little more of the water.  


pasta7.jpg

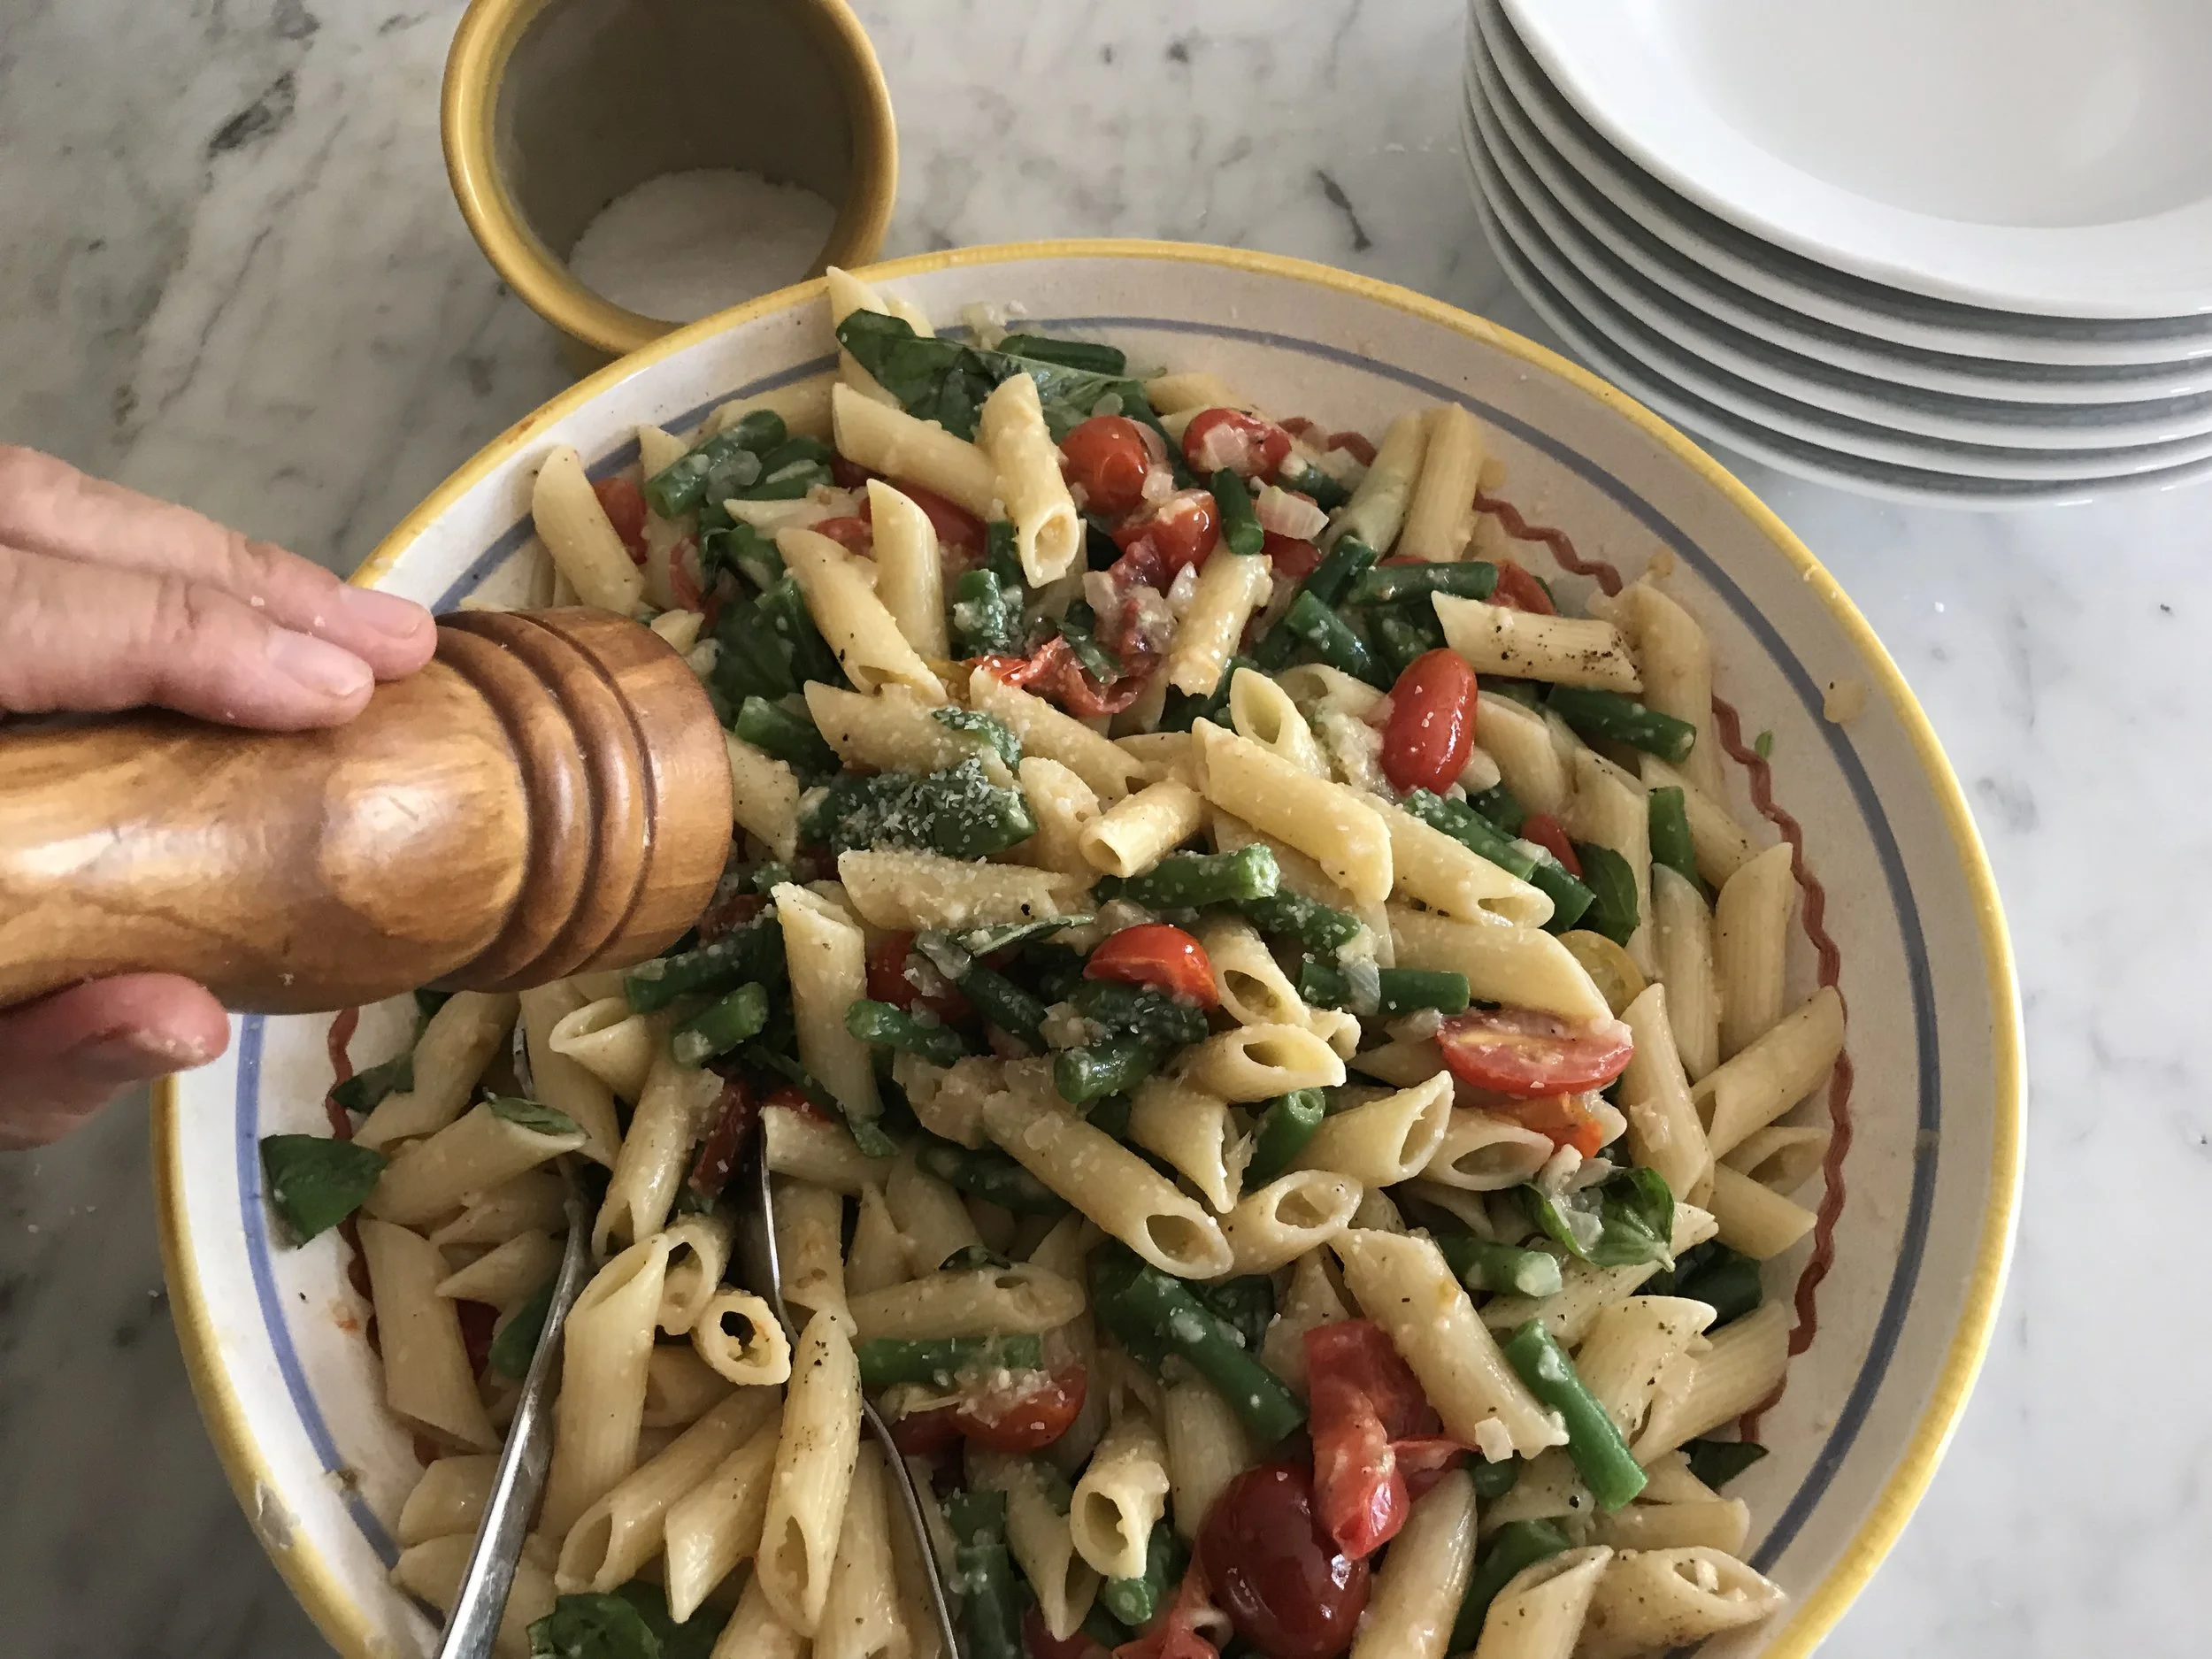
7B. Season with salt and pepper. Spoon pasta into bowls and serve immediately. Serve with extra cheese.

TIPS & TRICKS

•    There has been lots of research that shows the benefits of peel/crushing garlic and letting it sit 10-15 minutes before cooking it. This allows the enzyme alliinase to release, before exposing it to the heat. Alliinase as many health benefits. So I try to get in the habit of peeling the garlic and just letting it sit while I prep the rest of the recipe
•    You can use any variety of beans that look good to you, or you can do a combination of all the 3 colors!
•    If cherry tomatoes aren’t available, you can substitute chopped tomatoes.
•    Try to buy pasta that is 100% durum wheat to get the maximum nutritional benefits. Any shape will work for this recipe. I like to use shapes that are about the same size as the beans, so it will all fit on the fork for the perfect bite! Penne, rigatoni, mostaccioli are perfect or you can break the tagliatelli or fettuccini noodles into smaller pieces.
•    I like to buy a big wedge of cheese and grate it myself. You can do this easily in your food processor or blender. Just cut the cheese into small cubes and allow it to sit on your counter for 15-20 minutes to slightly soften, it makes it so much easier to grate. Store in glass or plastic containers until ready to use.
•    You could add cooked chicken or shrimp to make this a heartier meal.

In August 2018 Tags summer, appetizer, pasta, beans, cherry tomatoes, Pecorino Romano Cheese, basil
Comment

Chicken with Fennel, Tomatoes & Olives

August 21, 2018 Nancy Madok
chix:cover.jpg

Ingredients

2 medium onions
2 tsp each: sea salt and black pepper
2T fennel seeds
2T olive oil
1 chicken, about 4-5 pounds
1 lemon cut in half
several sprigs fresh herbs (oregano or thyme)
2-3 cups white wine
1 cup pitted black olives
1-2 tomatoes, diced
3T fresh basil, torn into bite size piece


1.    Preheat oven to 425º F.

2.    Peel and slice the onions into slices, then line the bottom of a 9x12 baking pan. Set aside. 


chix3.jpg

3.    In a small bowl combine the salt, pepper and fennel seeds together.

chix4.jpg

4.    Wash and pat dry the chicken. Place on work surface. Rub outside of bird with olive oil; use your fingers to separate the skin from the breast meat.

chix5a.jpg

5.    Rub the fennel mixture underneath the skin and all over the bird.      Place the lemon and herb sprigs inside bird.


chix6.jpg

6.    Use a piece of kitchen twine to tie the legs together.


7.    Place the chicken on top of the sliced onions. Pour 1 ½-2 cups of the wine alongside the bird.  

8.    Cover the pan on 3 sides with aluminum foil.  Place the covered chicken in a 425°F oven for 1 hour.


9.    After an hour, remove the foil, add the olives  (add the remaining wine if it has evaporated) and cook an additional 30 minutes more until golden brown and the internal temperature is 170° F.


10.    Remove from the oven carefully tip the leg end of the chicken into the pan allowing any juices that have collected to run into the pan.  Transfer to a platter and let rest for at least 15 minutes.

11.    Pour the drippings into a fat separator; leave the onions, and olives in the pan. Allow the drippings to sit until the fat has risen to the top.  Place the sauce in a small saucepan on the high heat and cook until the sauce has reduced slightly for about 3-4 minutes.

chix12.jpg

12.    Spoon the onion and olives onto a serving platter.

chix13.jpg
chix13b.jpg
chix13c.jpg

13.    Carve the chicken into pieces: The first cut remove the whole leg and thigh from the body. Then cut the leg from the thigh. Cut the wing from the breast. Cut along the breastbone to separate the meat from the bone. I like to cut each breast into 2 pieces. Place the pieces on top of onions, and olives.


chix14.jpg

14.    Spoon the sauce over the chicken.

15.    Sprinkle the diced tomato and basil on top and serve warm. 

TIPS & TRICKS

•    Try to buy olives that have their pits in them. This keeps the olive’s flesh firm and not mushy. To remove the pit, using the side of your knife, gently press down on the olive. The olive should squish and the pit should be easy to remove. I wear a plastic glove to remove the pits as to not get my fingernails black. 
•    I used black cured olives, but you could use green or kalamata
•    To test doneness, place the thermometer deep in the leg/thigh area. The internal temperature should be 170° F; as it sits it will “carry over cook” 5-10 degrees. 
•    I leave the skin on the breast meat but remove the skin from the thigh meat because it doesn’t get very crispy. 
•    The baking dish looks really messy and dirty, but it cleans up really quickly. 
•    You could substitute chicken pieces for the whole chicken. Bone-in thighs and leg should cook in about 1 hr. 20 minutes for an internal temperature of 170° F. Bone in breast meat internal temperature of 160° F, or about an hour. Check for doneness with the thermometer. Cooking meat with the bone adds so much more flavor than boneless. 
•    This dish doubles easily, you can use a bigger baking dish/roasting pan or two small ones.  It makes great leftovers and is perfect for entraining because it is delicious served warm.  


In August 2018 Tags Summer, entree, Fennel, Tomatoes, Olives, White Wine, Black Olives
Comment

Vanilla Panna Cotta with Summer Fruit

August 21, 2018 Nancy Madok
panna:cover.jpg

Ingredients

Custard:
2 tsp. gelatin
3T water
2½ cups cream
½ cup milk
½ cup granulated sugar
1T vanilla paste, 1 vanilla bean split open, or 1T vanilla extract ,
2 cups fresh fruit: peaches, figs, or berries
3T granulated sugar
3T Cointreau or Amaretto liquor.


1.    Place eight ¾ cup ramekins on a tray. Set aside.

panna2.jpg

2.    In a small bowl, place the 3 tablespoons of water. Sprinkle the gelatin on top and let sit for 5 minutes until it becomes “jelled”.  Set aside.


3.    In a small saucepan, add the cream, milk, sugar, and vanilla. Cook over low heat just until small bubbles begin to form around the edge of the pan, about 5-7 minutes. Do not boil. 


4.    Remove from the heat. Run a spatula around the edge of the jelled gelatin and stir in the gelatin. Mix until dissolved. Remove bean if using a whole bean.

5.    Pour the mixture into each ramekin.


6.    Place ramekins in the refrigerator. Chill 5 hours or overnight.

7.    Clean, peel and slice the fruit.

8.    Toss the fruit with the 3 tablespoons of sugar and liquor. Let sit at least 30 minutes to allow the juices to release.


9.    To serve, run a butter knife around the edge of the ramekins.


10.    Fill a shallow dish with hot water. Carefully place the bottom of the ramekin in the water, for 1-2 minutes to help loosen the custard from the dish.

panna11.jpg

11.    Unmold the ramekin on to a serving dish.


12.    Spoon the fruit on to the plate and serve.

TIPS & TRICKS

•    To get the most intense vanilla flavor, use the vanilla paste or the whole bean. The paste is an easy way to get the inside of the vanilla bean; all those flavorful black speaks with no work. 
•    To peel peaches: place a small saucepan full of water and bring to a boil. Turn the heat off and submerge the peach for 1-2 minutes. Remove from heat. Let slightly cool. The skin should just peel off effortlessly.
•    I pour the warm cream into a measuring cup for easy pouring into the ramekins.
•    Adding the sugar and liquor to the fruit allow the fruit to “marinate” and bring out its natural juices. The term is called macerating. You can change the liqueur as you change the fruits. Cointreau and Amaretto work well with most summer fruits. You could use Chambord liquor for berries, or a little pear brandy for pear. The longer it sits the more the fruit breaks down and gets “ juicy”. I like to let my fruit sit for this recipe no longer than a 1½ hours. If you don’t do alcohol, you can substitute fruit juice, like cranberry. 
•    You can make this dish all year long by just changing the fruit. For the spring and summer use apricots, berries, peaches, or figs. For fall and winter, use pears or persimmons.  


In August 2018 Tags vanilla, panna cotta, summer, cream, Cointreau, amaretto
Comment

PRIVACY POLICY 2020

COPYRIGHT 2020 Cucina Casa M